Automobile and Spare Parts Setup
Run an auto parts shop and workshop in BazaarPOS: find a part by any part number or by the vehicle it fits, keep your customers' vehicles, open job cards with an estimate the customer approves, remind owners when a service is due, and track deposits on parts that come back.
How it fits together
You keep your normal Items: brake pads, filters, oil, batteries. Nothing is entered twice. The Automobile screens add what a parts shop needs on top of those items:
- Parts Finder: look up a part by any of its numbers, by the vehicle, or by name, with stock and price.
- Vehicles: the vehicles your customers bring in, with the owner and the distance driven.
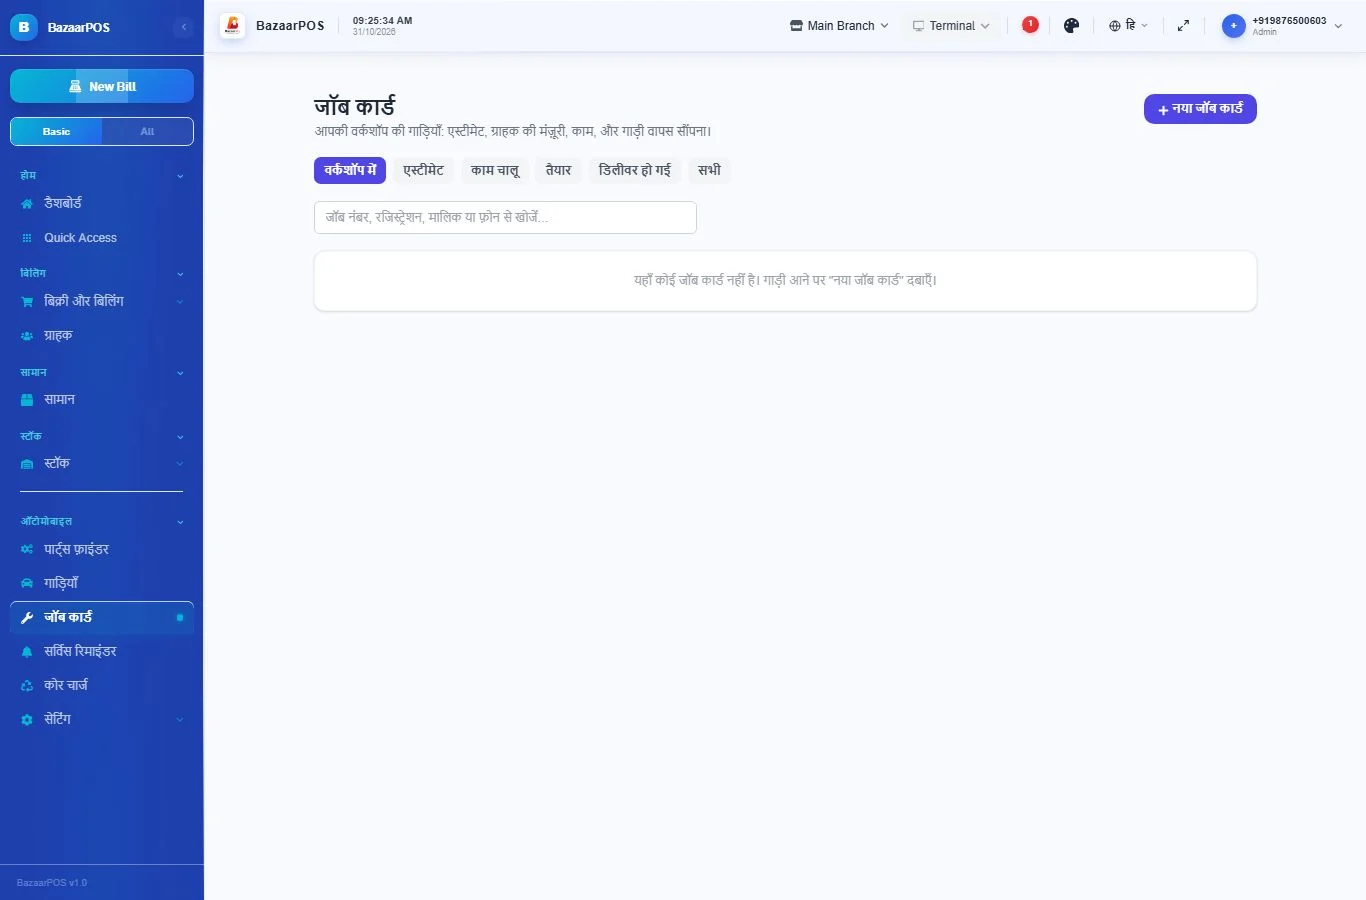
- Job Cards: the workshop job from estimate to delivery. Parts come from your items; the bill is made in the normal billing screen.
- Service Reminders: the next oil change or inspection, by date or by distance.
- Core Charges: a refundable deposit on parts such as batteries, until the old part comes back.
Step 1: Check your shop details
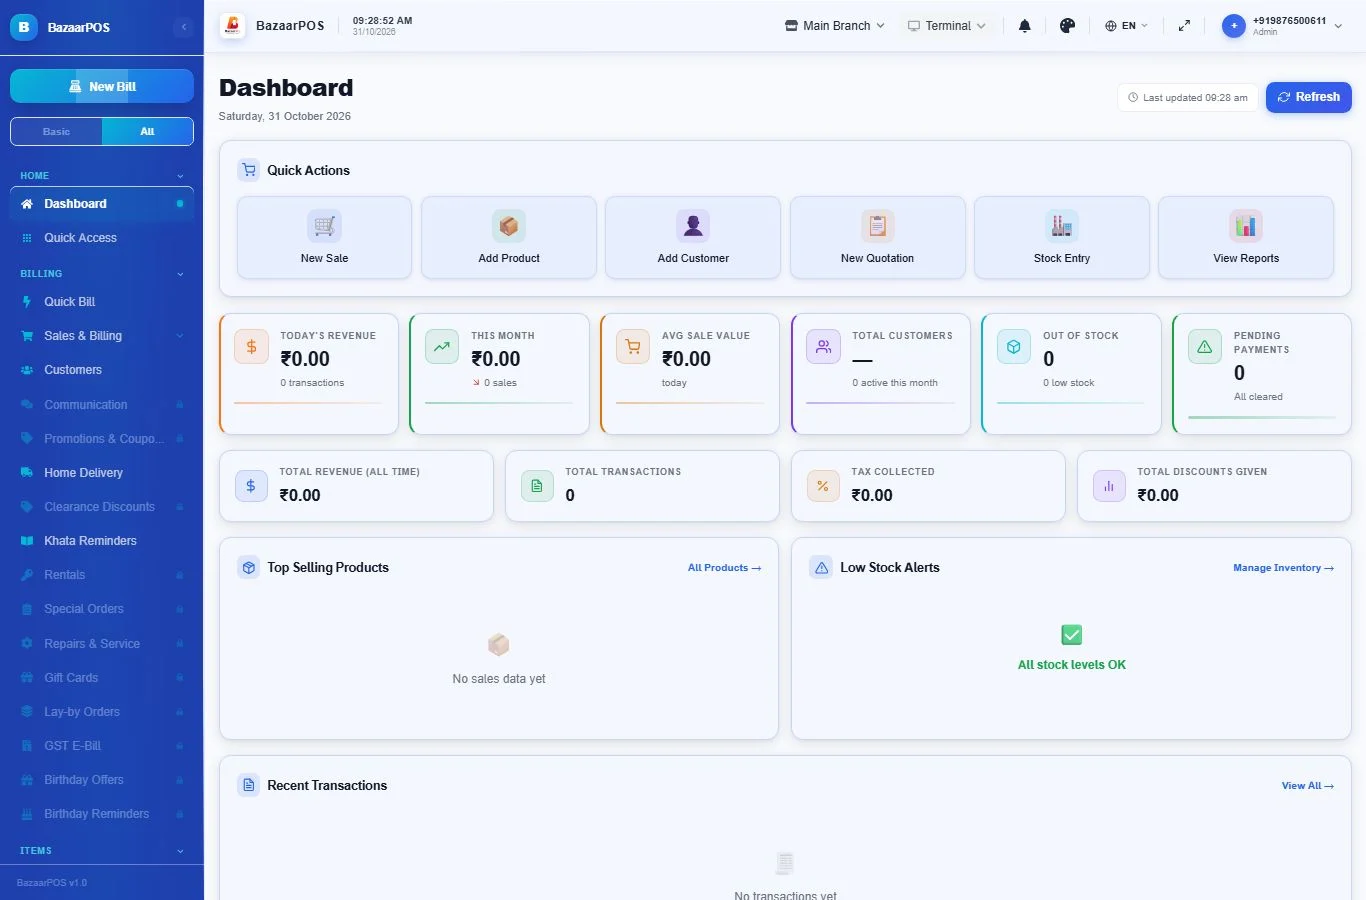
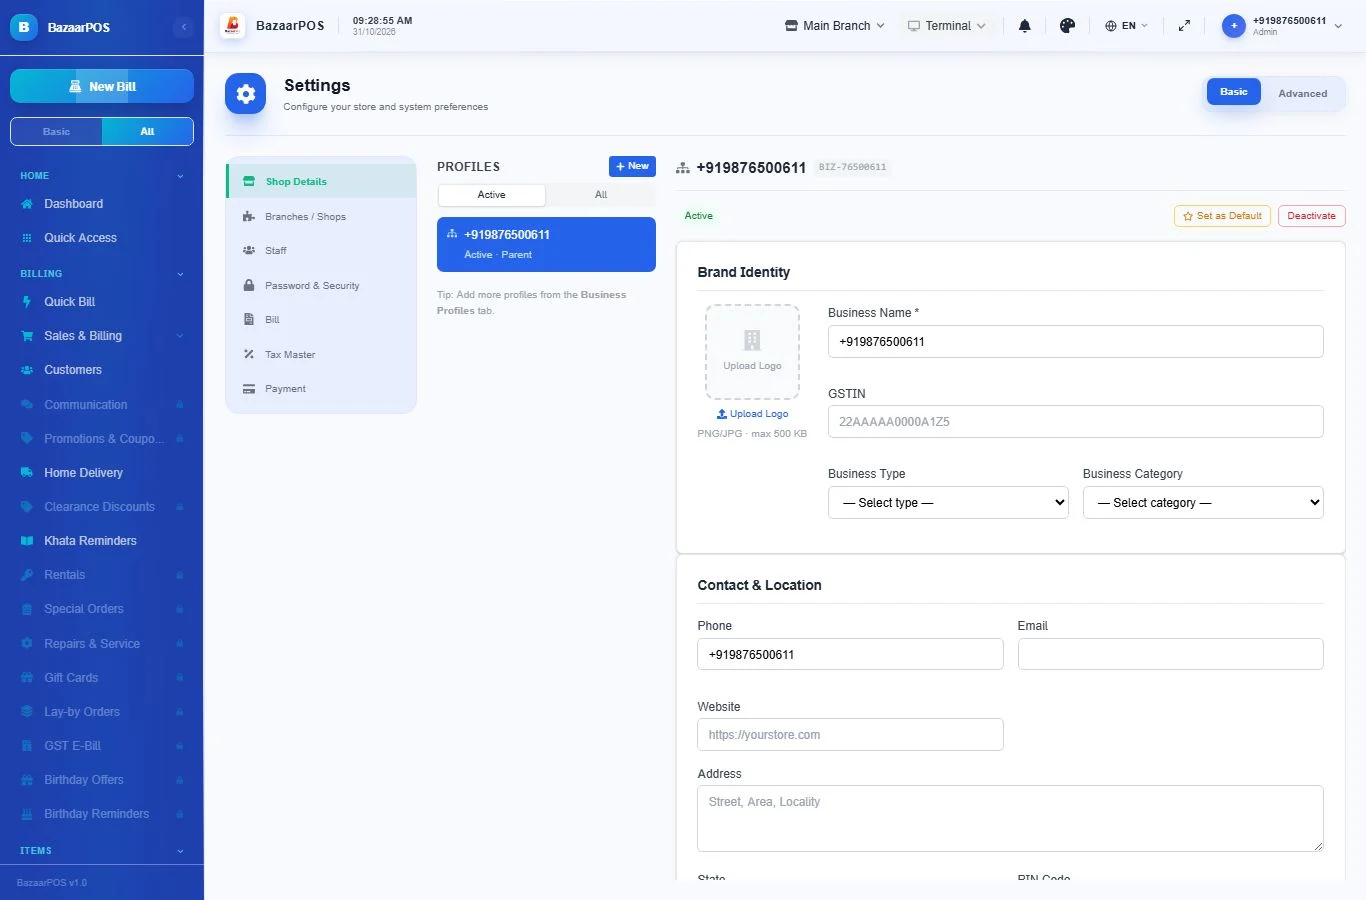
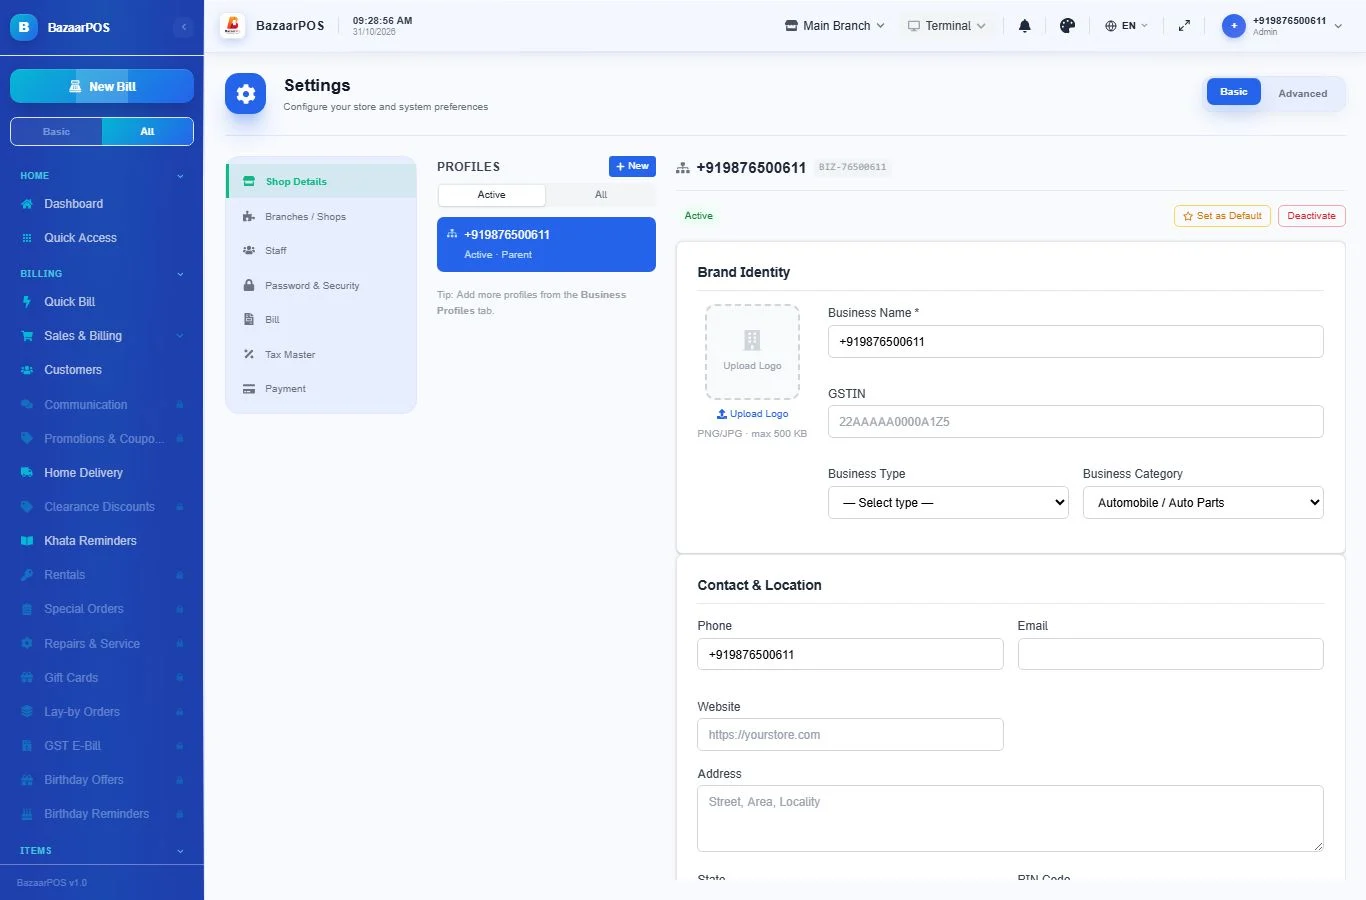
- Open Settings → Shop Details.
- Fill in the business name, address, phone and your tax number. These print on your bills.
- Under Business Category choose Automobile / Auto Parts and click Save.
Step 2: Your items, part numbers and fitment
You do not need to enter your parts again. Items you already have stay in Items exactly as they are, with their name, code, barcode, price and stock. New parts are added there in the normal way.
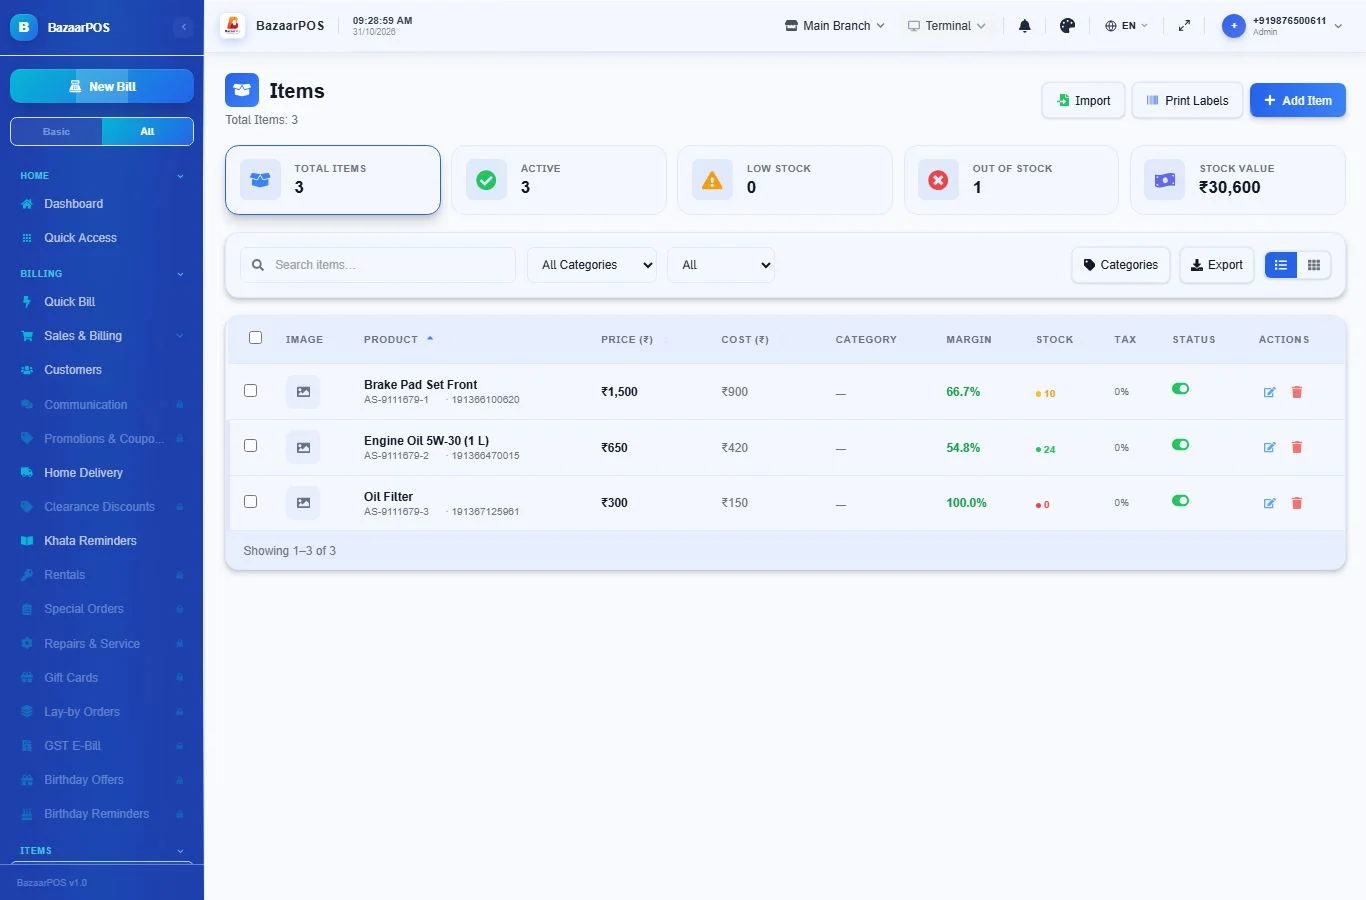
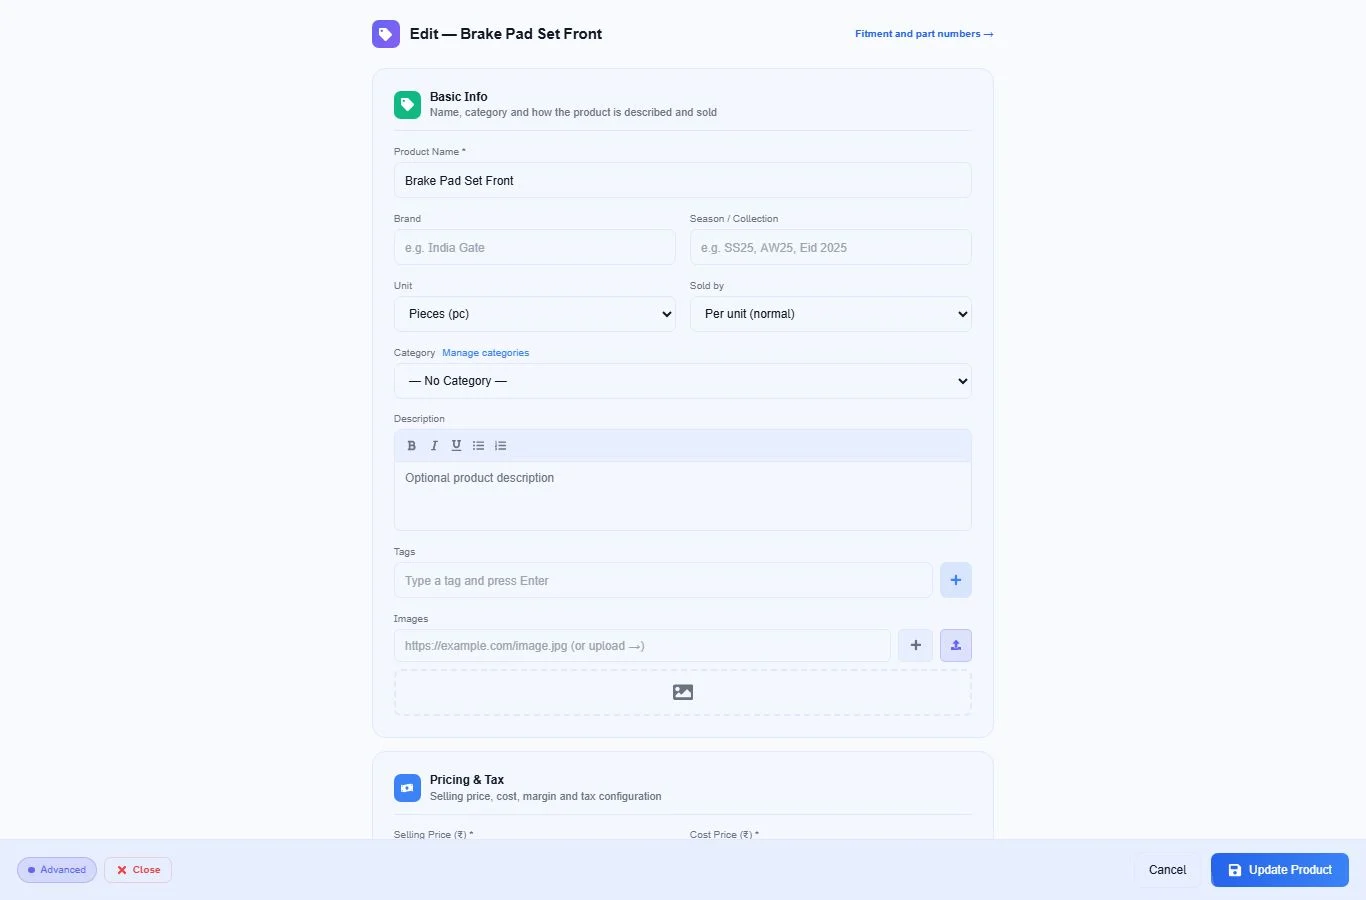
Open an item with its edit button. The Part Number and Manufacturer boxes hold the number you normally use. A link at the top, Fitment and part numbers →, goes to the screen where you say which vehicles the item fits and add its other numbers.
To find a part by other numbers (the maker's number, an aftermarket number, an older one) and by the vehicles it fits:
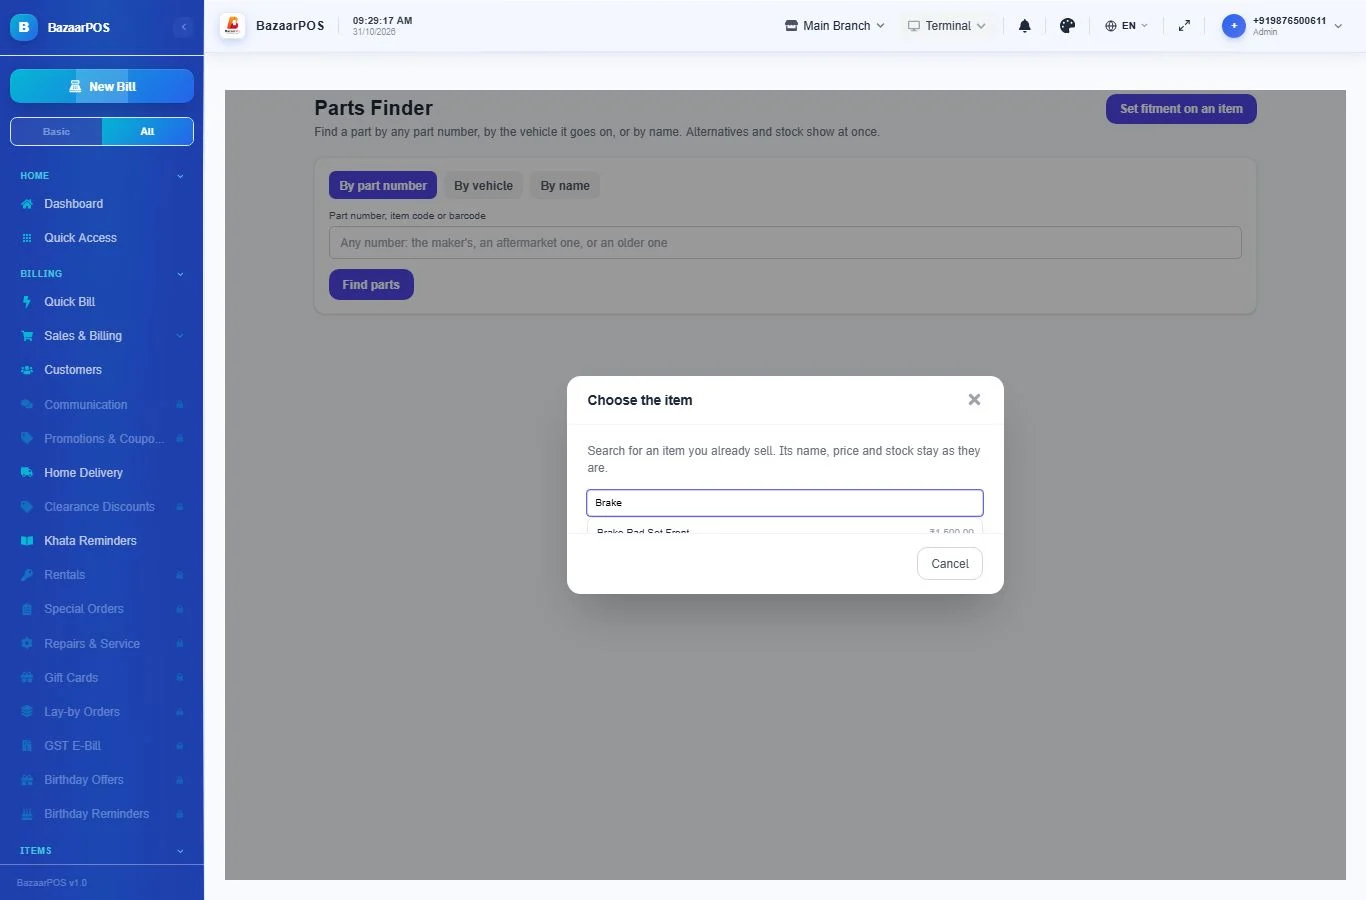
- Open Automobile → Parts Finder and click Set fitment on an item, or use the link on the item form. Search for the item and pick it.
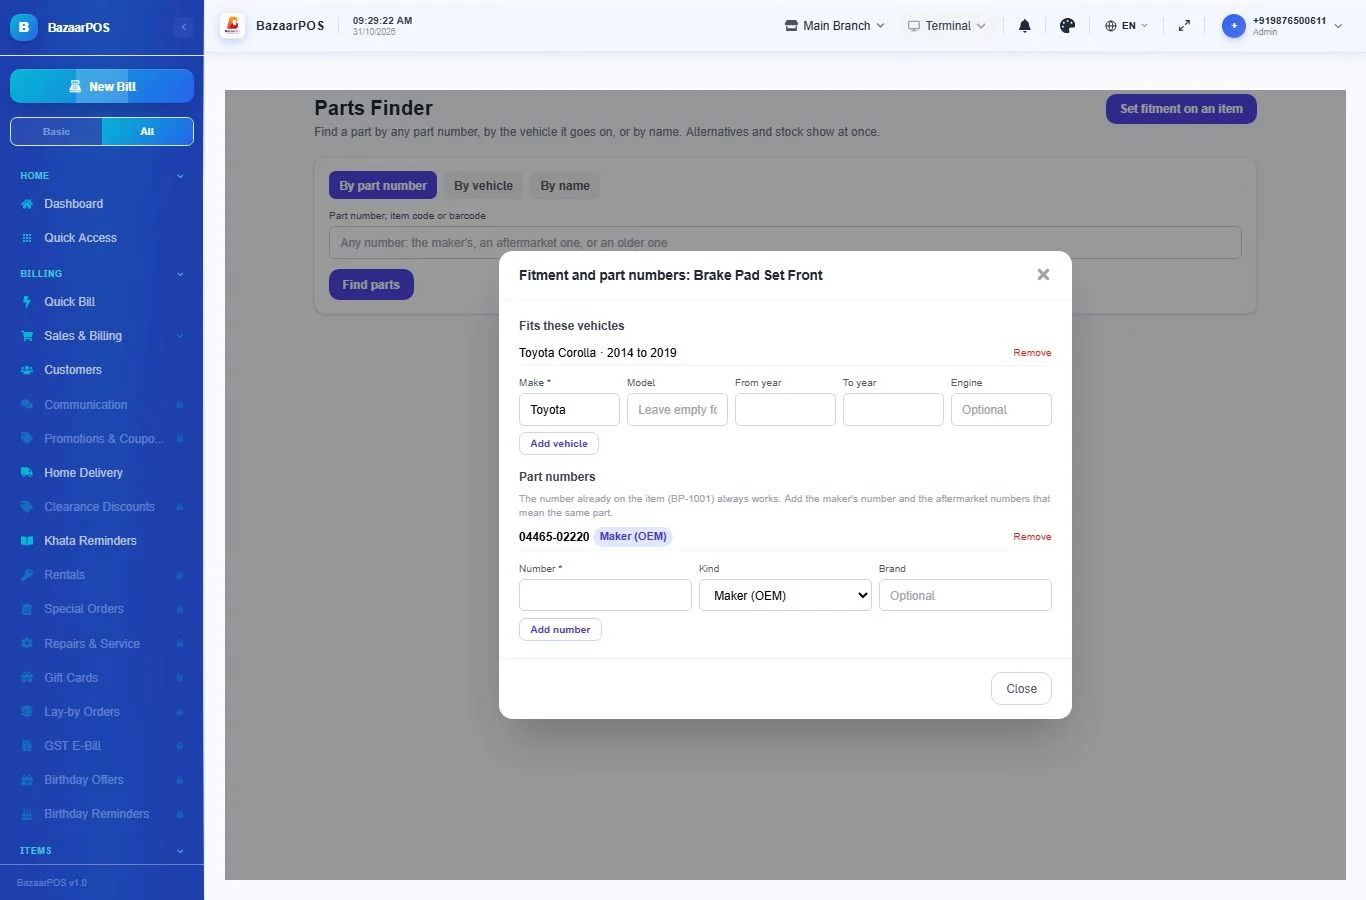
- Pick the item. Under Fits these vehicles add the make, the model and the years. Leave the model empty if the part fits every model of that make; leave the years empty if it fits every year.
- Under Part numbers add the maker's (OEM) number, aftermarket numbers and older numbers. Spaces and dashes do not matter when you search.
Step 3: Find a part at the counter
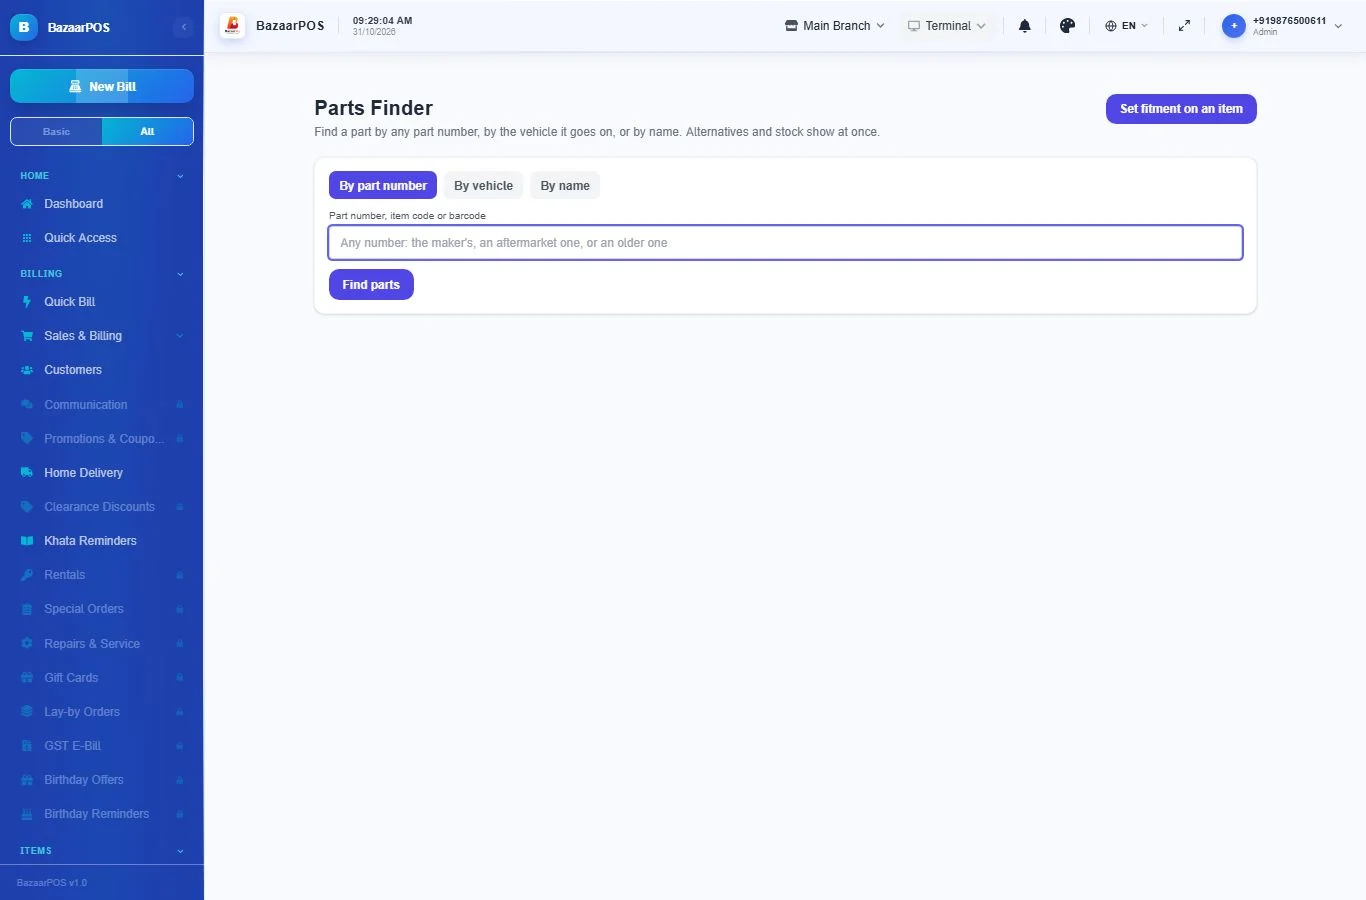
Open Automobile → Parts Finder.
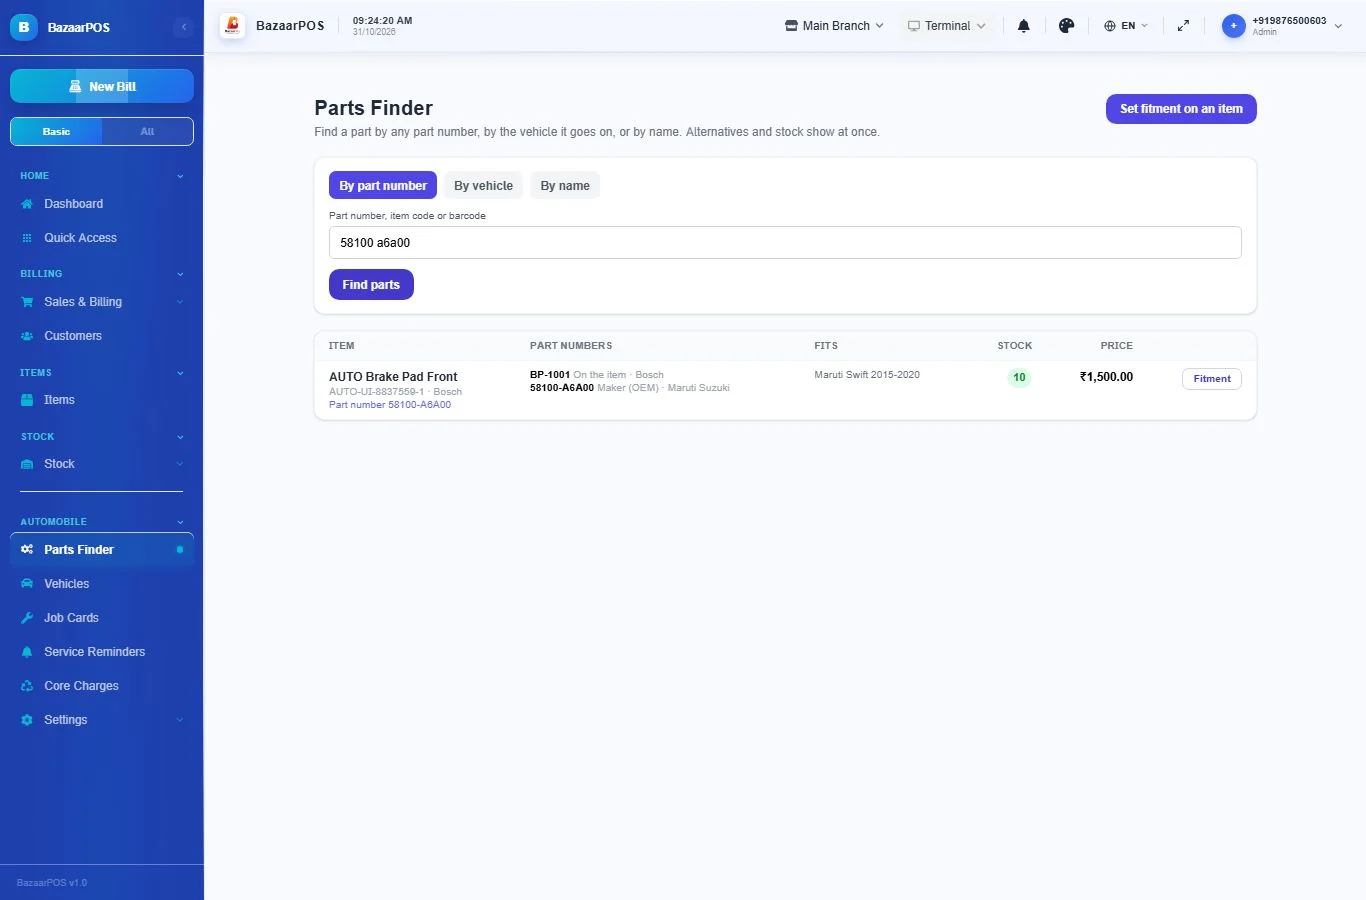
- By part number: type any number, with or without spaces and dashes. The result shows the item, all its other numbers, the vehicles it fits, the price and whether it is in stock. Parts in stock are listed first.
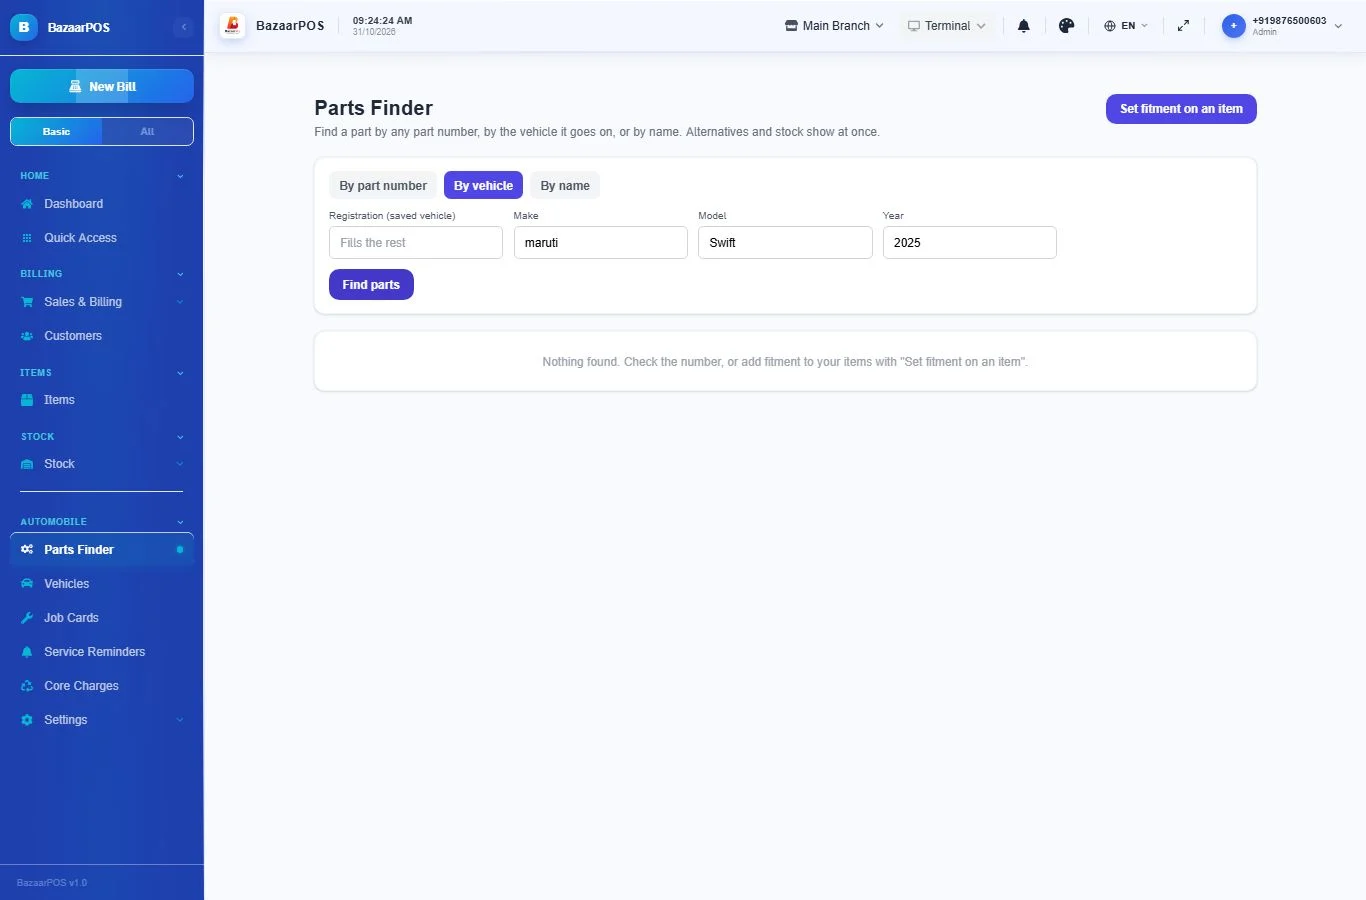
- By vehicle: type the make, model and year (or the registration of a saved vehicle). You see every part that fits it.
- By name: type words from the name, such as brake pad front.
Step 4: Customers' vehicles
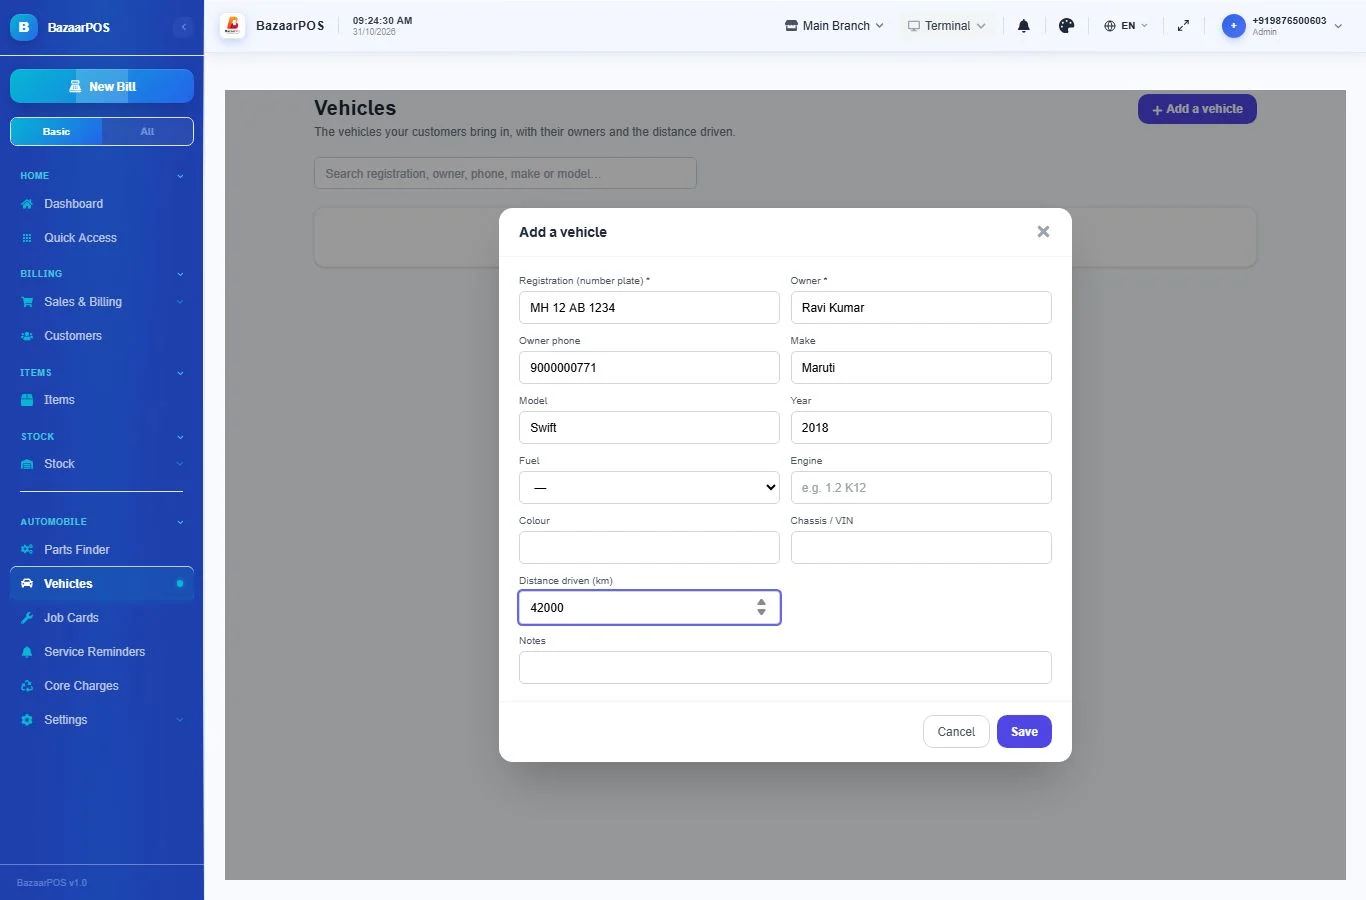
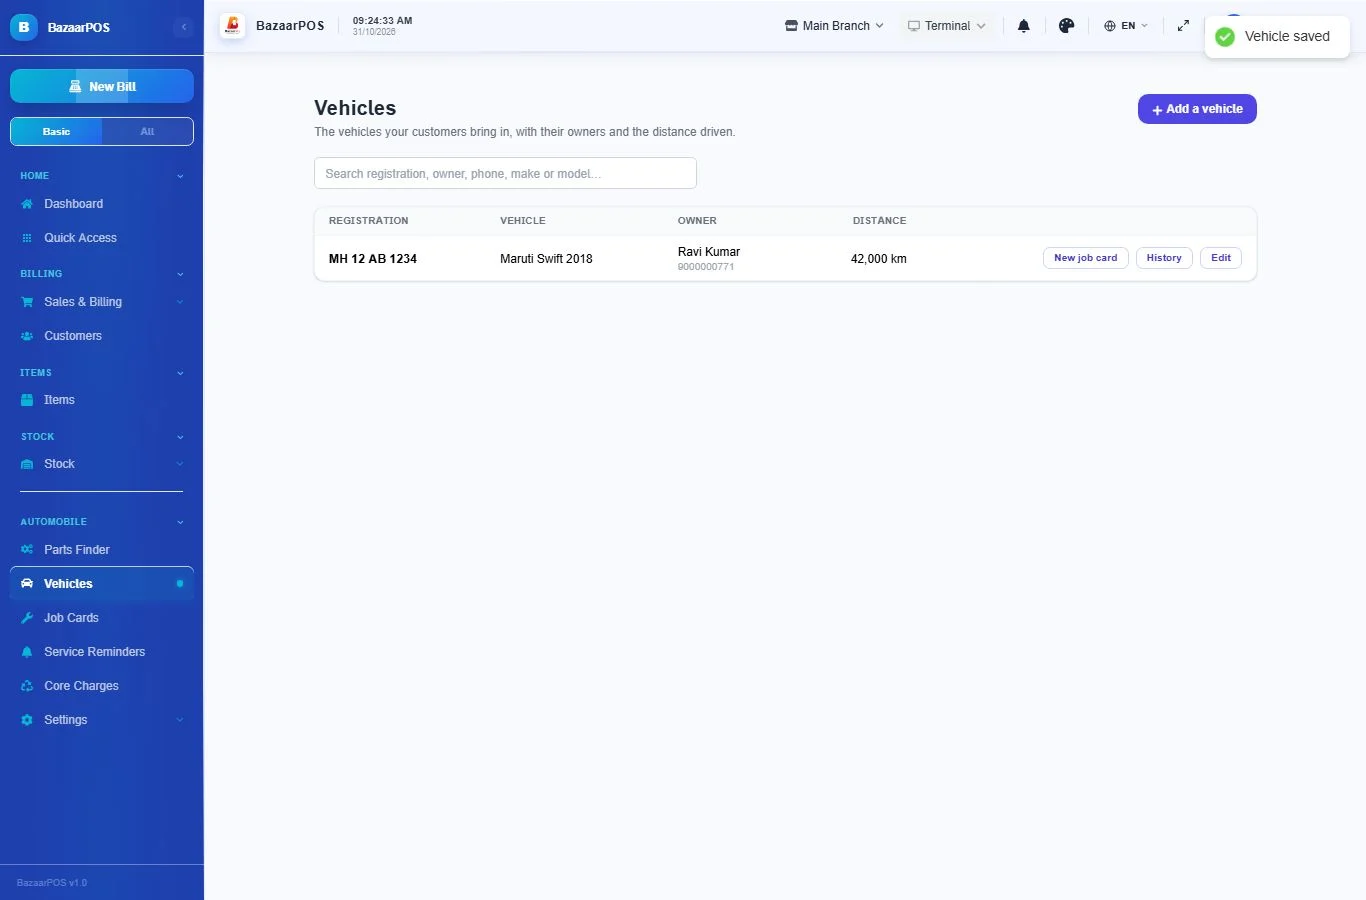
Open Automobile → Vehicles and click Add a vehicle. Enter the registration, the owner, the make, model and year, the fuel, and the distance driven. The owner becomes a customer in your customer list, so advances and refunds go on their account. The same registration cannot be saved twice, however it is typed.
Step 5: A job card from estimate to delivery
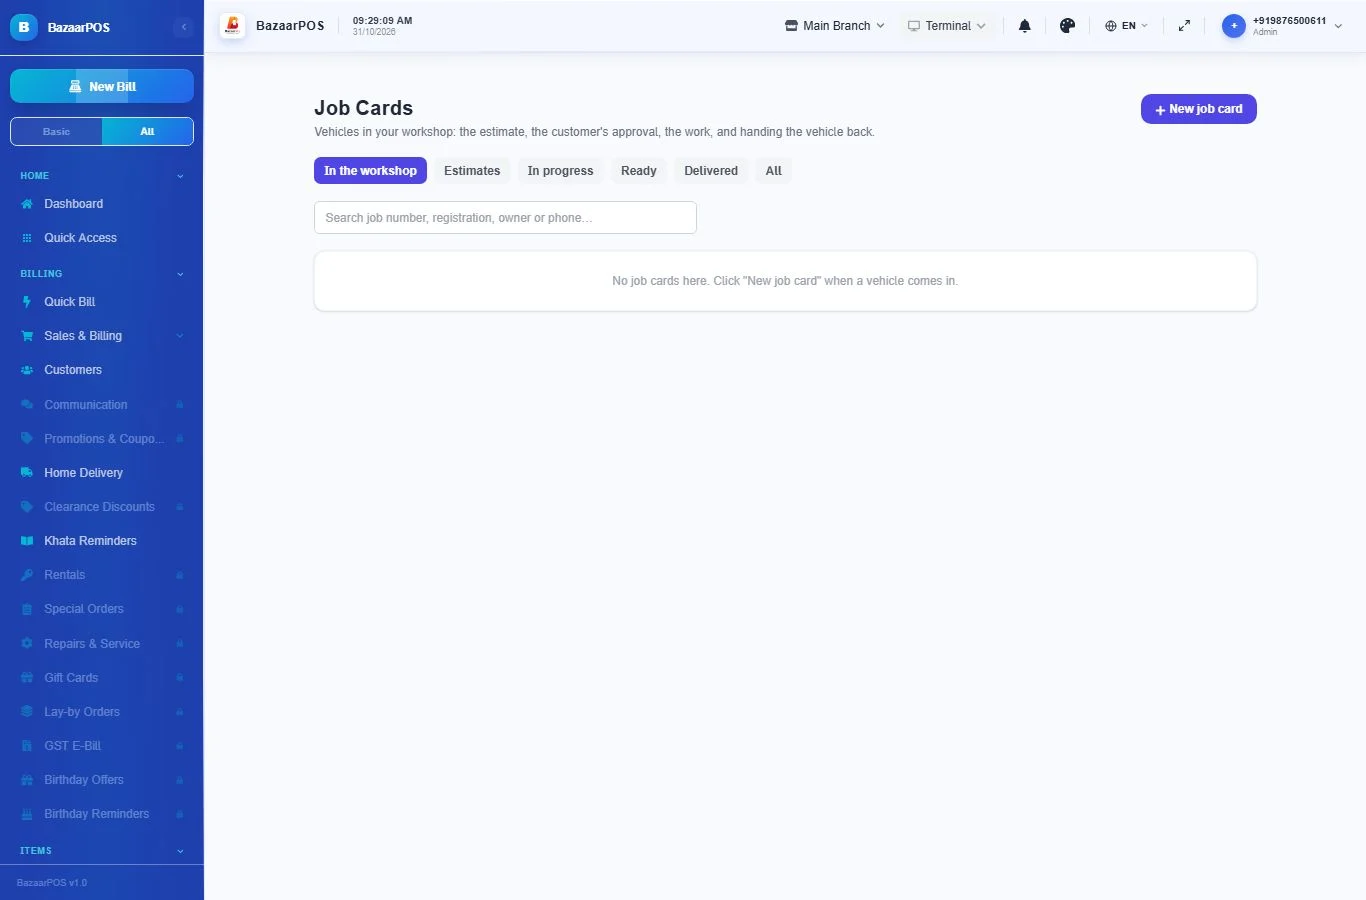
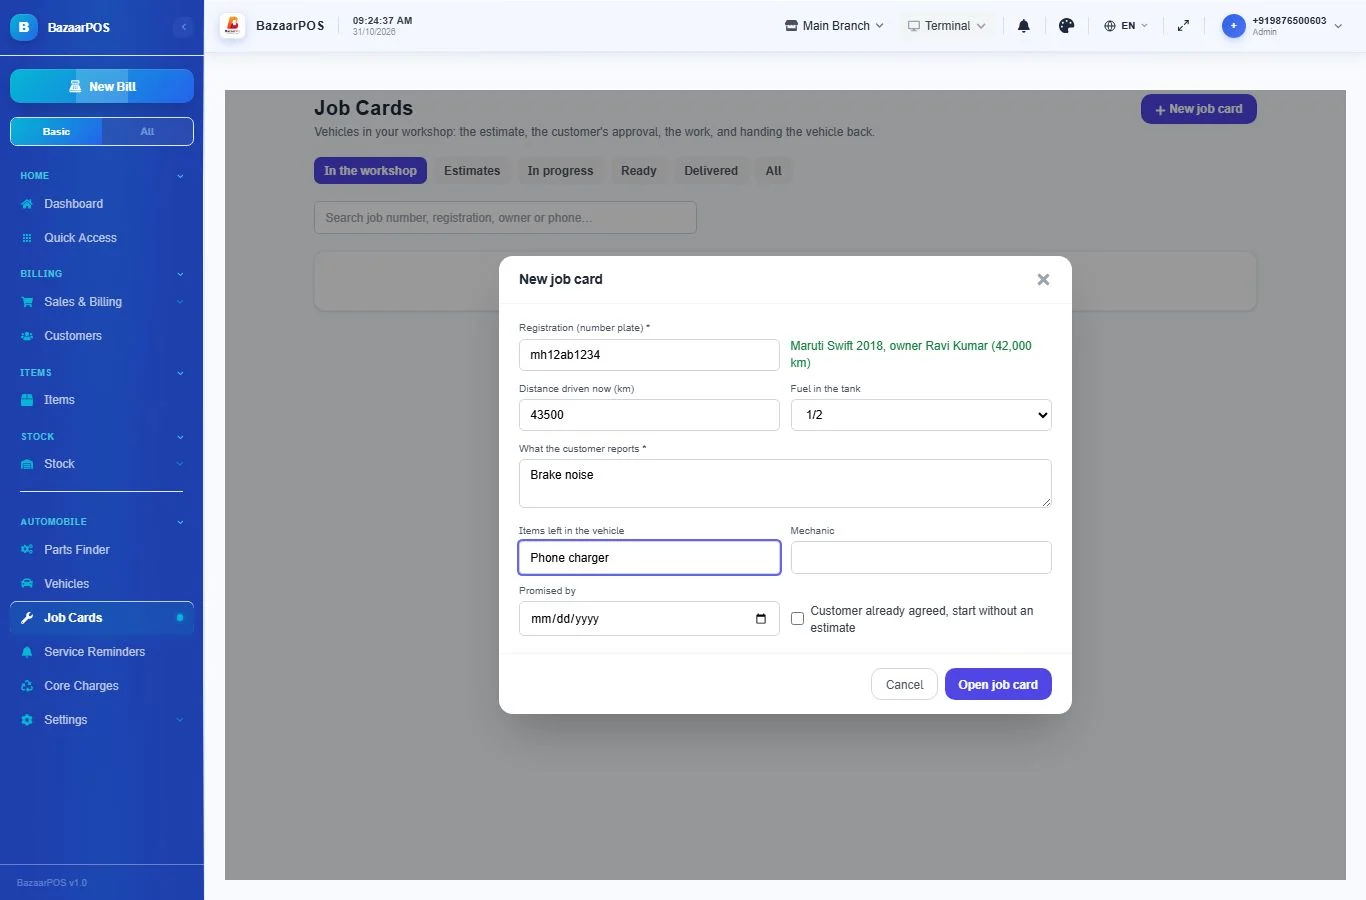
- Open Automobile → Job Cards and click New job card. Type the registration. A saved vehicle is recognised. For a new vehicle, fill in the owner, make and model and it is saved with the job.
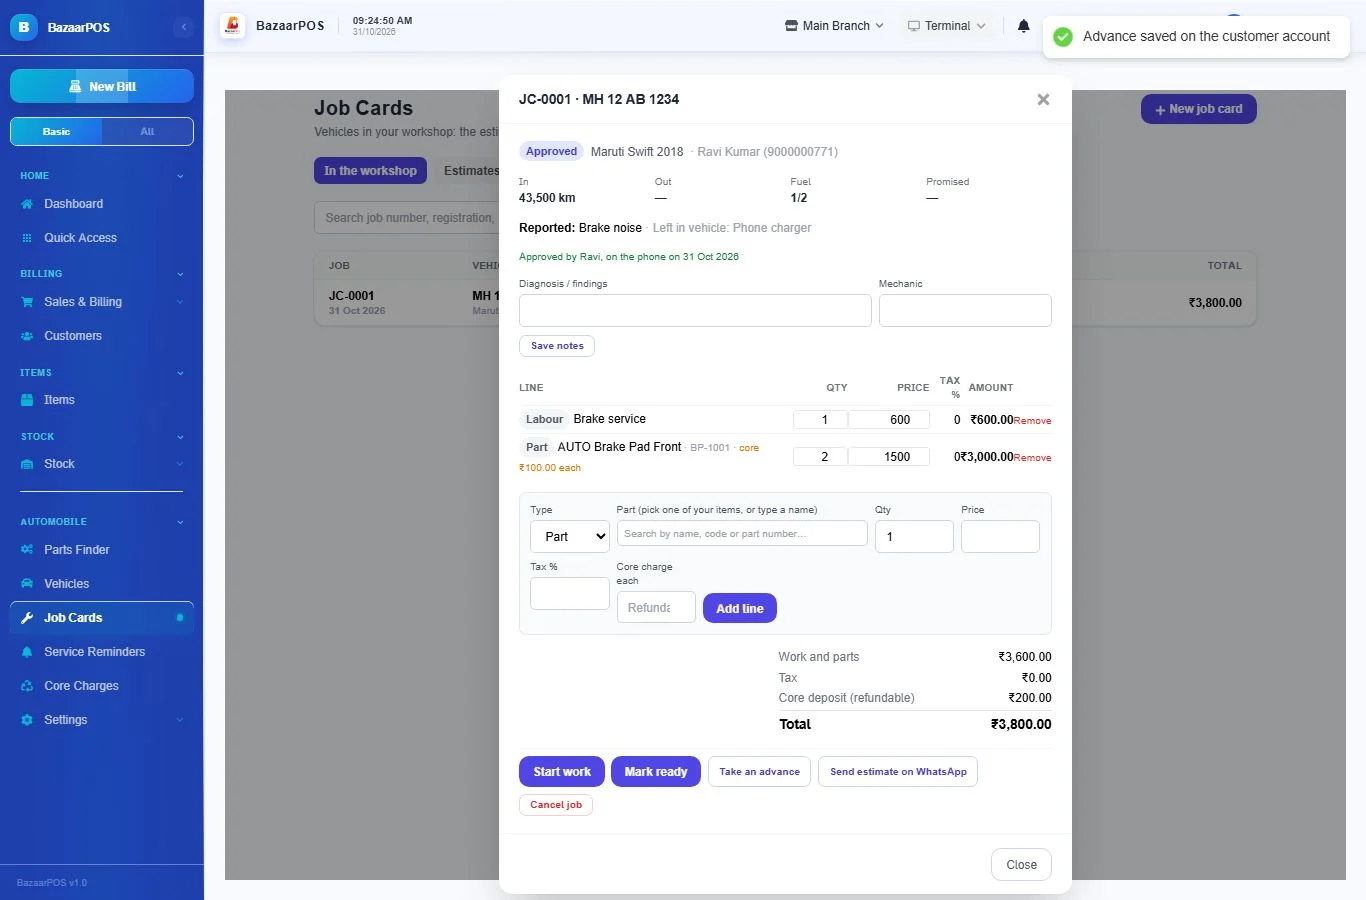
- Write what the customer reports, the distance driven now, the fuel in the tank, and anything left in the vehicle. Click Open job card. It starts as an Estimate.
- Add the lines: Labour, Part, Outside work or Other. For a part, search your own items: the name, price, tax rate and part number are filled in. Enter a Core charge each for parts that carry a refundable deposit.
- Each line has its own tax rate, so labour and parts can be taxed differently. Tax follows your shop's tax settings. The total shows the work and parts, the tax, and the refundable core deposit.
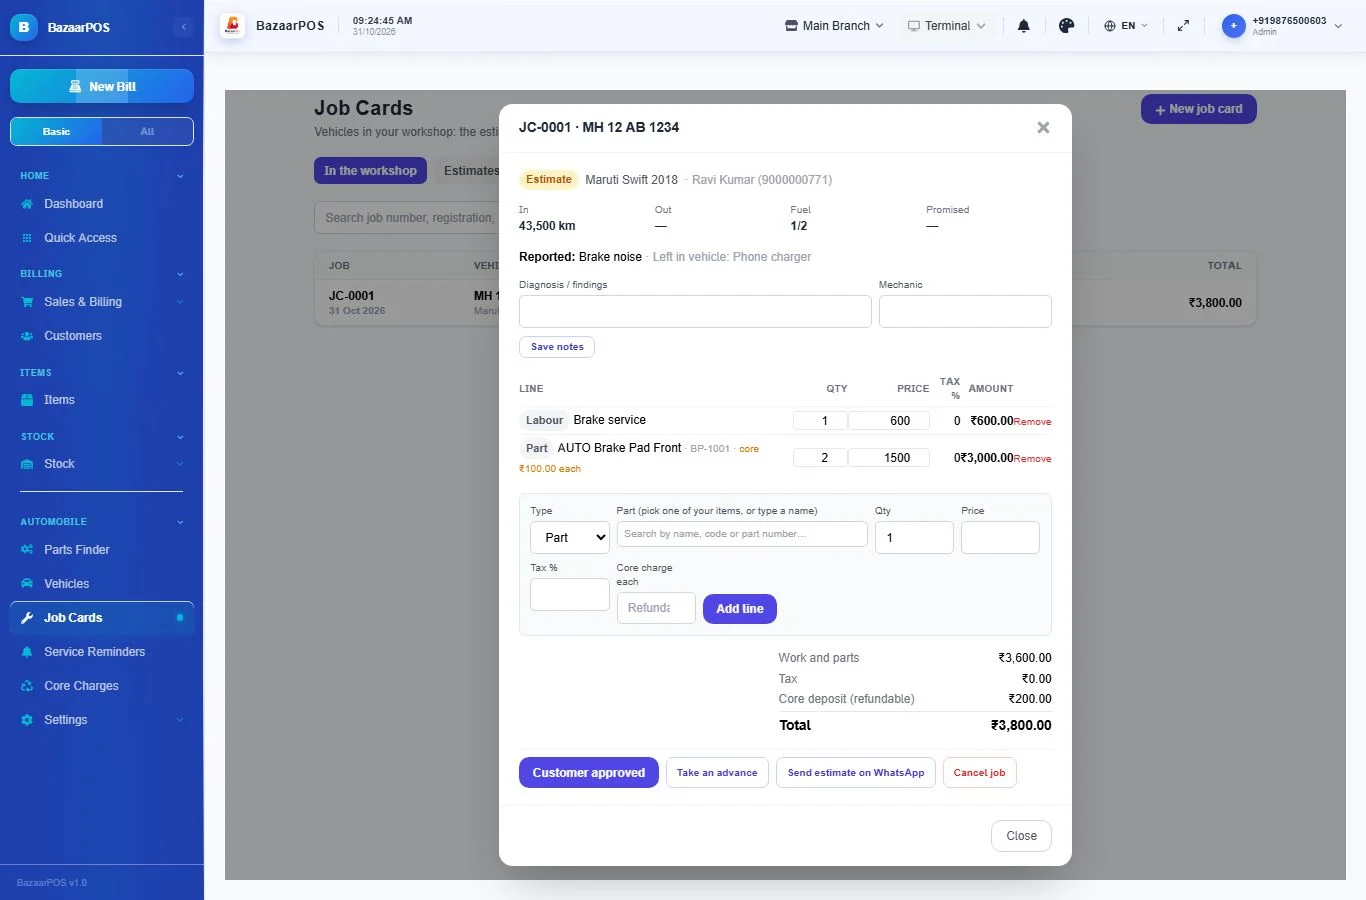
- When the customer agrees, click Customer approved and note who approved it and how (for example "Ravi, on the phone"). Use Send estimate on WhatsApp to send the lines and the total first.
- Click Take an advance if the customer pays something now. It is kept on their account, and the billing screen offers it on the final bill.
- Move the job along with Start work and Mark ready. If extra work is added after approval, the screen reminds you to tell the customer.
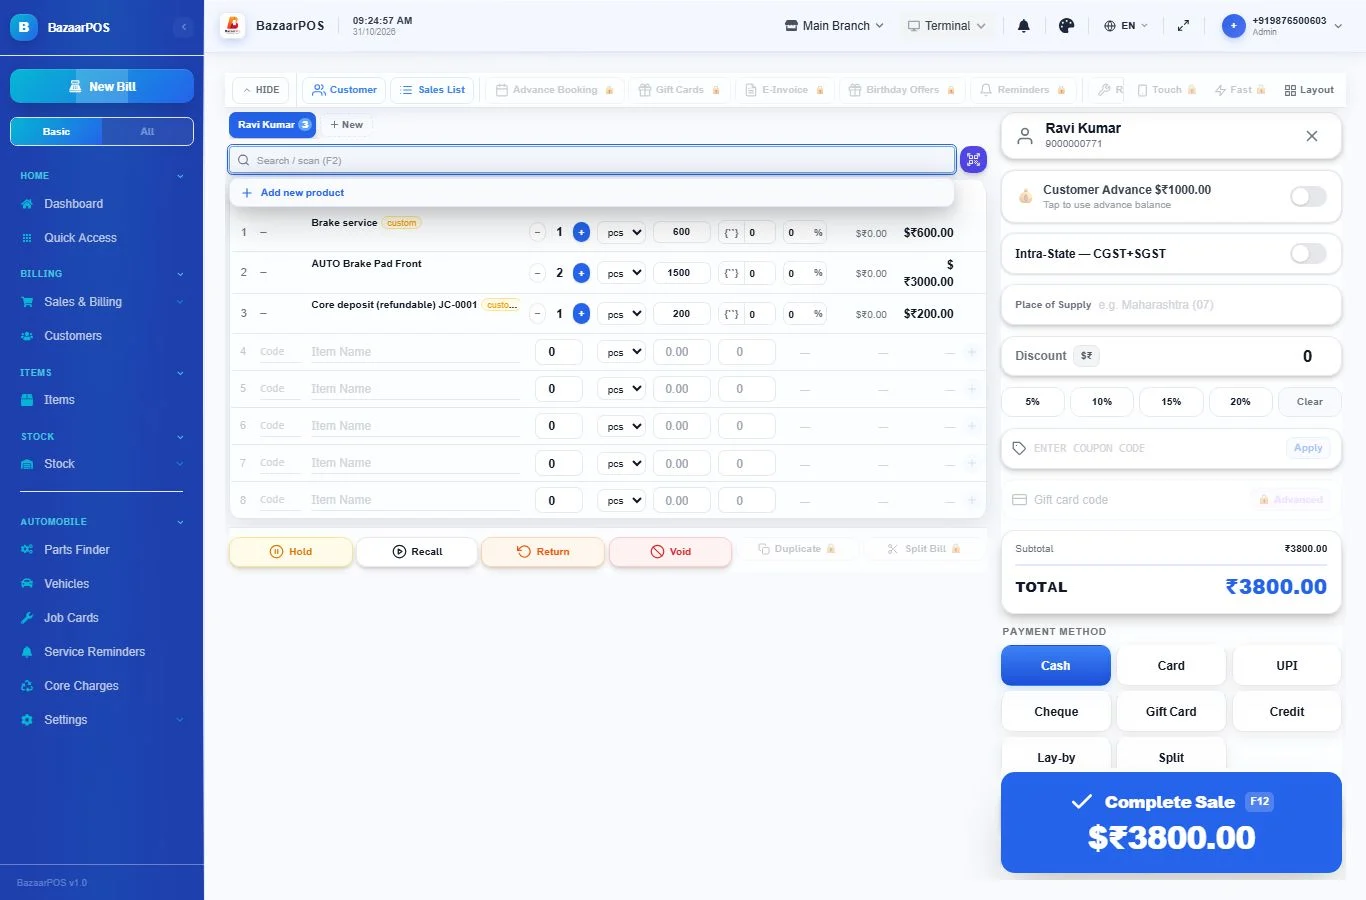
- When the vehicle is ready, click Open in billing. The billing screen opens with the customer, the labour, the parts and one refundable core deposit line. Stock goes down on the bill, and the advance can be used there.
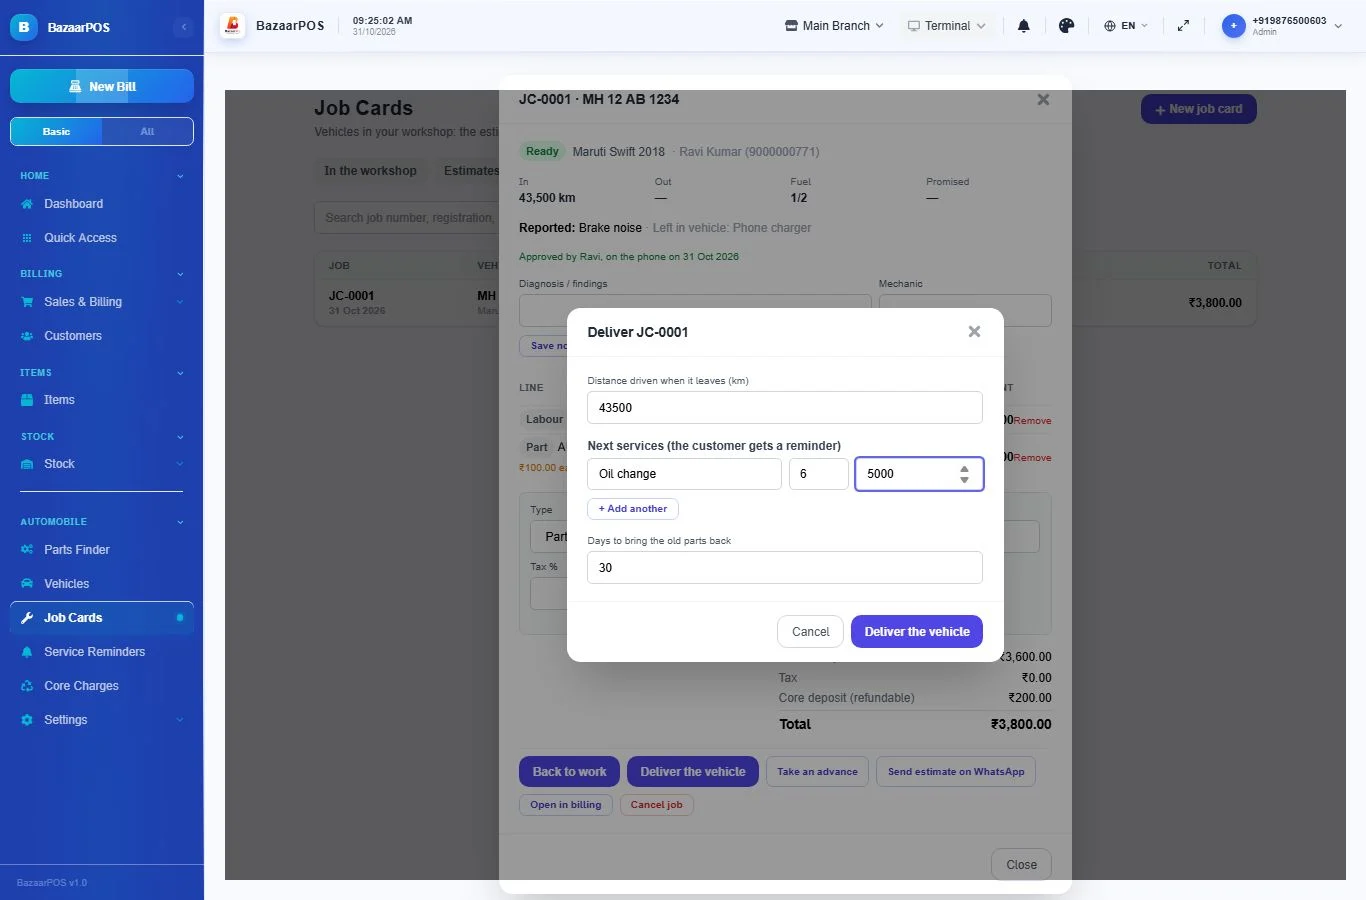
- Click Deliver the vehicle. Enter the distance driven when it leaves and, under Next services, the next service (for example Oil change, in 6 months or after another 5,000 distance units). A reminder is created for each. If parts carry a core charge, say how many days the customer has to bring the old parts back.
Step 6: Service reminders
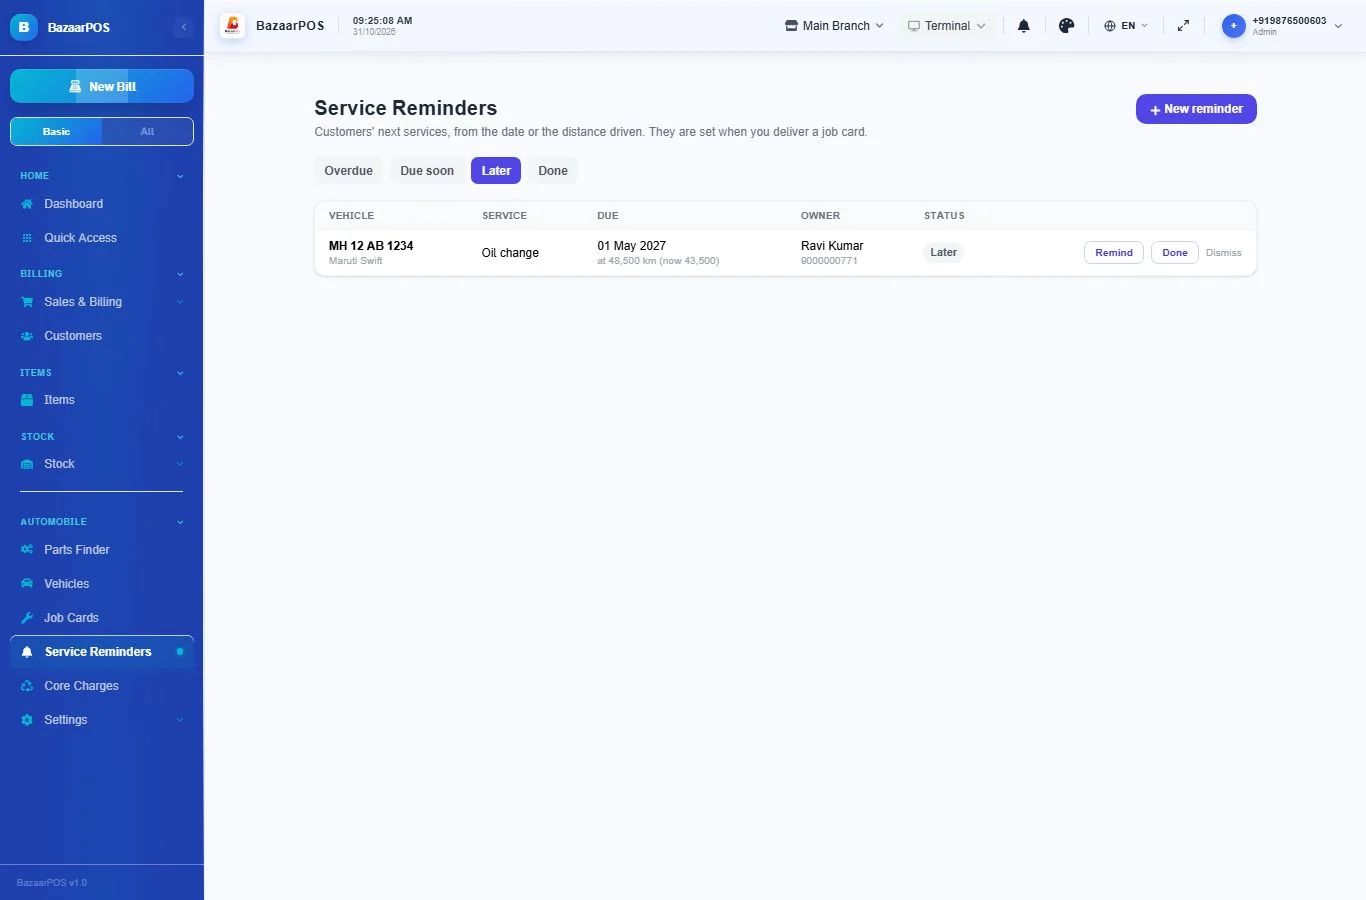
Open Automobile → Service Reminders. Each reminder is Overdue (the date has passed or the vehicle has reached the distance), Due soon (within about 14 days or 500 distance units) or Later. Click Remind to open WhatsApp with a ready message to the owner, then Done when the service is booked or done. New reminder adds any other reminder, such as an insurance renewal.
Step 7: Core charges
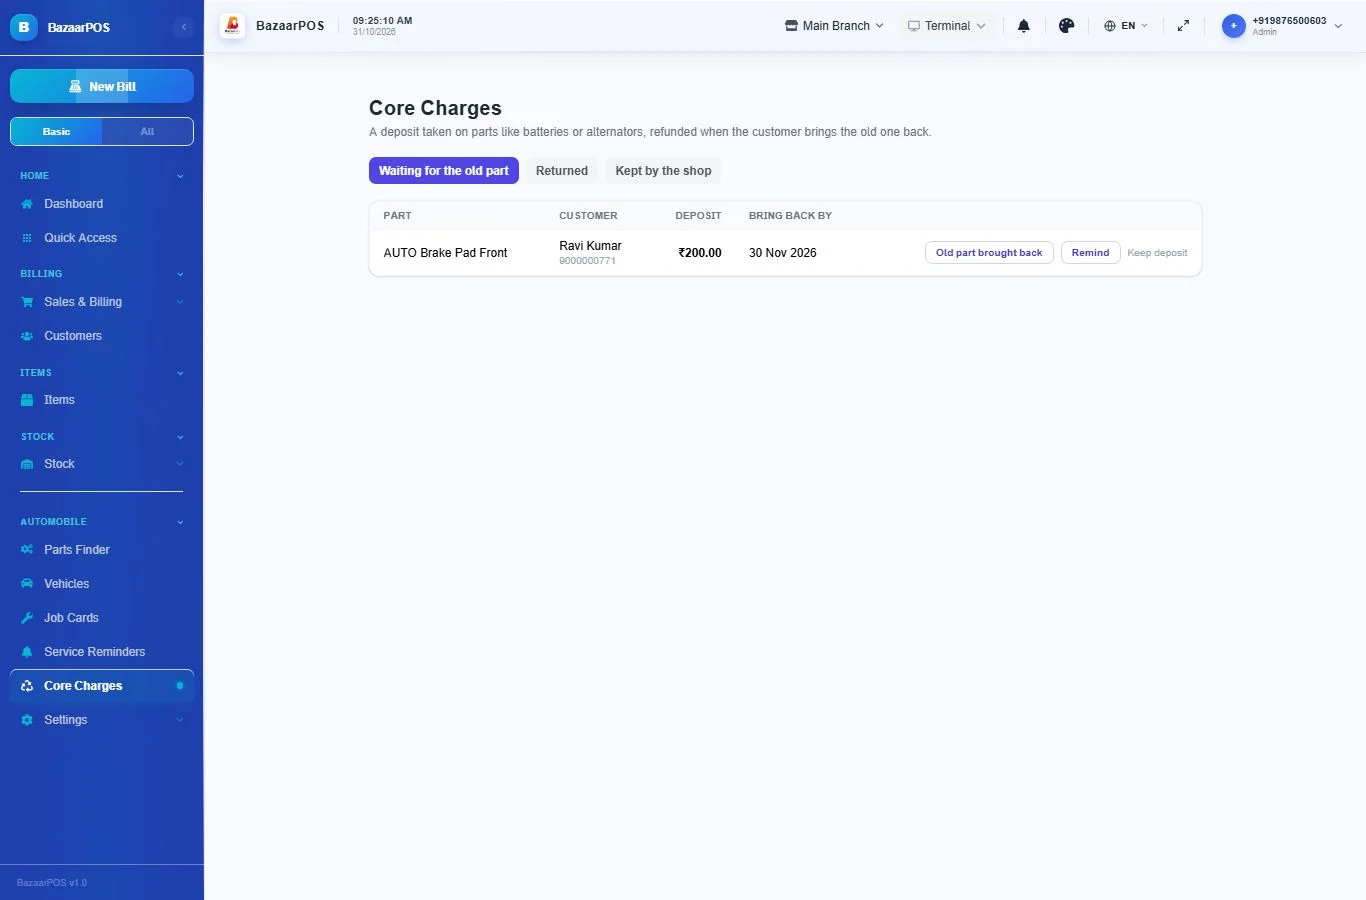
When a job with a core charge is delivered, the deposit appears in Automobile → Core Charges as waiting for the old part. When the customer brings the old part back, click Old part brought back: the deposit goes back as credit on their account. Remind sends a WhatsApp message. If it never comes back, Keep deposit closes it.
Step 8: Vehicle papers and the service book
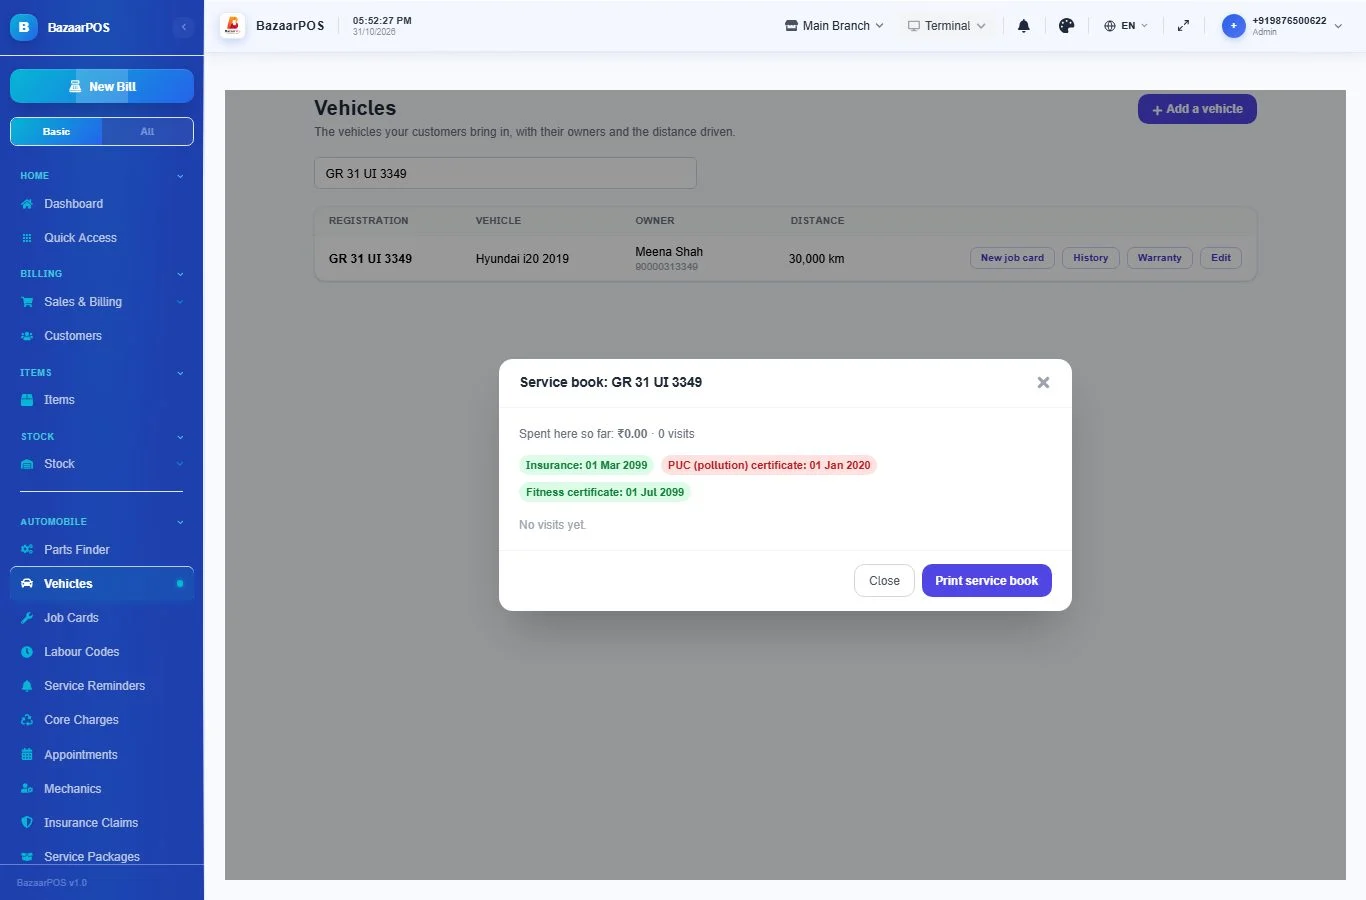
On a vehicle, fill in the insurance company, policy number and expiry, and the expiry dates of the PUC, fitness certificate and road tax. A reminder is made for each date and moves when you change the date. Open a vehicle's Service book to see every job, what was done and what it cost.
Step 9: Reminders that send themselves
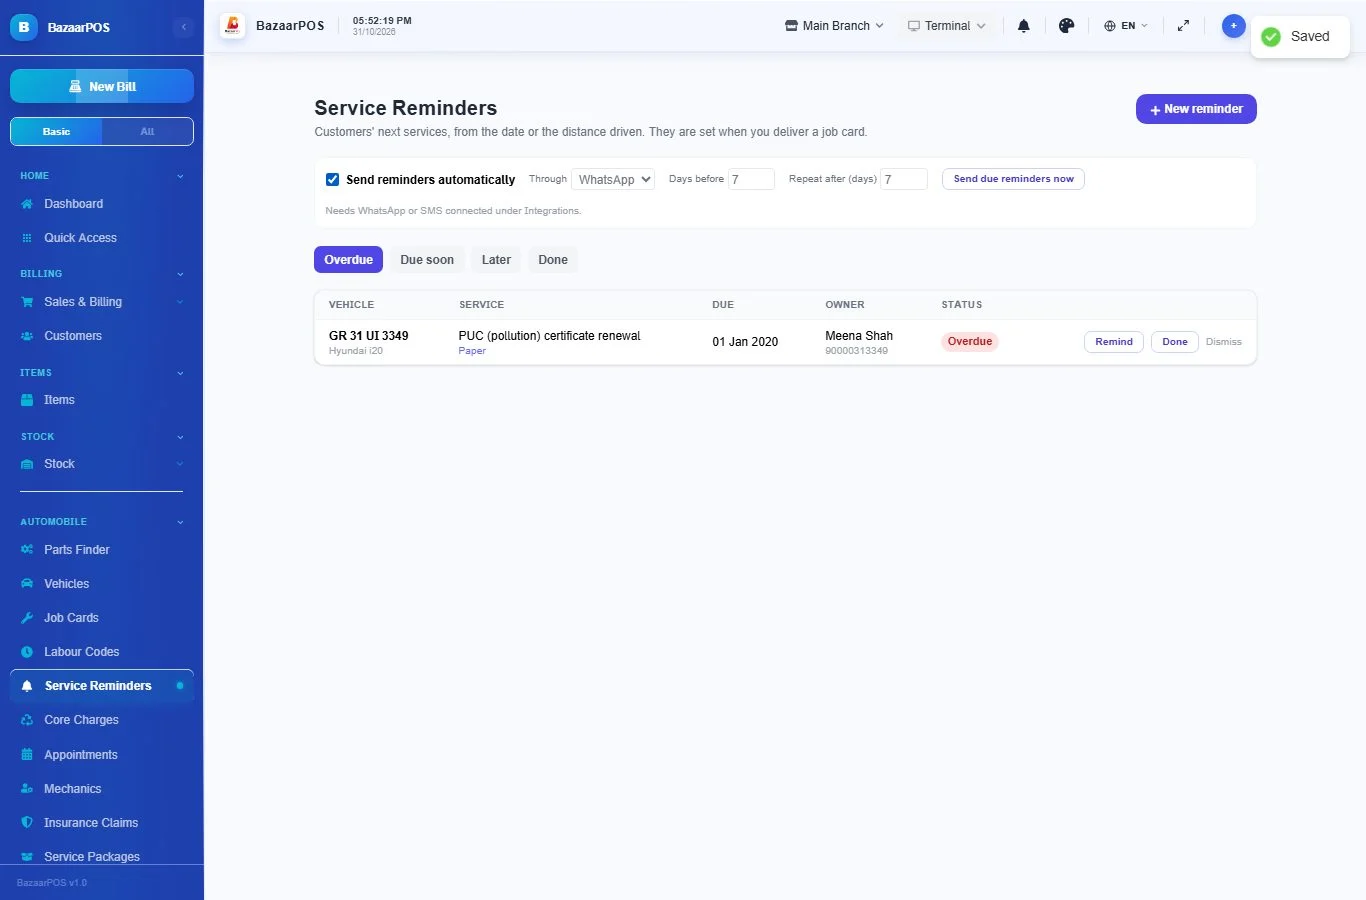
On Service Reminders, tick Send reminders automatically. Choose WhatsApp or SMS, how many days before the date to send, and how many days to wait before repeating. Send due reminders now sends straight away. WhatsApp or SMS must be connected under Integrations.
Step 10: Appointments and bays
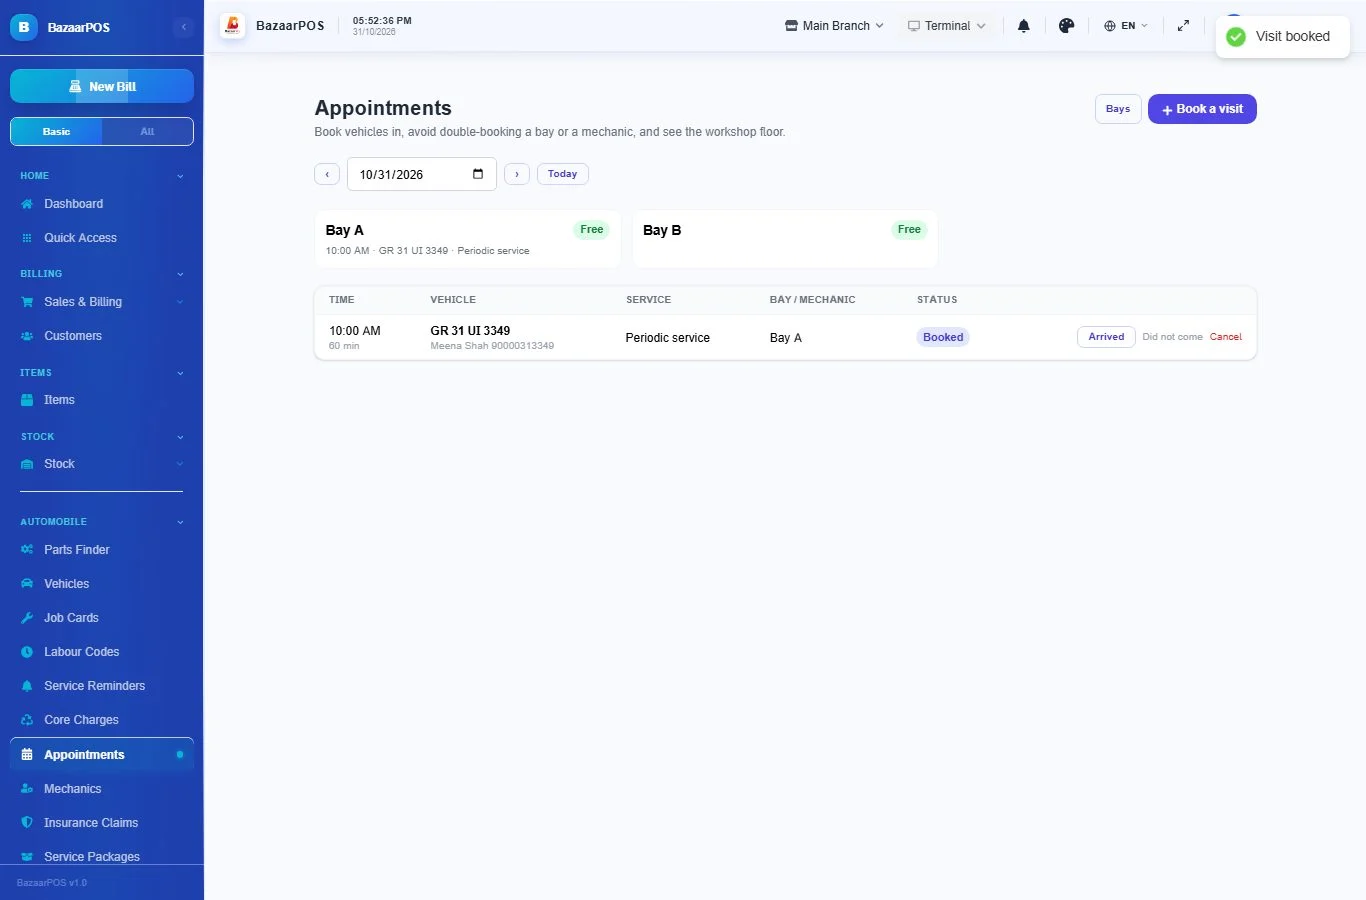
Open Automobile → Appointments. Add your bays (lifts or work areas), then book a visit with the vehicle, the bay, the mechanic and the time. The screen warns you if the bay or the mechanic is already busy then. Check in opens the job card and puts the vehicle in the bay. A bay holds one open job at a time.
Step 11: Inspection on the job card
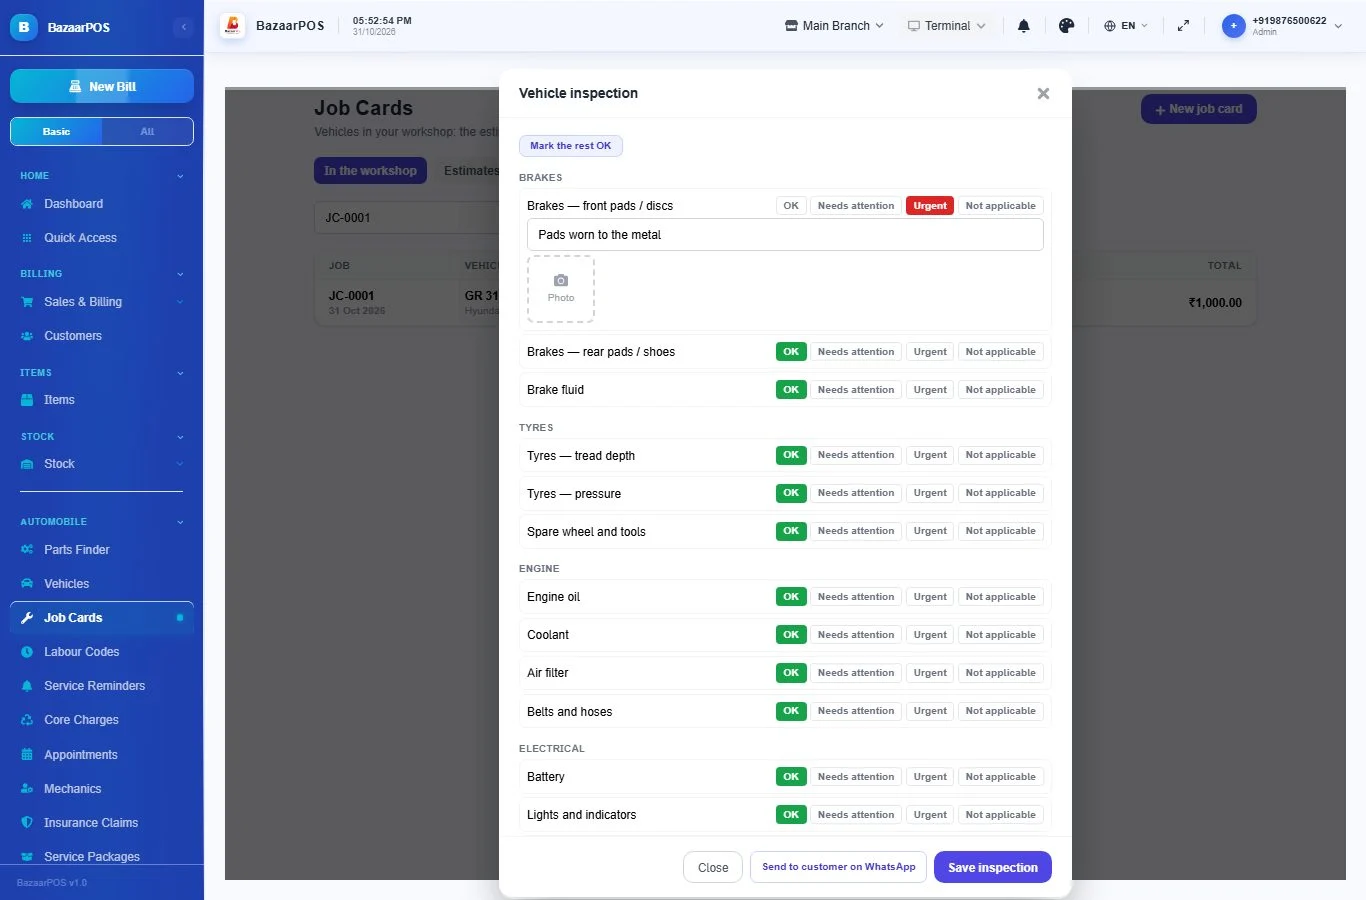
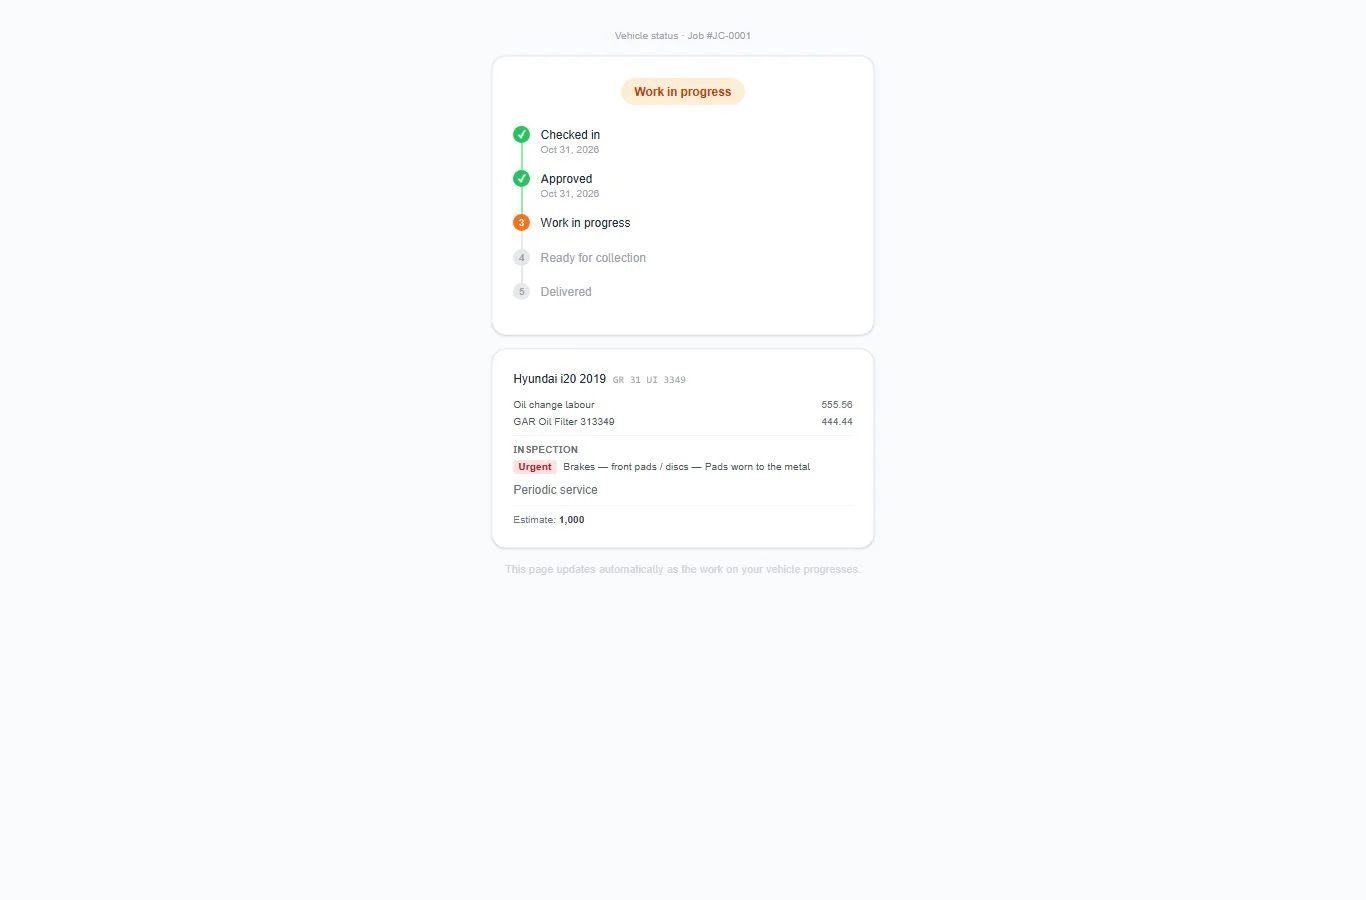
On a job card, the Inspection panel lists 17 usual checks (brakes, tyres, lights, fluids and more). Mark each OK, Needs attention or Urgent, add a note, and attach up to 6 photos. The customer sees only the problems, not the photos, on their tracking link.
Step 12: Mechanics, time and commission
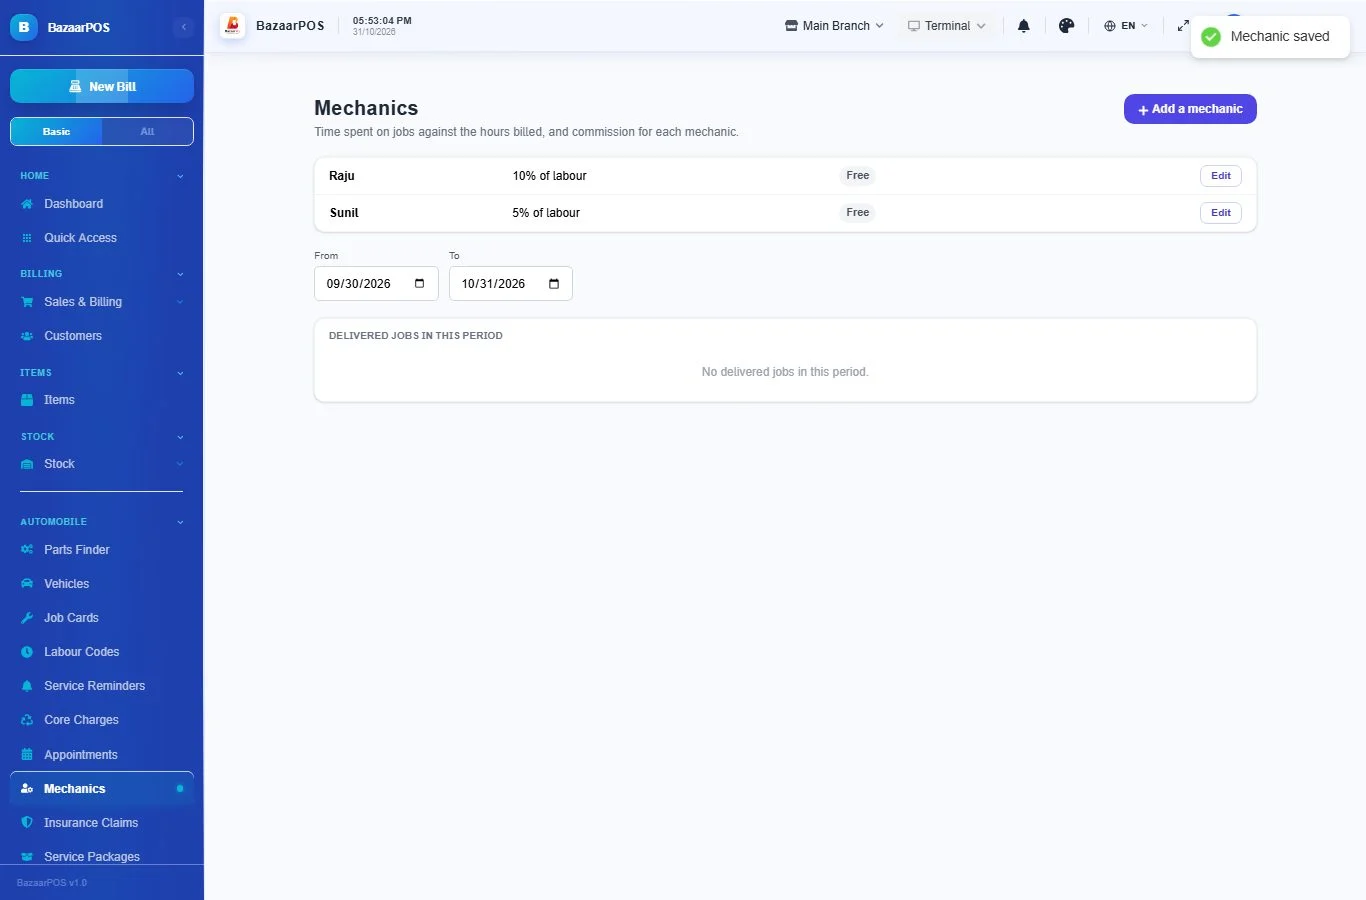
Add your mechanics under Automobile → Mechanics with their commission. On a job card, start a timer for a mechanic; it stops when the job is ready, delivered or cancelled. The report shows the hours and commission for each mechanic over any dates.
Step 13: Insurance claim jobs
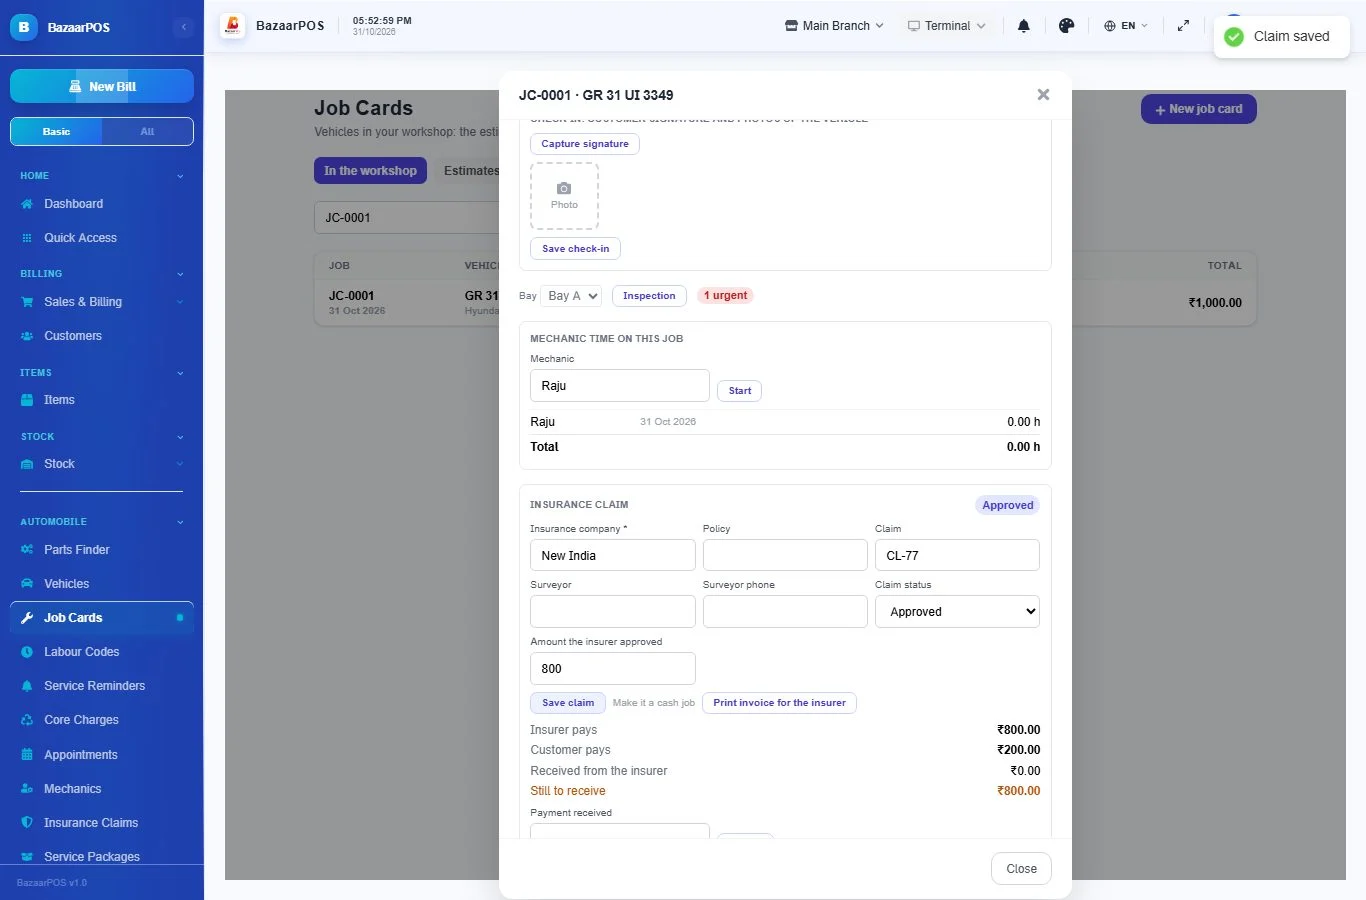
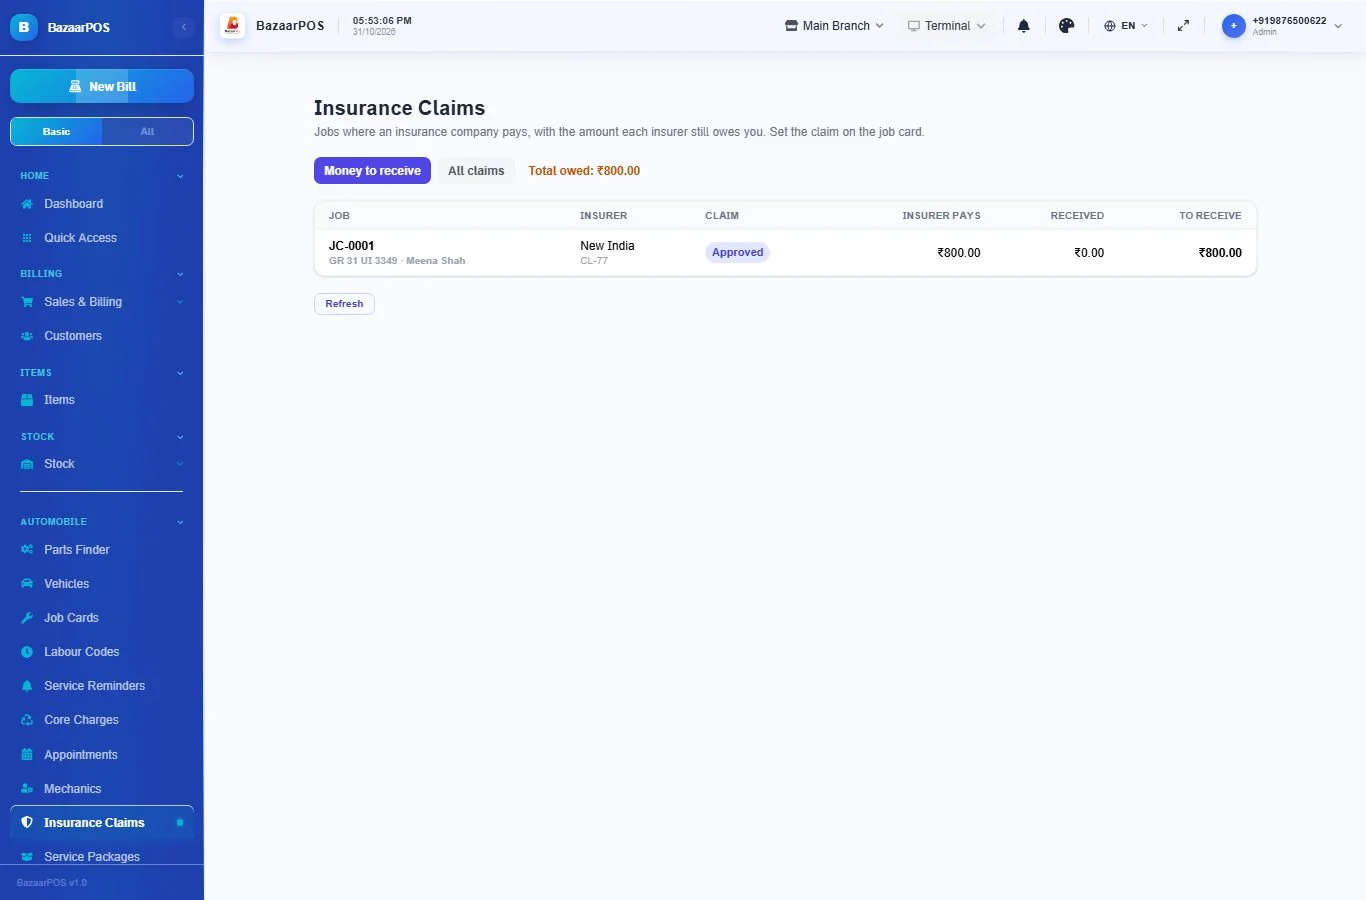
On a job card choose Insurance claim and enter the insurer, policy, claim number and surveyor. Put in the amount the insurer approved: billing then charges the customer only their share. Record each payment from the insurer under Automobile → Insurance Claims, which shows what the insurer still owes you.
Step 14: Service packages
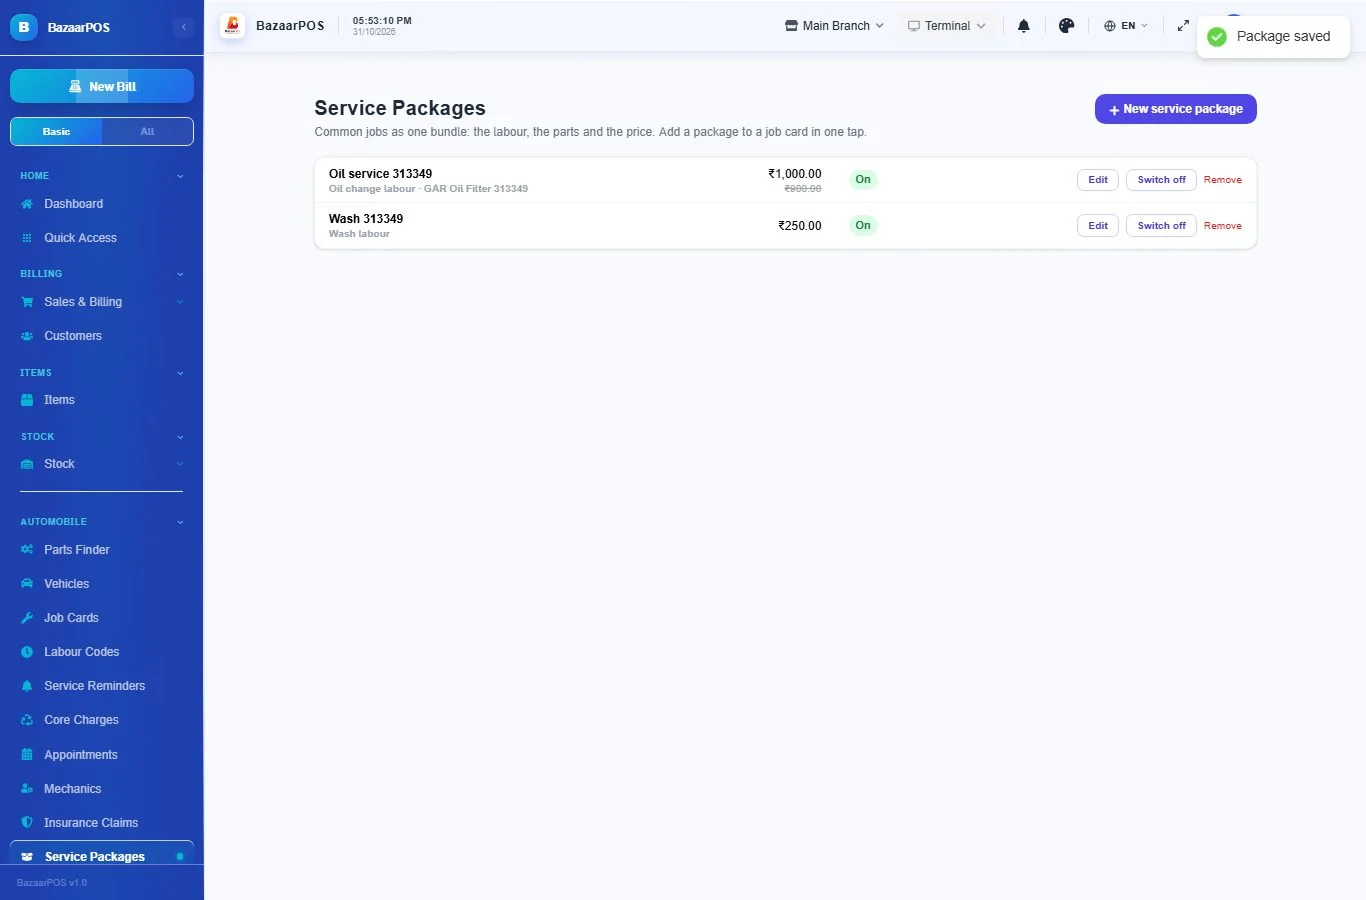
Under Automobile → Service Packages, save common jobs such as Full service with their labour and parts. Give a fixed price if you want one: the lines are adjusted so the job gets exactly that price. On a job card, add the package in one tap.
Step 15: Labour codes and standard times
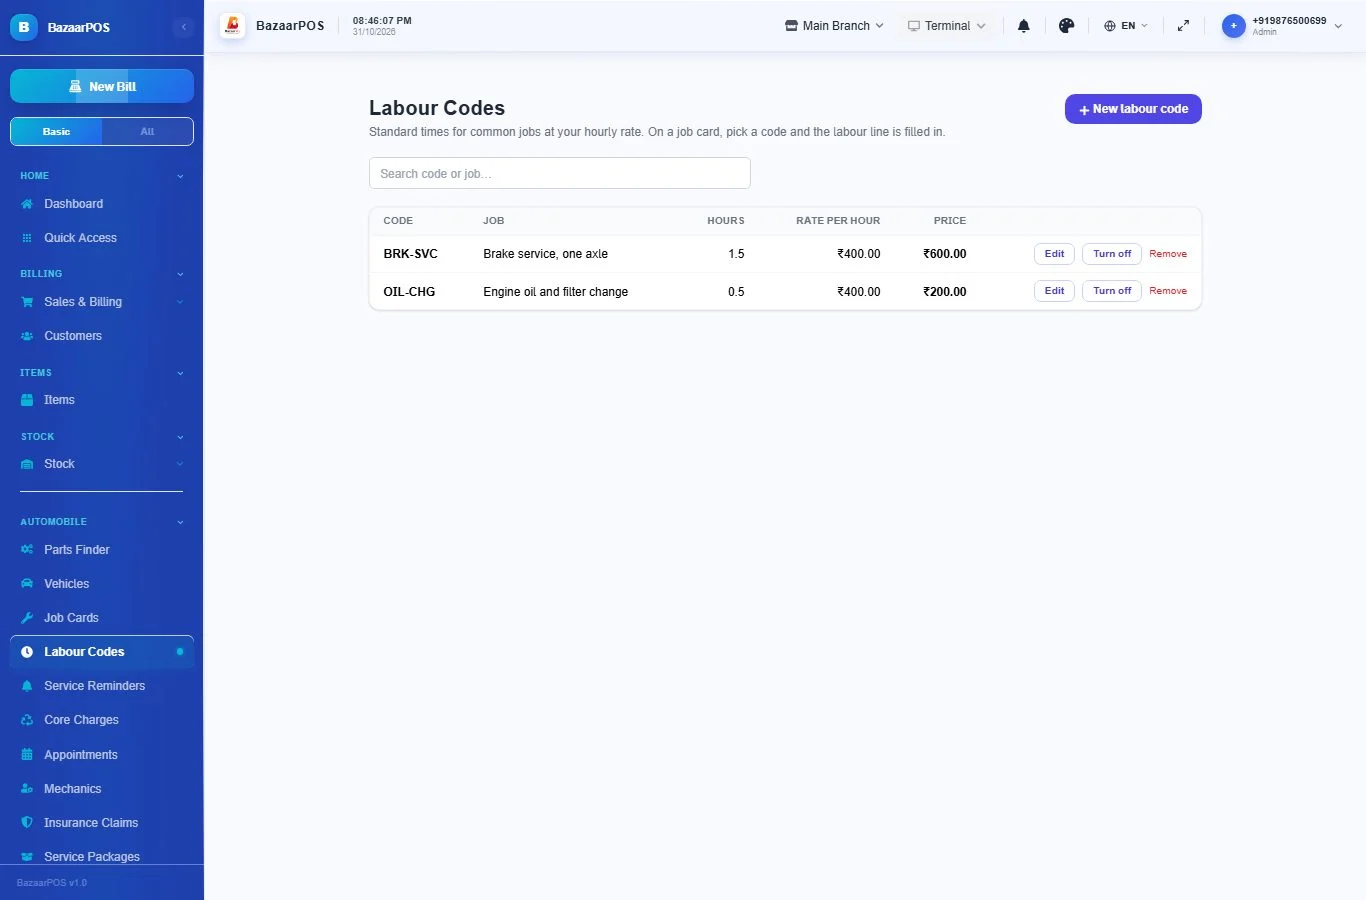
Open Automobile → Labour Codes and add the jobs you do again and again, such as a brake service. Each code has a short name, a description, the standard hours and your rate per hour; the price is worked out for you. On a job card, pick the code on a labour line and the hours and price are filled in. Turn off hides a code without losing it.
Step 16: Tyre size and the VIN
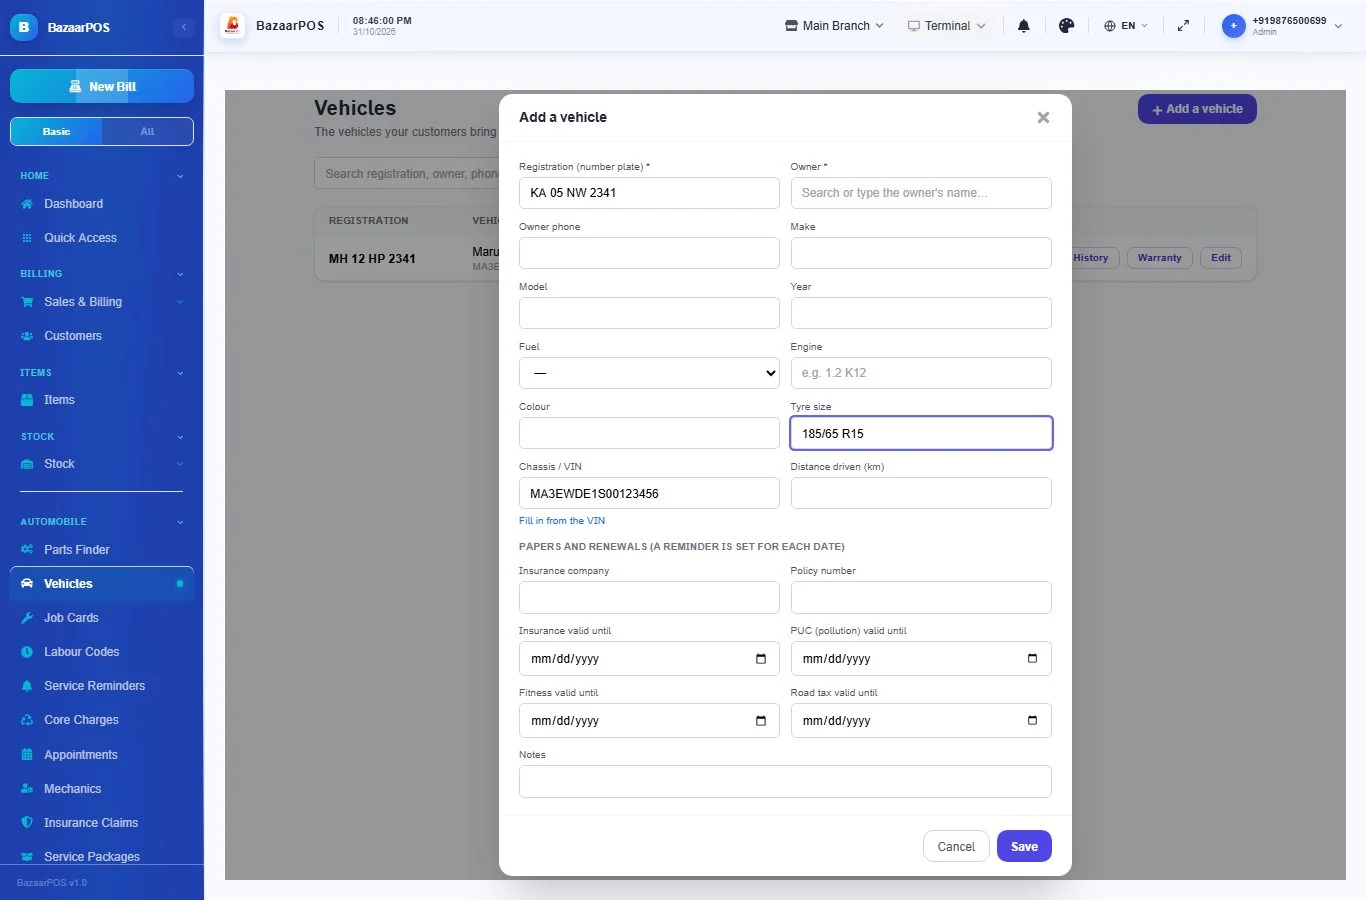
On a vehicle, write the tyre size (for example 185/65 R15) so you can find the right tyres without asking the customer again. Type the chassis number (VIN) and press Fill in from the VIN: the year, the maker and where the vehicle was made are read straight away, even without a connection. With a connection it also fills the model, engine and fuel.
Step 17: Warranty on parts
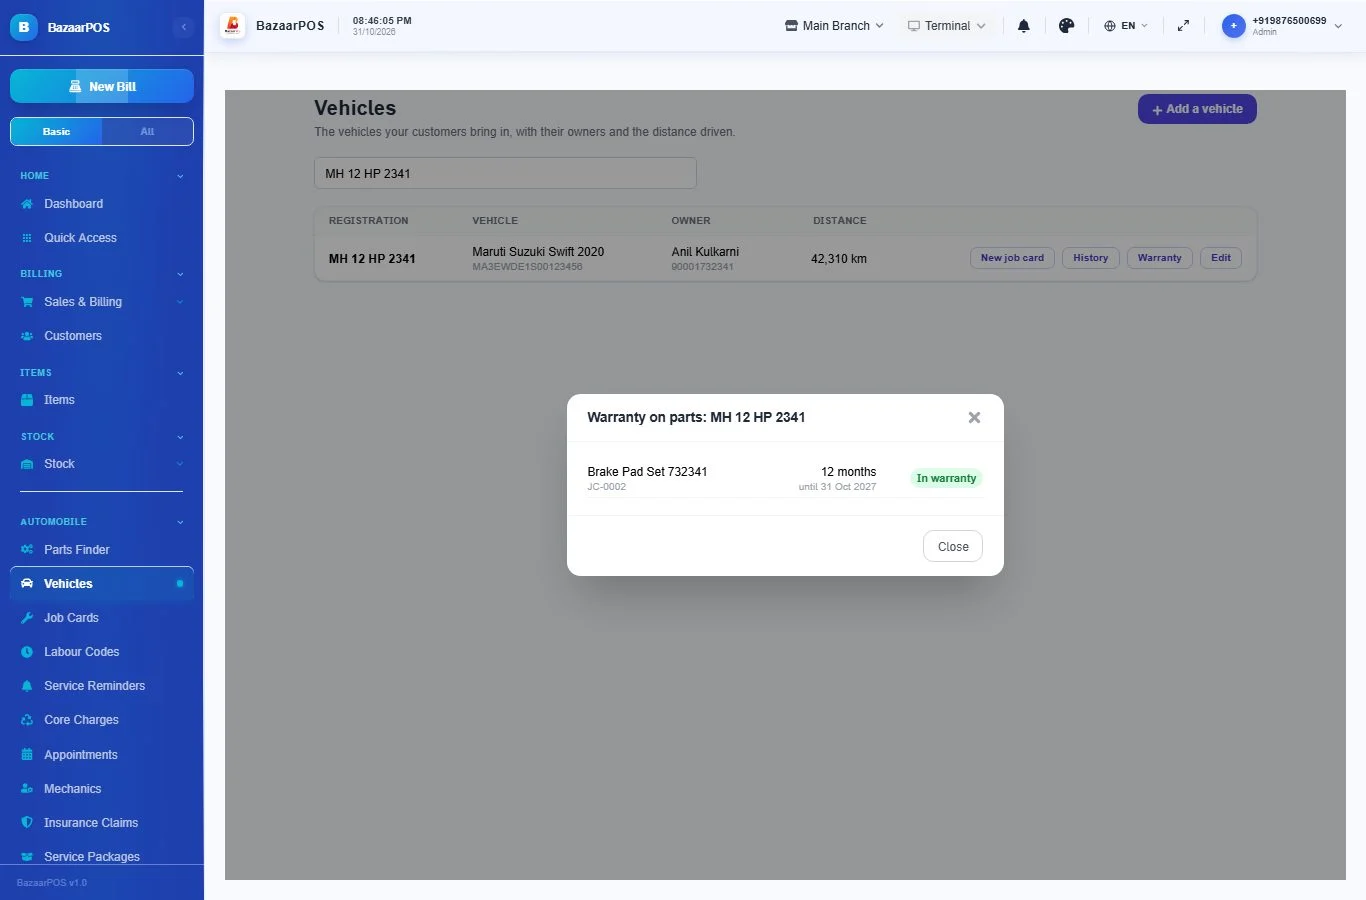
On a job card, a part line has a Warranty (months) box. The warranty counts from the day the vehicle is delivered. Press Warranty on a vehicle to see every part still in warranty and until when, or open the Service book, which also marks them. When the same vehicle comes back with a problem, you can see at once what you have to cover.
Step 18: Extra work after the customer approved
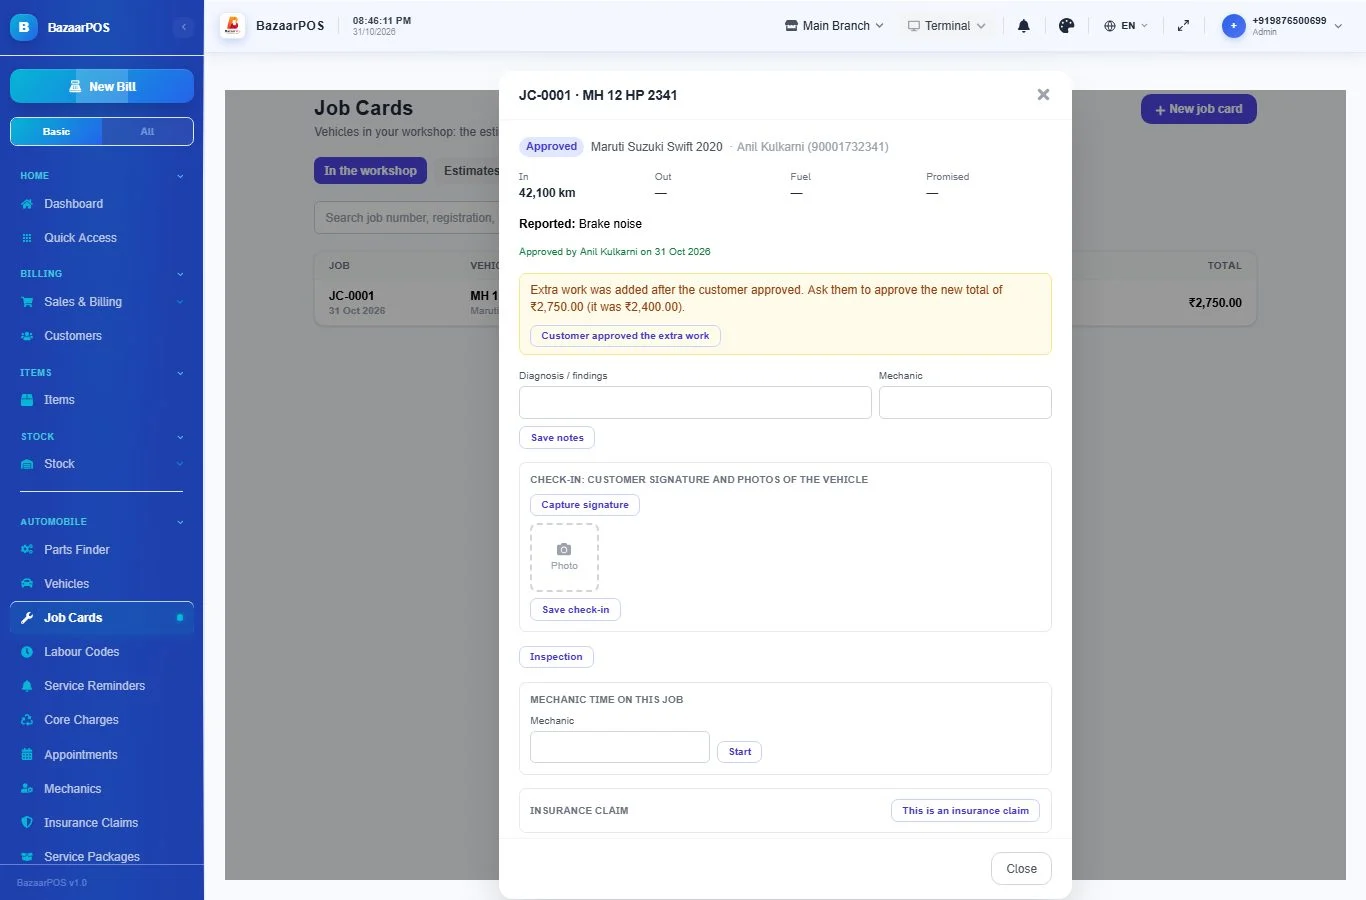
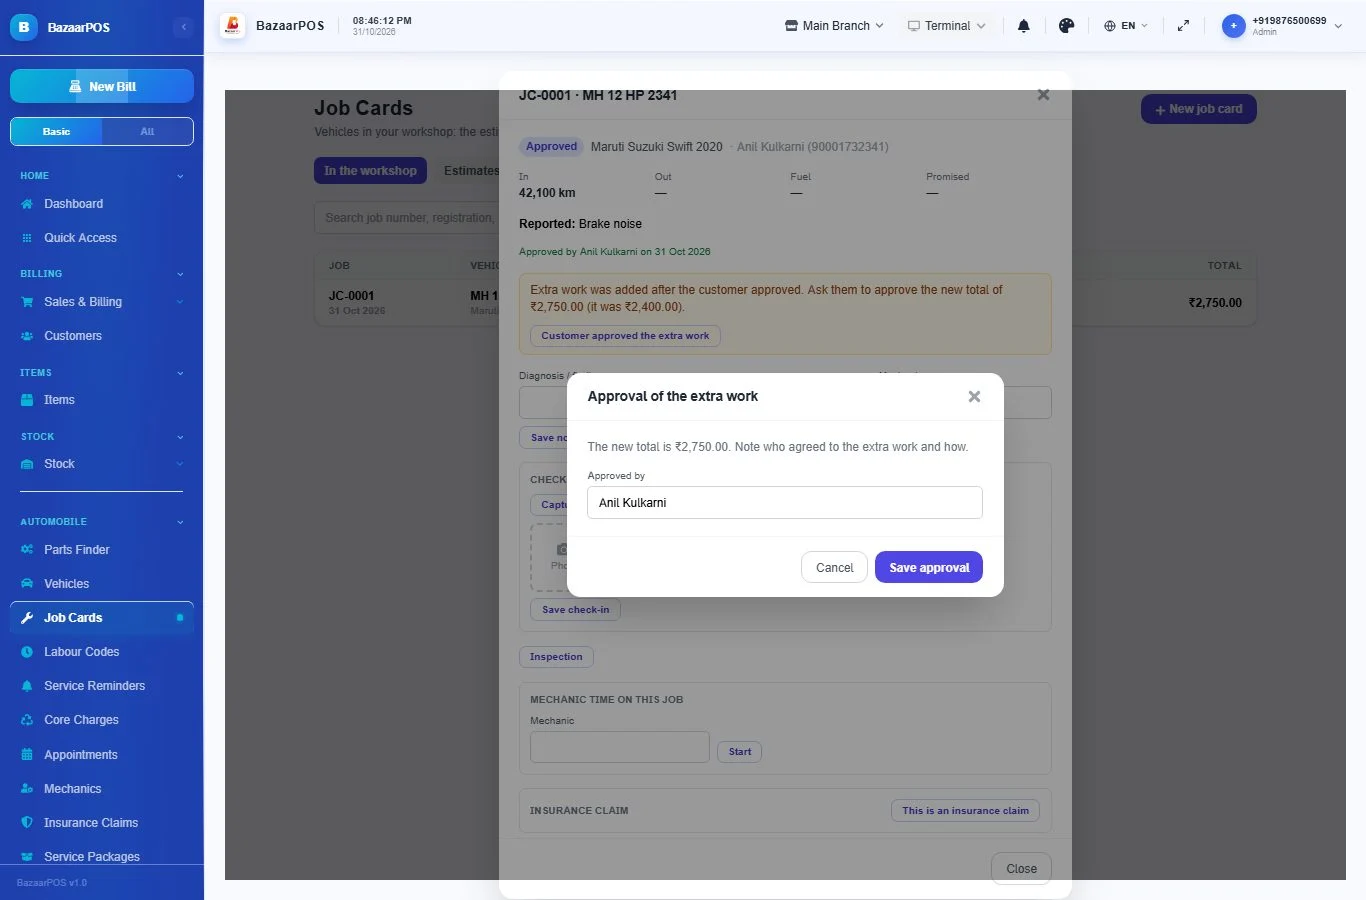
If you add a line after the customer approved the estimate, the job card shows a yellow notice with the new total and the old one. Ask the customer, then press Customer approved the extra work and write who agreed and how (for example "Anil, on the phone"). The job card keeps this record.
Press Share tracking link on a job card to send the customer a WhatsApp message with a link. They can follow the work from their own phone: where it is, the estimate and, if you did an inspection, what needs attention. They do not need to log in.
Step 19: Deposits you paid to suppliers
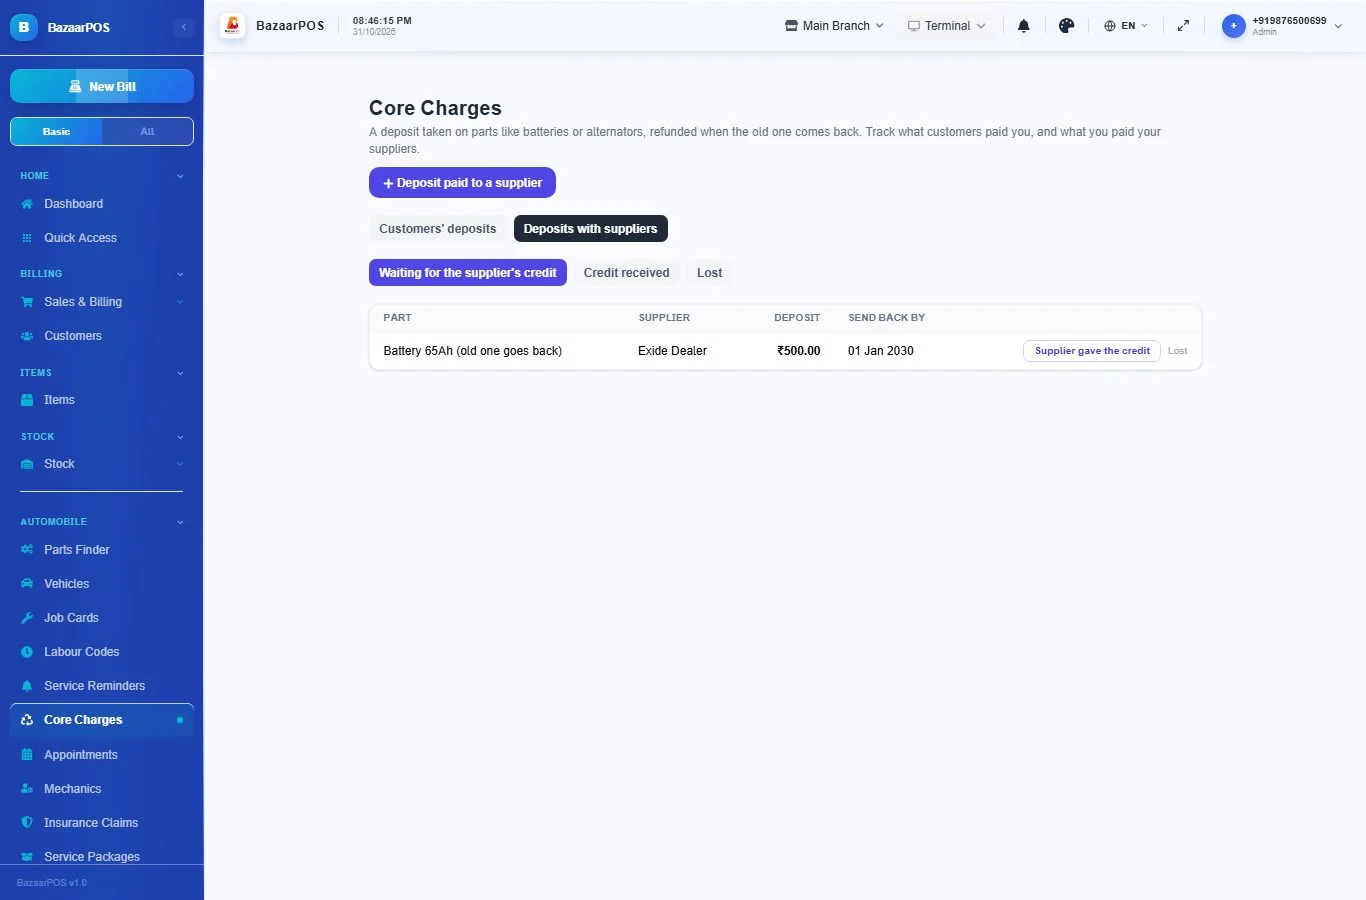
When you pay a supplier a deposit on a battery or alternator, write it in Core Charges → Deposits with suppliers → Deposit paid to a supplier. It stays under Waiting for the supplier's credit until the old part goes back. Press Supplier gave the credit when it does, or Lost if you will not get it back.
Which plan includes what
Automobile comes in Basic, Advanced and Enterprise plans. A screen your plan does not include shows a message with how to upgrade.
- Basic: Parts Finder, Vehicles (papers and service book), Job Cards, Service Reminders, Labour Codes and Core Charges.
- Advanced: everything in Basic, plus Appointments and bays, Mechanics (time and commission) and Service Packages.
- Enterprise: everything in Advanced, plus Insurance Claims and more than one branch.
On the phone
The BazaarPOS phone app has Parts Finder, Vehicles (papers and service book), Job Cards, Service Reminders, Appointments, Mechanics, Insurance Claims and Service Packages in the Apps screen for an Automobile licence. They use the same data and work without a connection. Estimates, approval and delivery are done at the desk; the phone is for the counter lookup, booking and checking in a visit, opening a job, adding a line or a package, recording an inspection finding, starting a mechanic's timer, entering claim details, recording an insurer's payment and moving the work on.
Language
The screens follow the language you pick at the top of the app. Hindi is available now.