Optical Shop Setup
Run an optical shop in BazaarPOS: write the eye test once, order the glasses from it, follow the lab, take an advance, bill and hand over, then bring the customer back for the next test.
How it fits together
You keep your normal Items, Customers, billing, advances, repairs and warranty. Nothing is entered twice. A frame is an ordinary item: its colours and sizes are the item's variants. The Optical section adds what an optician needs on top:
- Eye Prescriptions: the powers of both eyes, contact lens details and the next test date, with a history for each person.
- Glasses Orders: a frame and a lens from a prescription, with the lab, an advance, the bill and a tracking link for the customer.
- Lens Price List: each lens with its price and the extra charge for high powers.
- Eye Test Visits, Reminders, Frame Finder and Insurance Claims.
Amounts, dates and tax follow your shop's country and tax settings. The same screens work in any country.
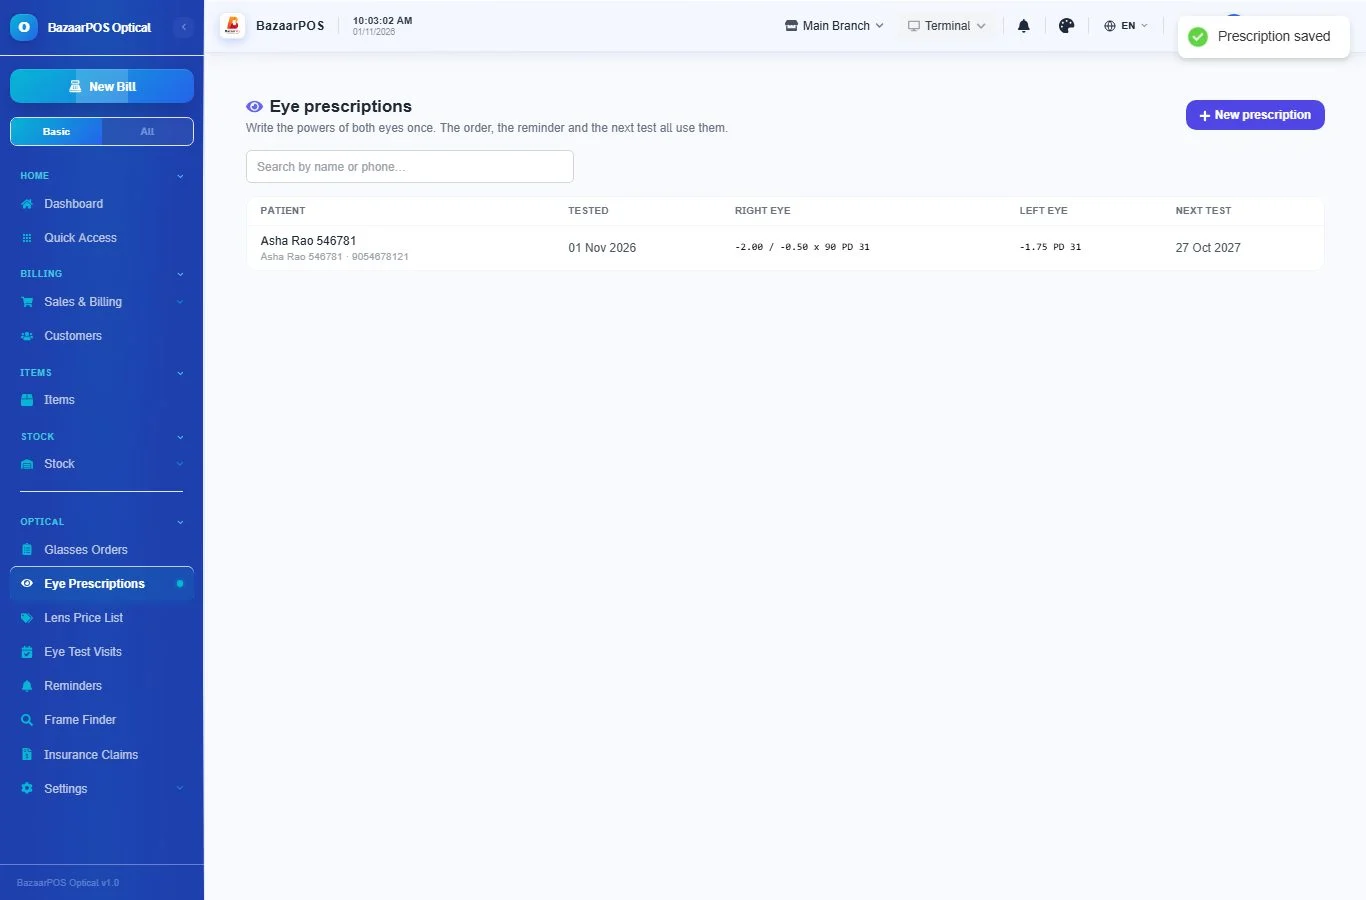
Step 1: Add your frames as items
Open Items and add each frame model as an item. Use the item's variants for the colours and sizes, and its barcode and stock like any other item. When you open a saved frame, a Frame details card appears with the material, shape, who it is for, the type and the size (lens width, bridge, temple). These help you find the frame later.
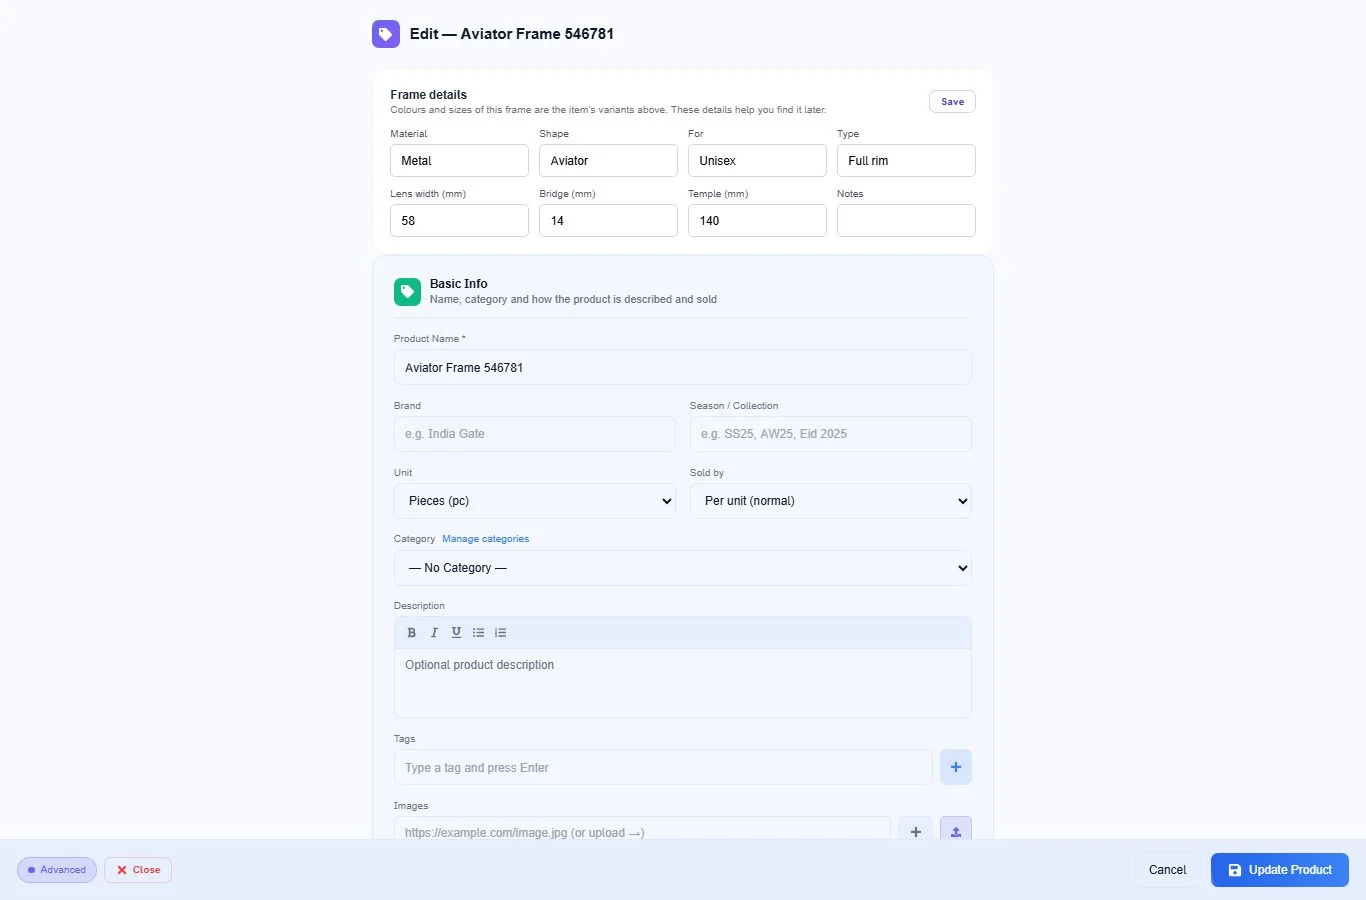
Step 2: Fill the lens price list
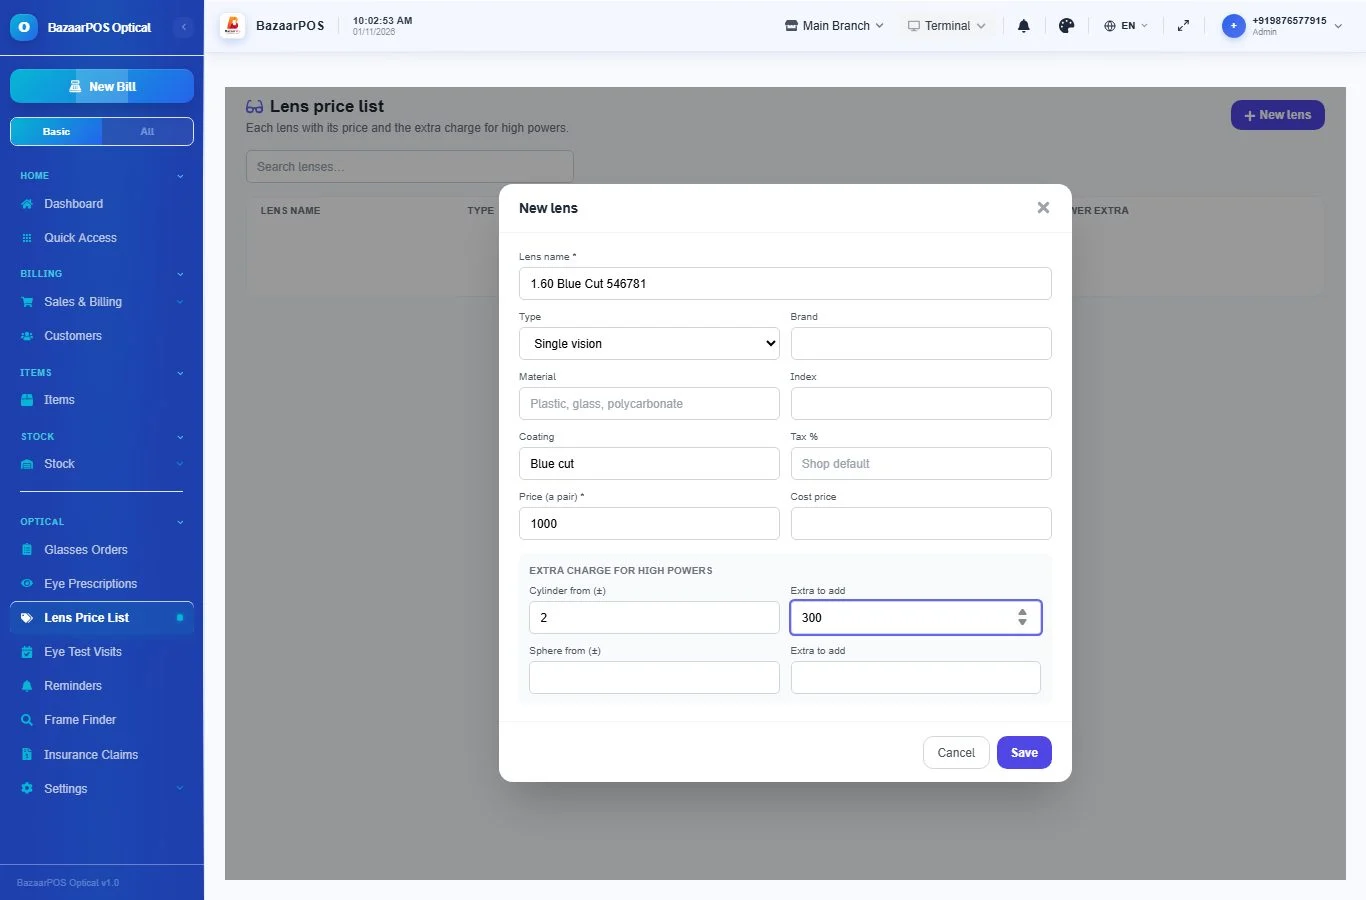
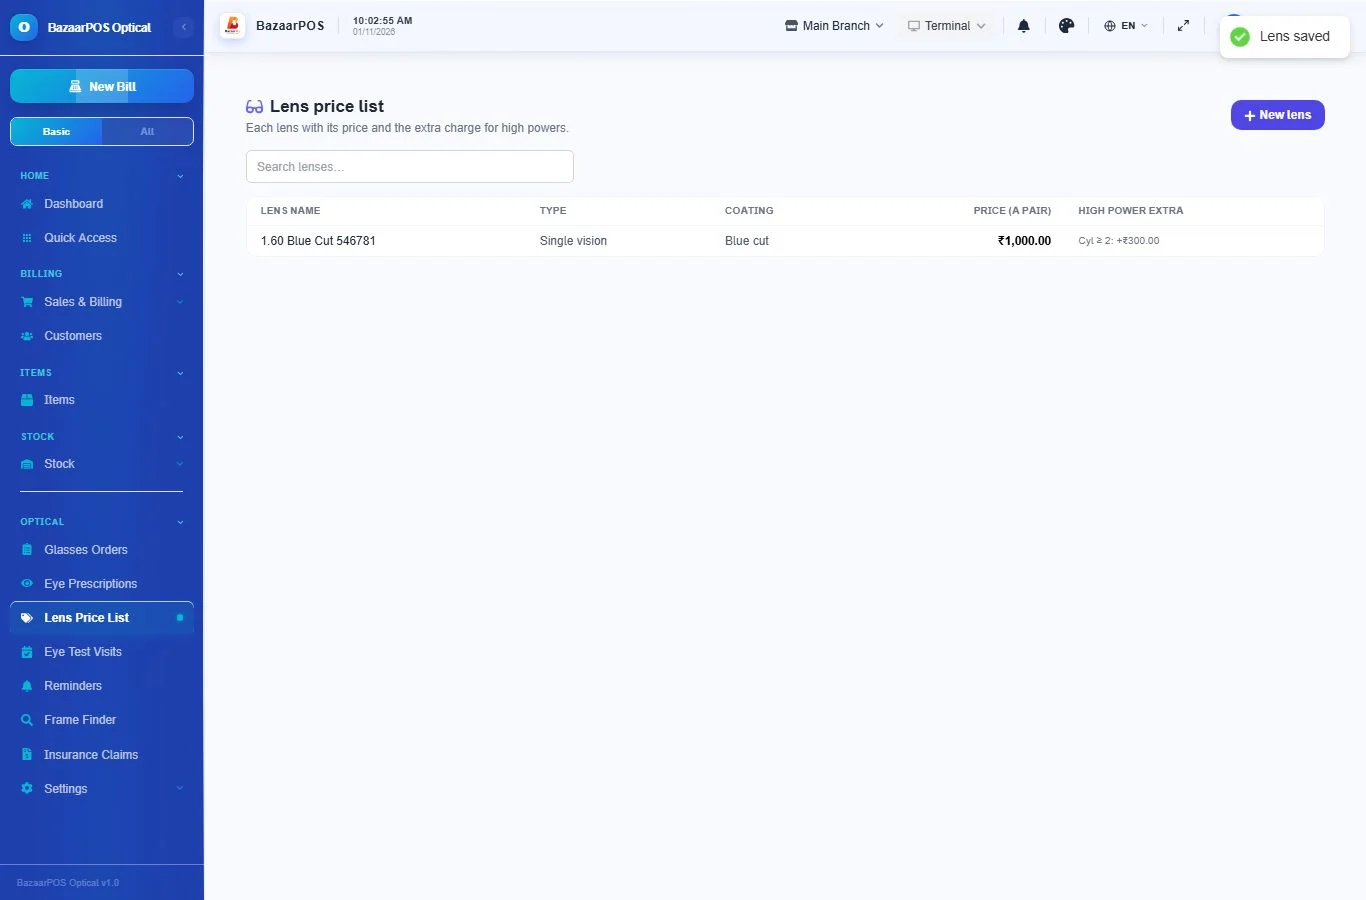
Open Optical → Lens Price List and press New lens. Write the lens name, its type (single vision, bifocal, progressive or office), material, index, coating, price for a pair and tax. Leave the tax empty to use your shop's default tax.
Some lenses cost more at high powers. Write the Cylinder from and Sphere from values with the extra to add. When a lens is chosen for an order, the extra is added by itself if the prescription is at or above that power.
Step 3: Write the eye test
Open Optical → Eye Prescriptions and press New prescription. Choose the customer. If the glasses are for a family member, write their name in Whose eyes: they stay on the same customer. Choose Spectacles or Contact lenses, then write the sphere, cylinder, axis, addition and PD for the right and the left eye, and the visual acuity if you note it.
- A cylinder needs an axis (0 to 180). The screen tells you if it is missing.
- For contact lenses write the brand, base curve, diameter, how often they are replaced and the pack size. If you give the first pack to the customer now, write First pack lasts (days): the refill reminder starts from today.
- Next test in sets the date for the reminder (12 months to start with).
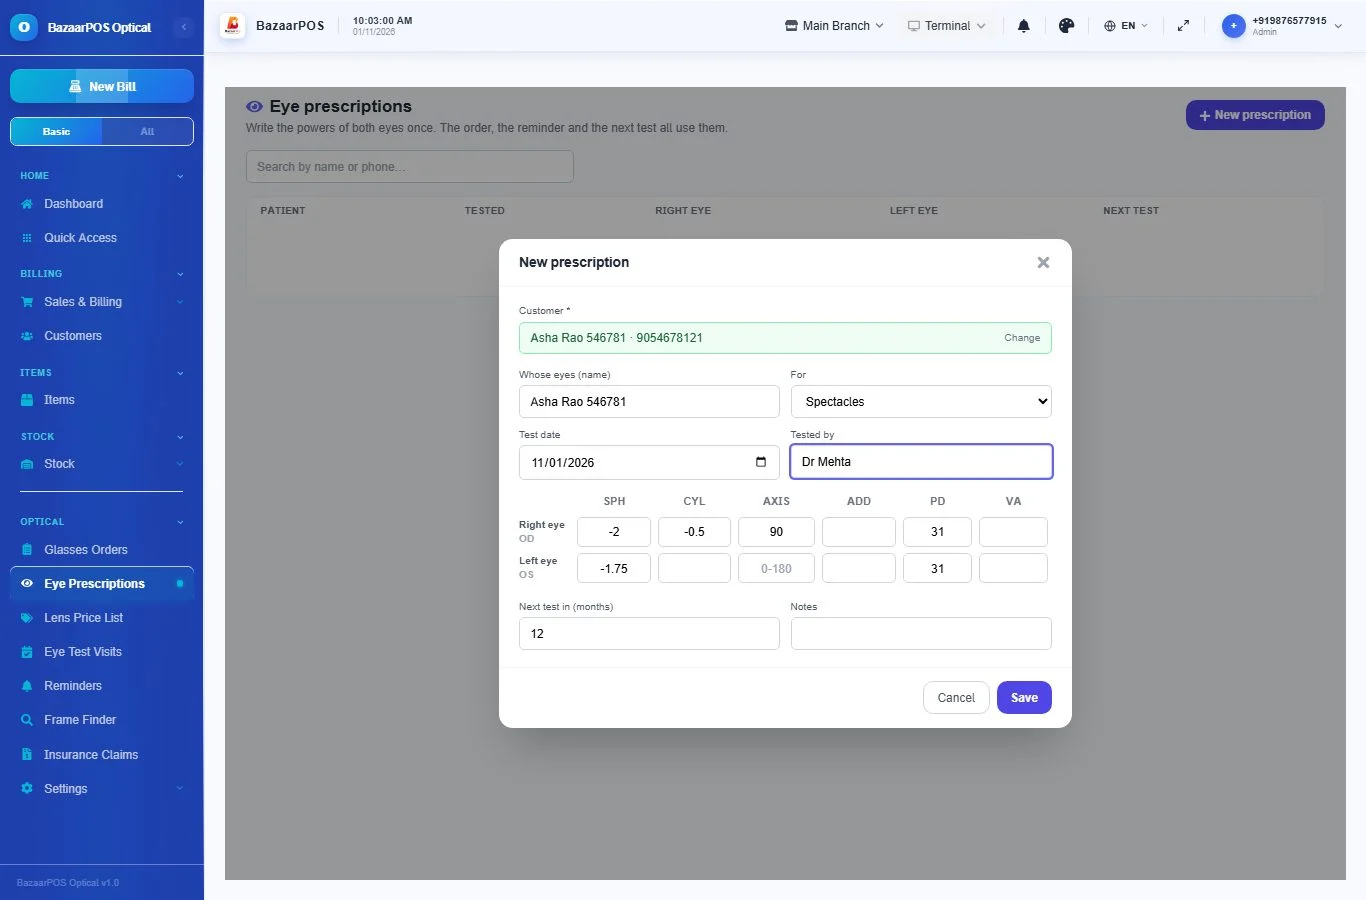
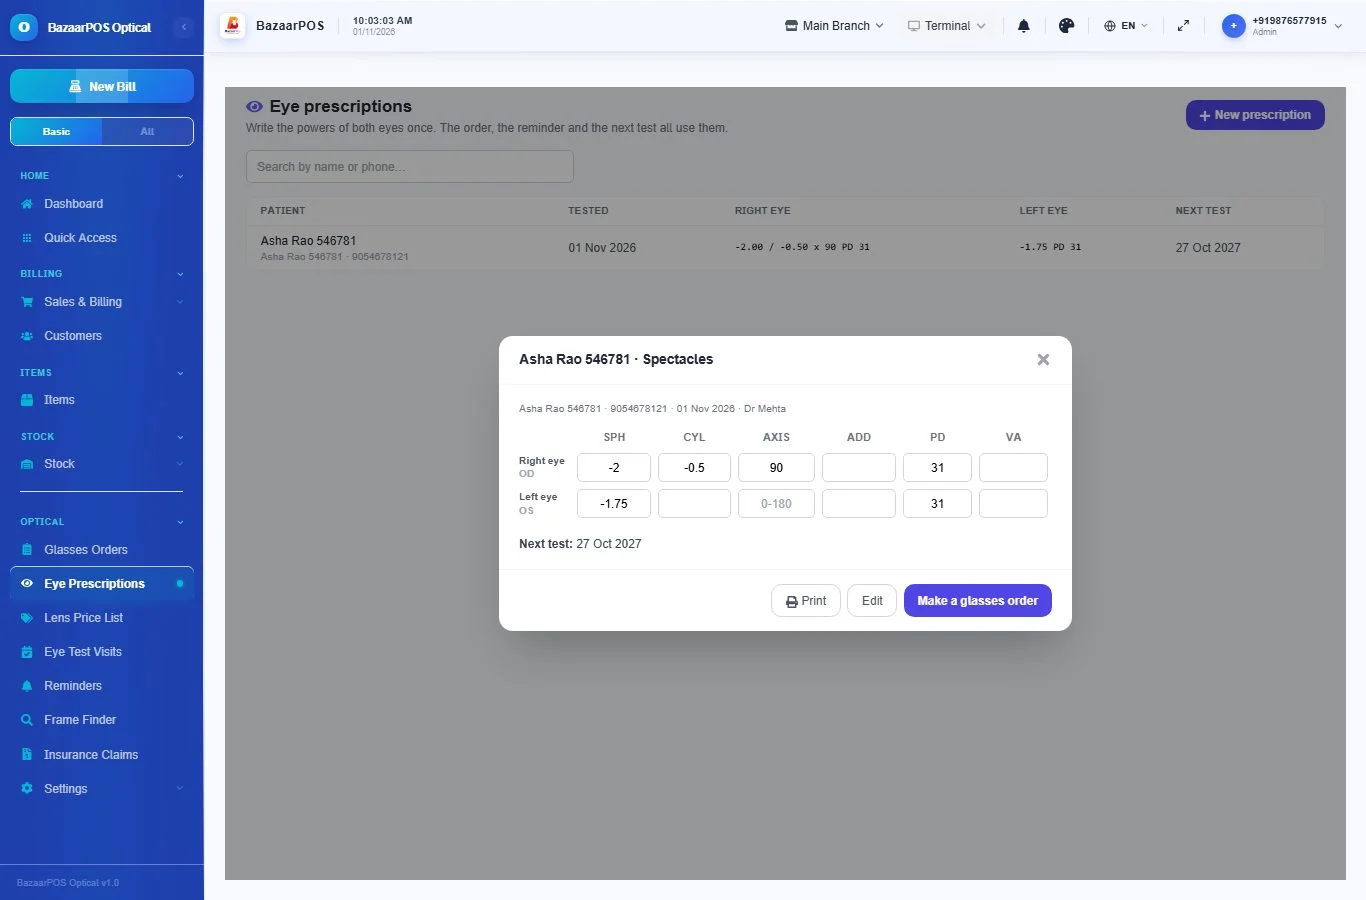
Press a prescription to see it with the earlier tests of the same person, so a change in power is easy to see. Print gives a clean prescription card. For contact lenses, press Save next to Supplied today for ... days when you hand over a pack: the refill reminder counts from that day.
Step 4: Book the glasses
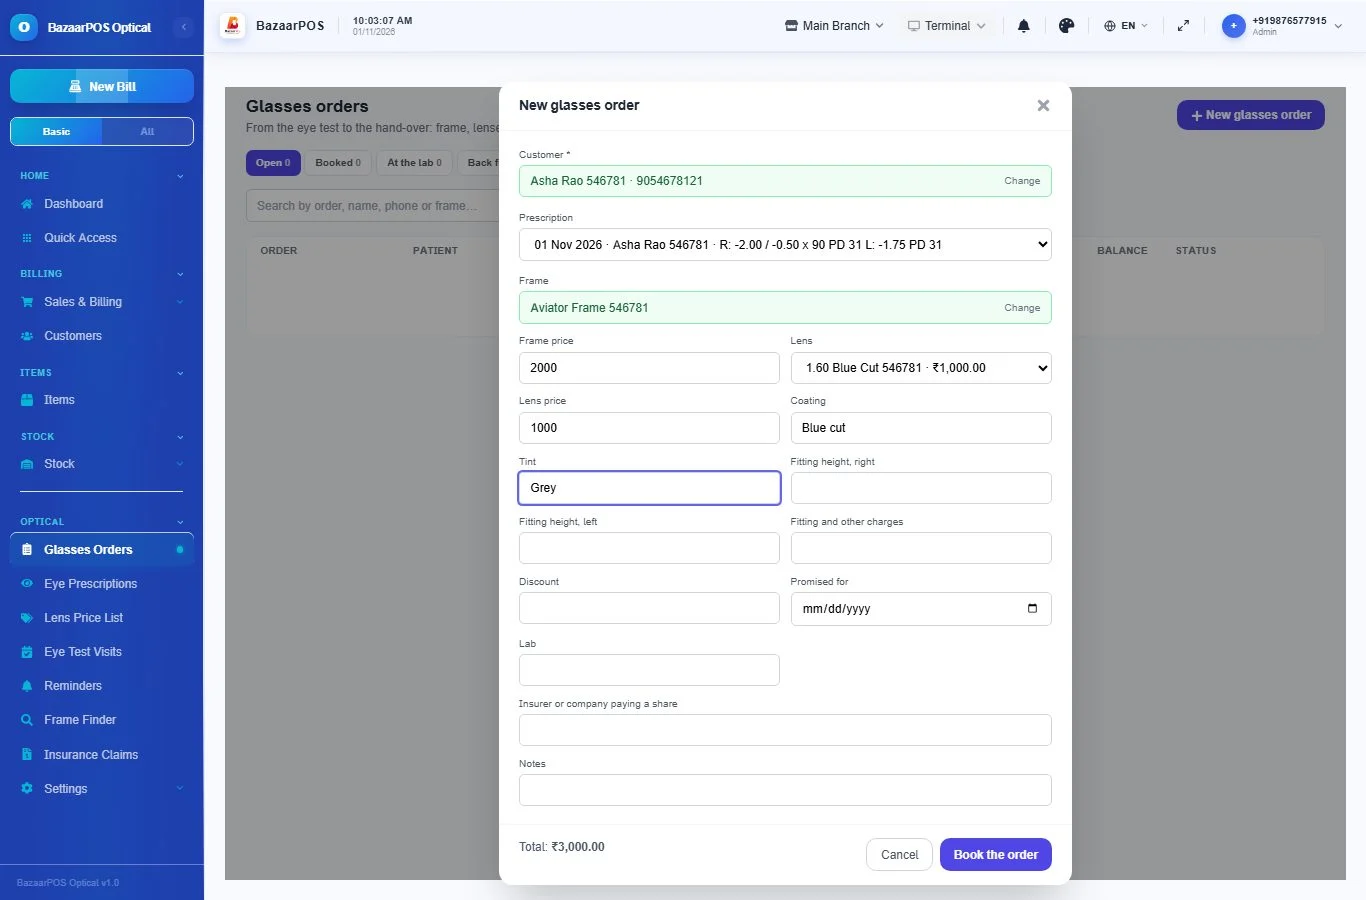
From a prescription press Make a glasses order, or open Optical → Glasses Orders and press New glasses order. Choose the customer and the prescription, search the frame in your items, and choose the lens. The price comes from the lens list, with the high power extra if it applies. Write the coating, tint, fitting heights, the promised date and the lab if you know it. A customer's own frame can be used too.
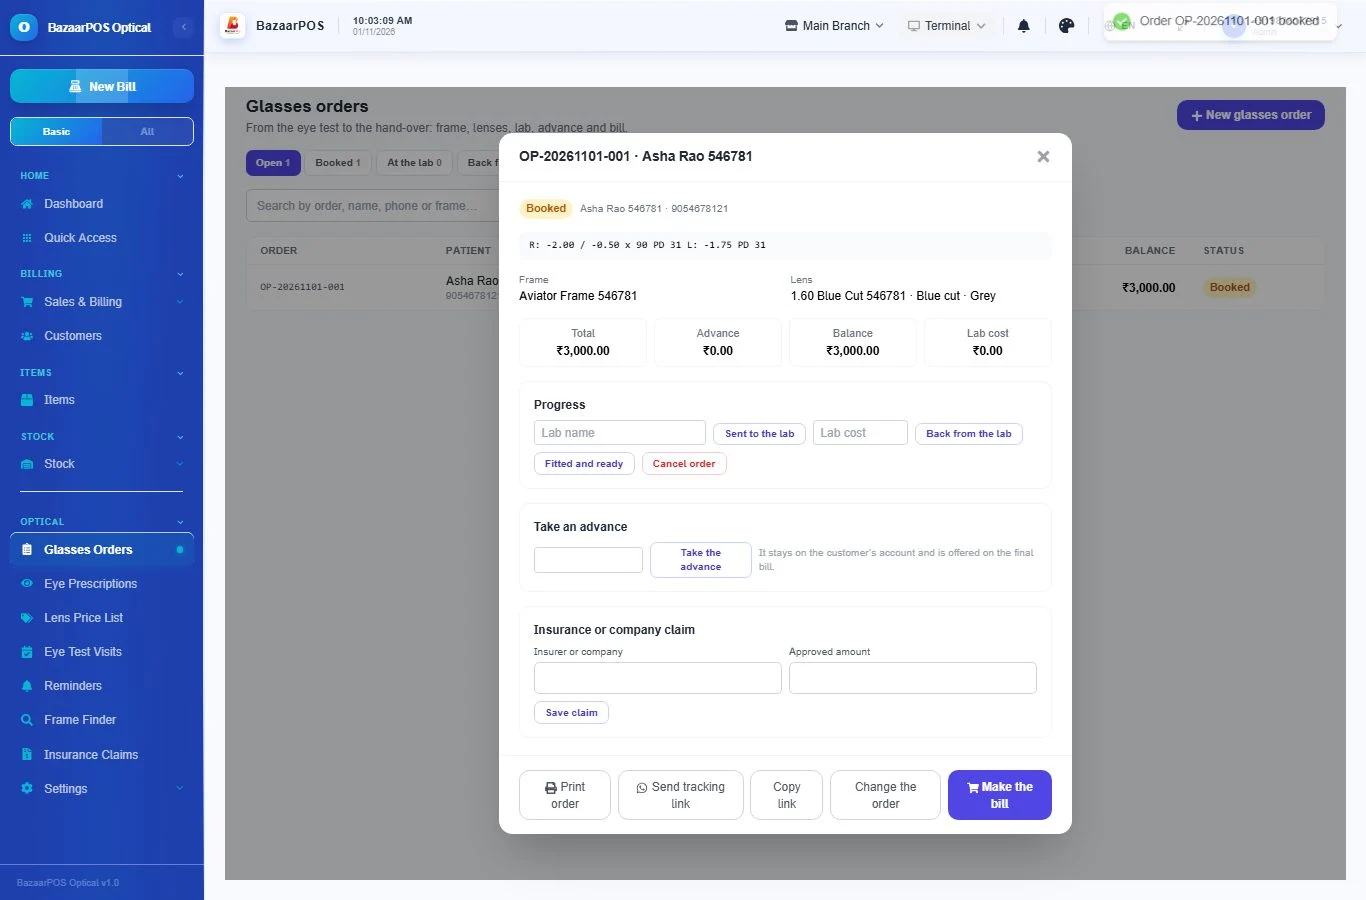
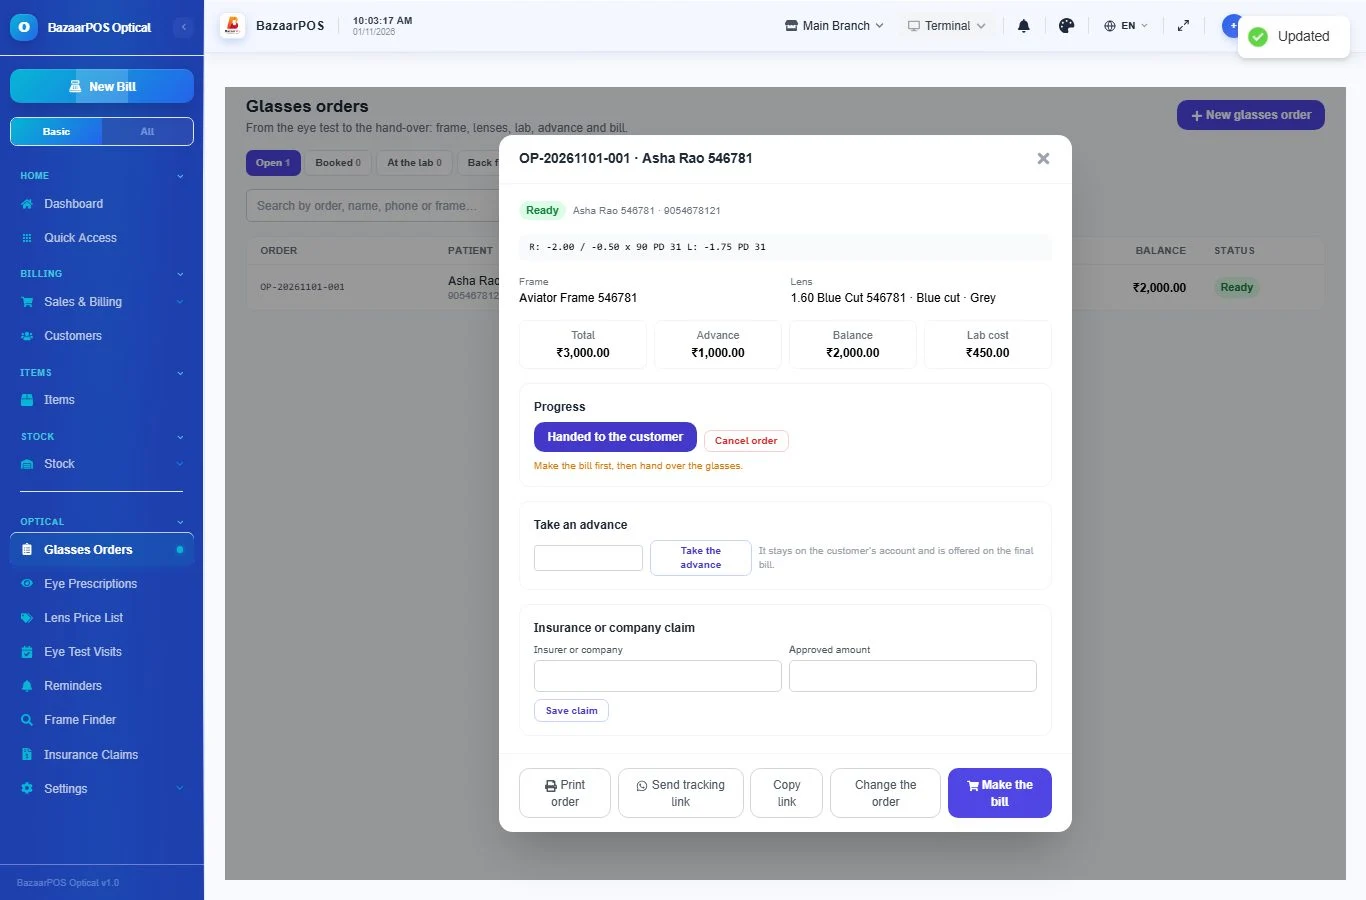
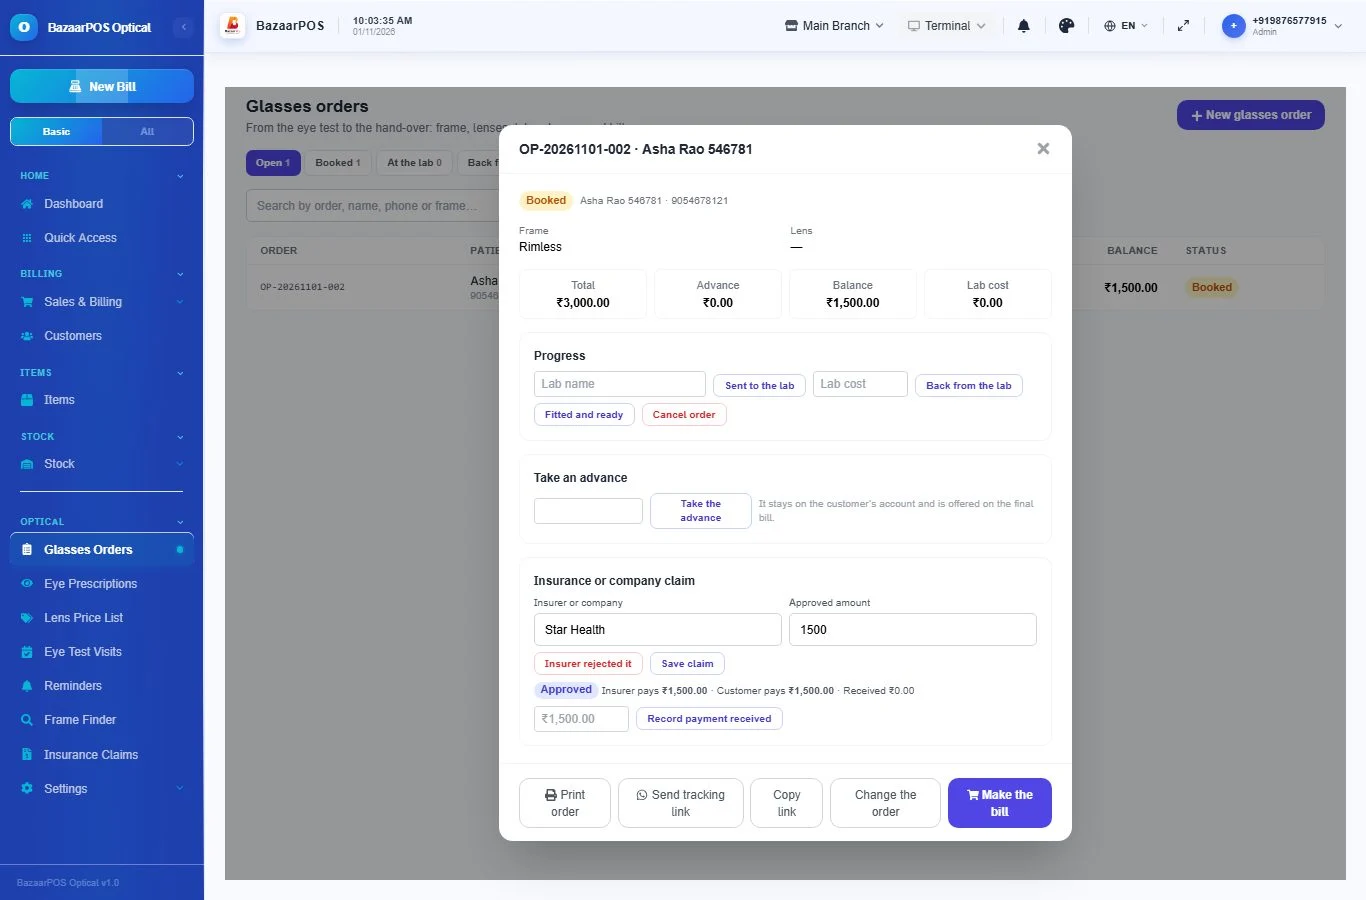
Each order gets a number such as OP-20261101-001. Open an order to see the prescription, the frame and the lens, and the total, the advance, the balance and the lab cost. Press Change the order to change the frame, lens, finishing, charges, discount, promised date or lab until the order is billed.
Step 5: Take an advance
In the order, write the amount under Take an advance. It is kept on the customer's account like any other advance and is offered again on the final bill, so it is never counted twice. An advance cannot be more than the order total.
Step 6: Follow the lab
In the order, write the lab's name and press Sent to the lab. When the lenses come back, write the lab's charge if you want to track cost and press Back from the lab, then Quality checked if you check the glasses before handing over (you can skip this step), and Fitted and ready once the glasses are made up. Orders past their promised date show Late.
Step 7: Bill and hand over
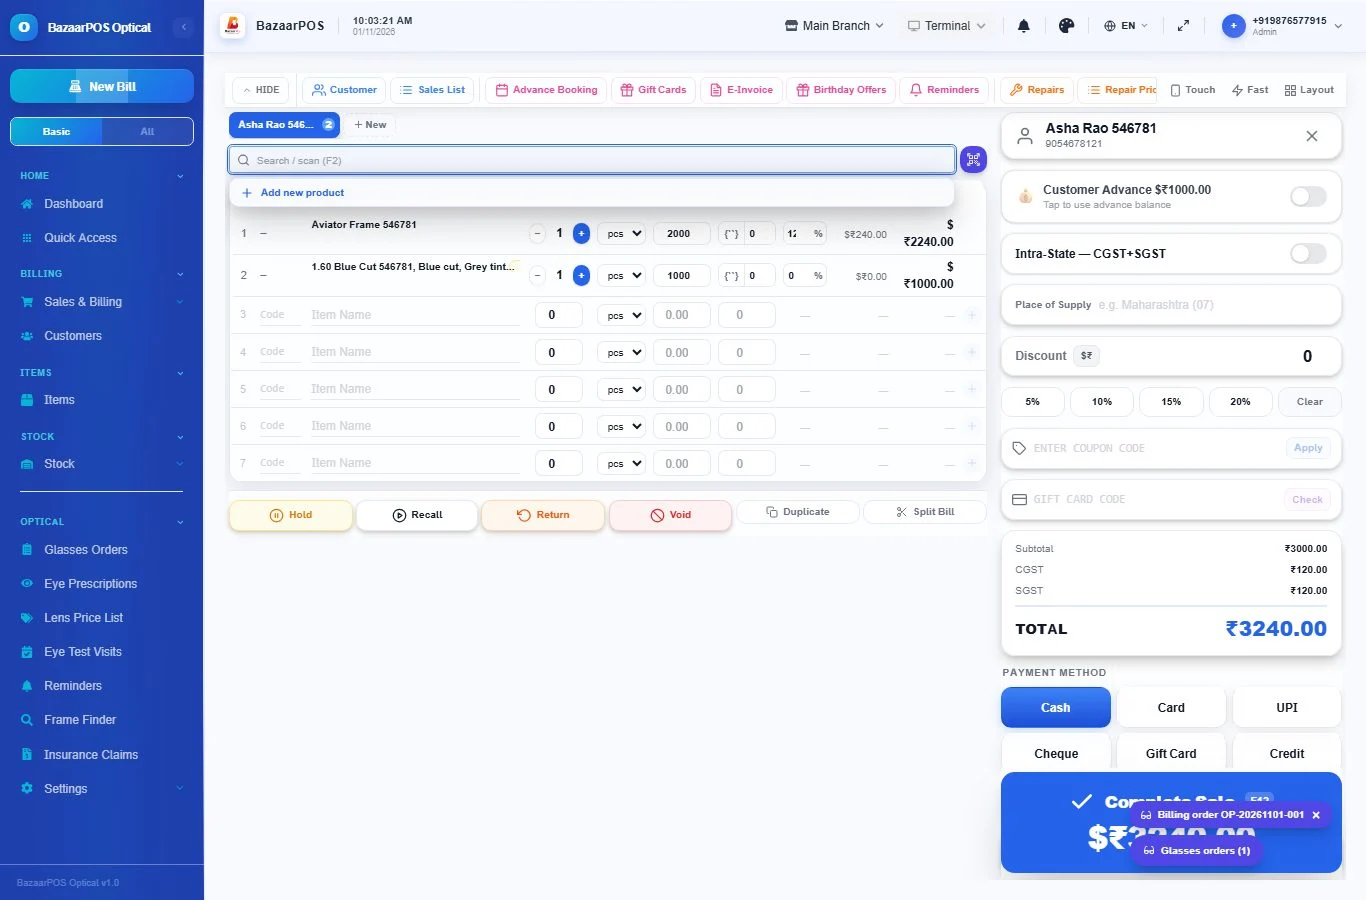
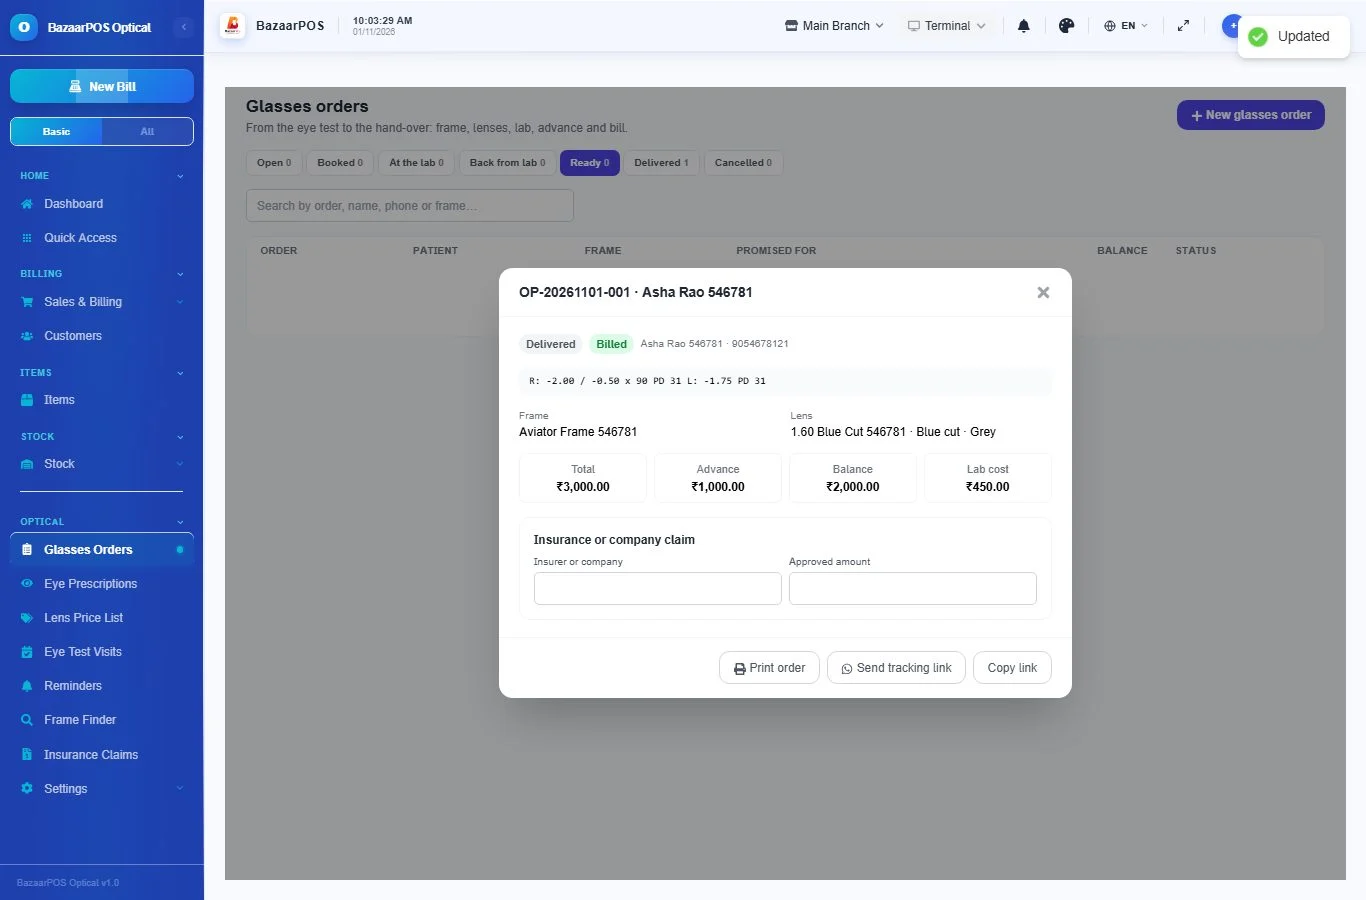
Press Make the bill on the order, or choose the customer in New Bill and press the Glasses orders button at the bottom right to add the order. The frame, the lens and the other charges come on the bill with the right tax. The advance is offered as a payment. When the bill is saved the order is marked billed. Then press Handed to the customer.
Step 8: Send the customer a tracking link
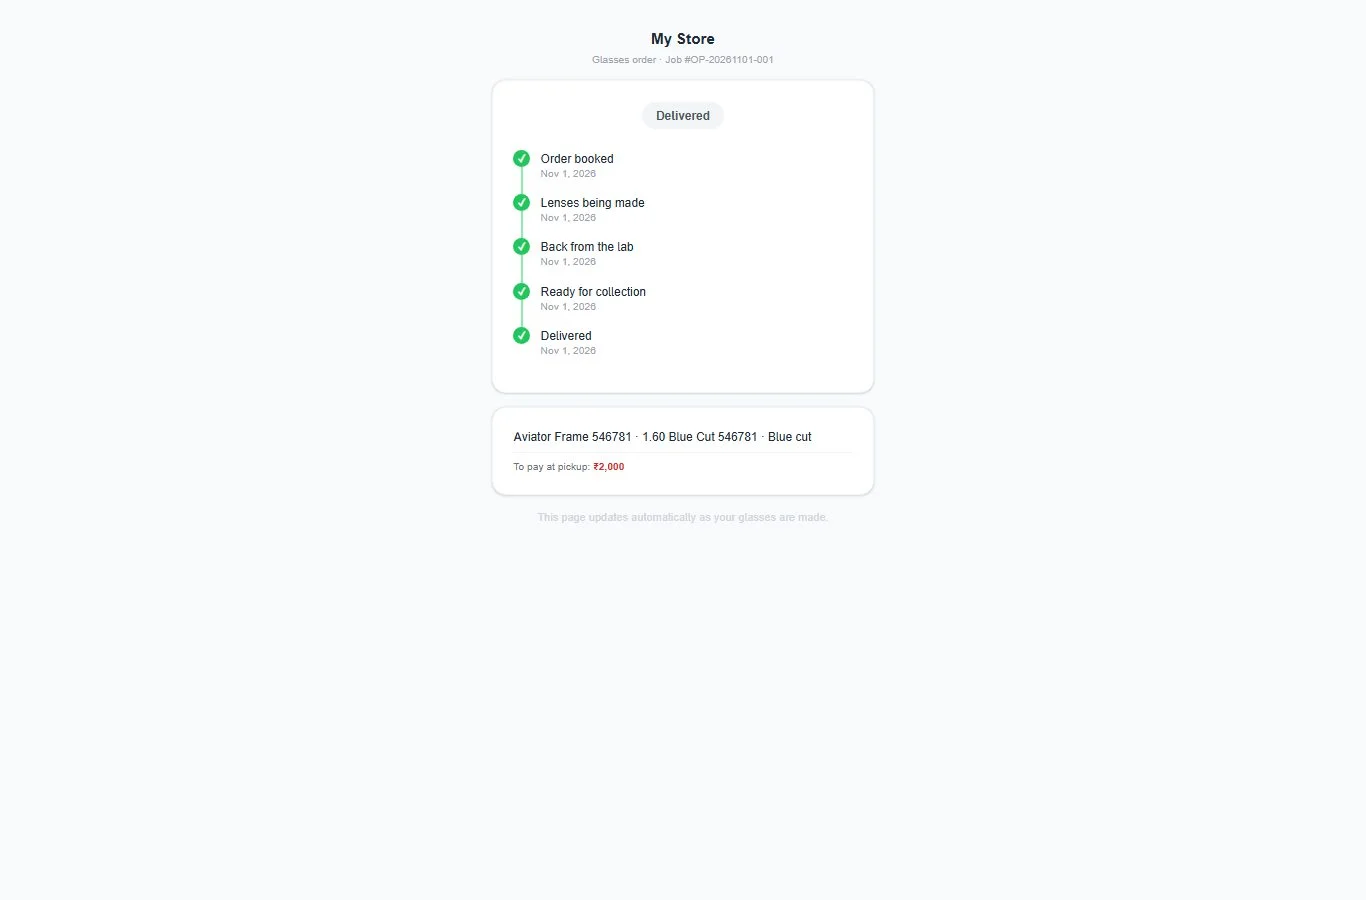
In the order press Send tracking link to send it on WhatsApp, or Copy link. The customer opens a page, with no login, that shows the steps: order booked, lenses being made, back from the lab, ready for collection and delivered. It shows the balance to pay at collection but not the prices of the items.
Step 9: Eye test visits
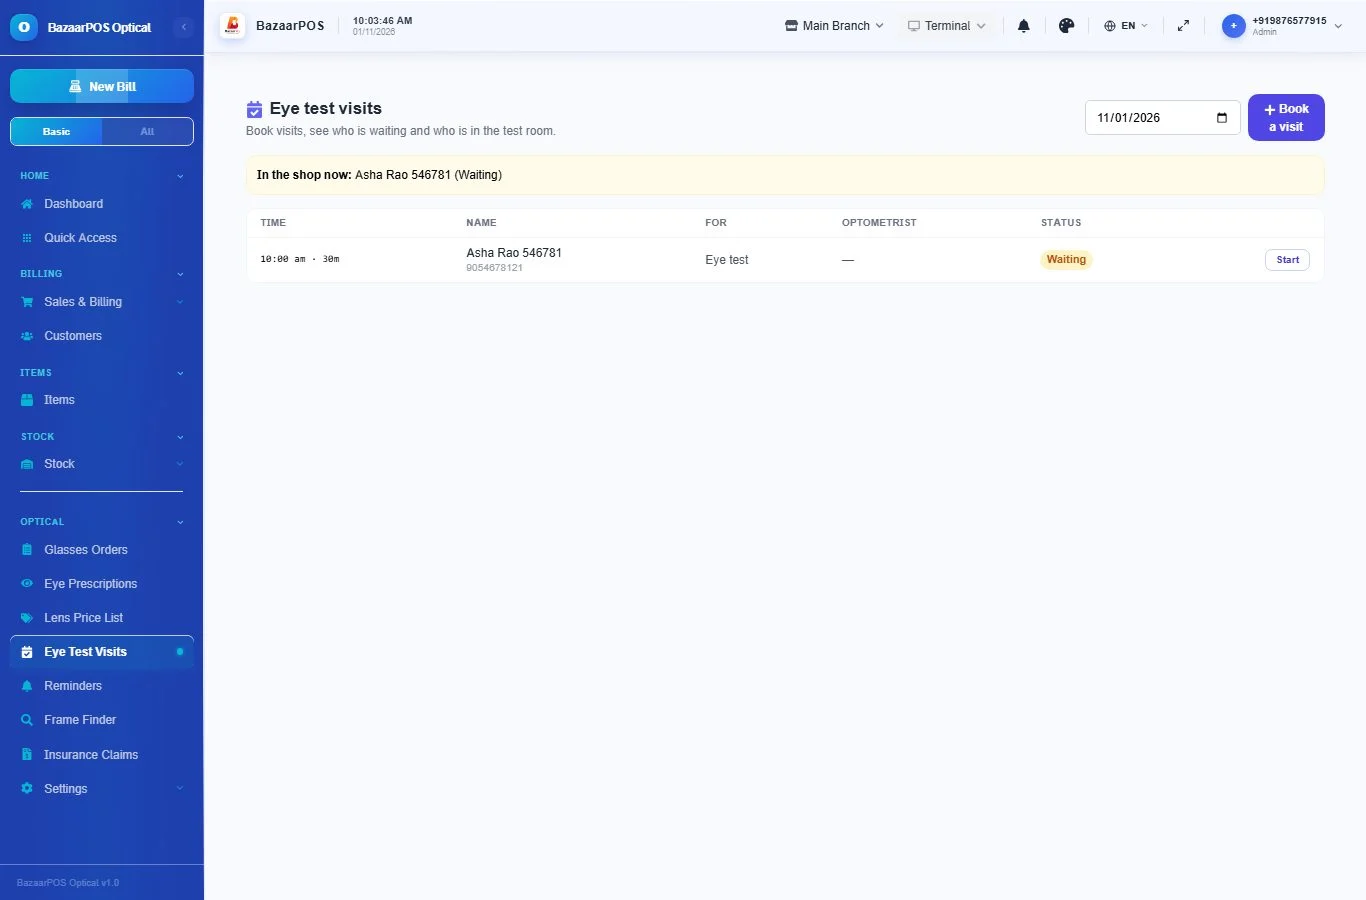
Open Optical → Eye Test Visits and press Book a visit: choose the customer or write a name and phone, the date and time, the length, what it is for and the optometrist. An optometrist cannot be booked twice at the same time. On the day press Arrived when the person comes in and Start when they go to the test room. The top of the page shows who is in the shop now.
Step 10: Reminders
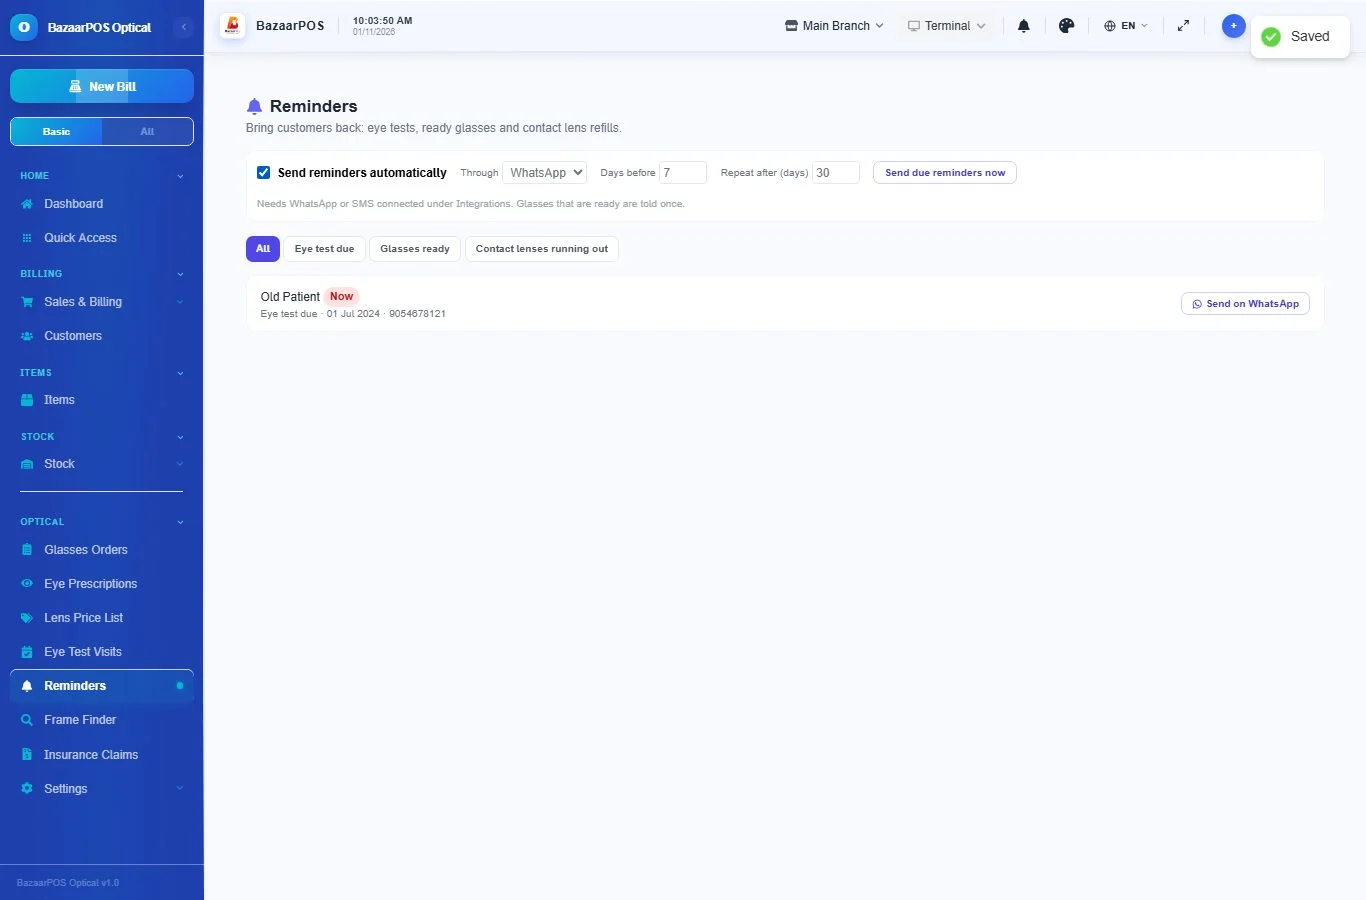
Open Optical → Reminders. It lists eye tests that are due (from each person's latest prescription), glasses that are ready to collect, and contact lenses that will run out within a week or so. Send on WhatsApp opens the chat with the message ready.
To have them sent for you, tick Send reminders automatically at the top of the page, choose WhatsApp or SMS (it uses the connection under Settings → Integrations), how many days before, and how long to wait before telling the same person again. Glasses that are ready are told once. Send due reminders now sends what is due straight away.
Step 11: Frame finder
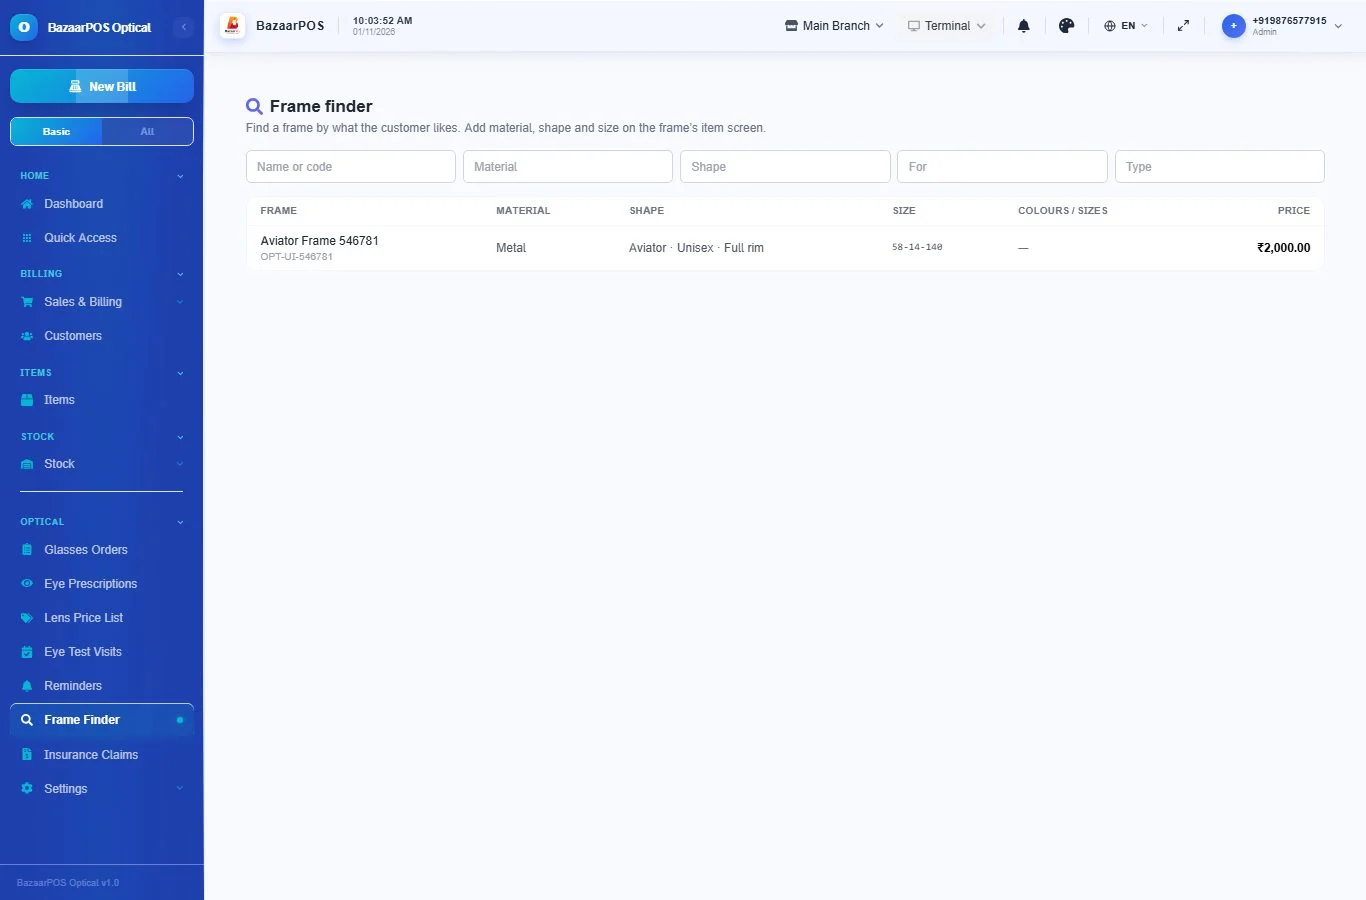
Open Optical → Frame Finder. Filter by material, shape, who it is for and type, or search the name or code. Each frame shows its size, its colours and sizes and its price.
Step 12: Insurance and company claims
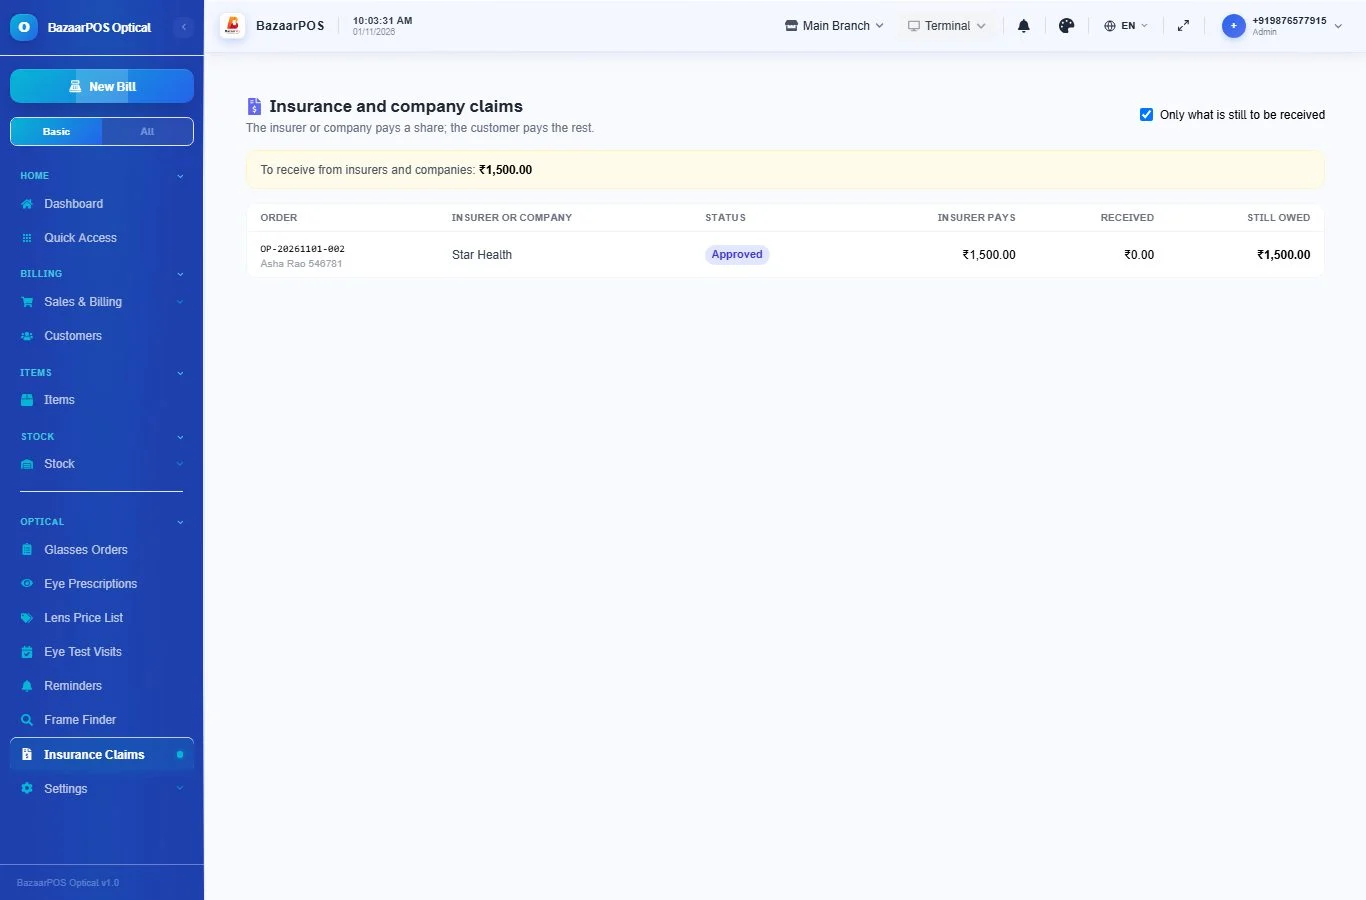
When an insurer or a company pays part of the glasses, write who it is in the order's Insurance or company claim box and the approved amount. The bill then asks the customer only for their share. When the insurer pays, press Record payment received. If the insurer refuses, press Insurer rejected it and the customer pays the whole bill. Optical → Insurance Claims shows what is still to be received.
Also useful for an optician
- Repairing or adjusting a frame, with a tracking link: see Repairs.
- Credit and reminders: see Customers and Khata reminders.
- Counting stock: see Stock count.
On the phone
The BazaarPOS phone app has an Optical group in the Apps screen with Glasses Orders (including changing an order and the insurance claim), Eye Prescriptions (with sharing a prescription), Eye Test Visits, Reminders, Frame Finder, Lens Price List and Insurance Claims. On the billing screen the customer's open glasses orders can be added to the bill, and the order is marked billed when the bill is saved. They work without internet and sync with the desktop. The tracking link and automatic reminders are set from the desktop app.
Which plan includes what
The Optical Shop comes in Basic, Advanced and Enterprise plans. A screen your plan does not include shows a message with how to upgrade.
- Basic: billing, items, customers, reports, Eye Prescriptions, Glasses Orders and the Lens Price List.
- Advanced: everything in Basic, plus Eye Test Visits, Reminders and the Frame Finder.
- Enterprise: everything in Advanced, plus Insurance and company claims, more than one branch and AI sales forecasting.