Clinic & OPD Setup
Run a clinic in BazaarPOS: a token queue for the waiting room, visits with vitals and a signed note, a printable prescription, and one bill for the fee, procedures and medicines.
How it fits together
You keep your normal Items, Customers, billing, purchase orders and special orders. Nothing is entered twice. A procedure and a medicine are normal items, the patient is a normal customer and the bill is a normal sale, so the tax of your country comes from the item. Added on top are the queue, the visit, the prescription and the follow-ups. It makes no promise of compliance with any medical-record rule.
- Waiting Room: the day’s tokens, check-in, calling a patient in, and the visit with vitals, prescription, procedures, signing and billing.
- Patients: name, phone, allergy and alert notes, the record of visits and files kept by link.
- Fees and Procedures: the clinic name, doctor and registration number for the prescription, the consultation fee, the free follow-up days and the procedures.
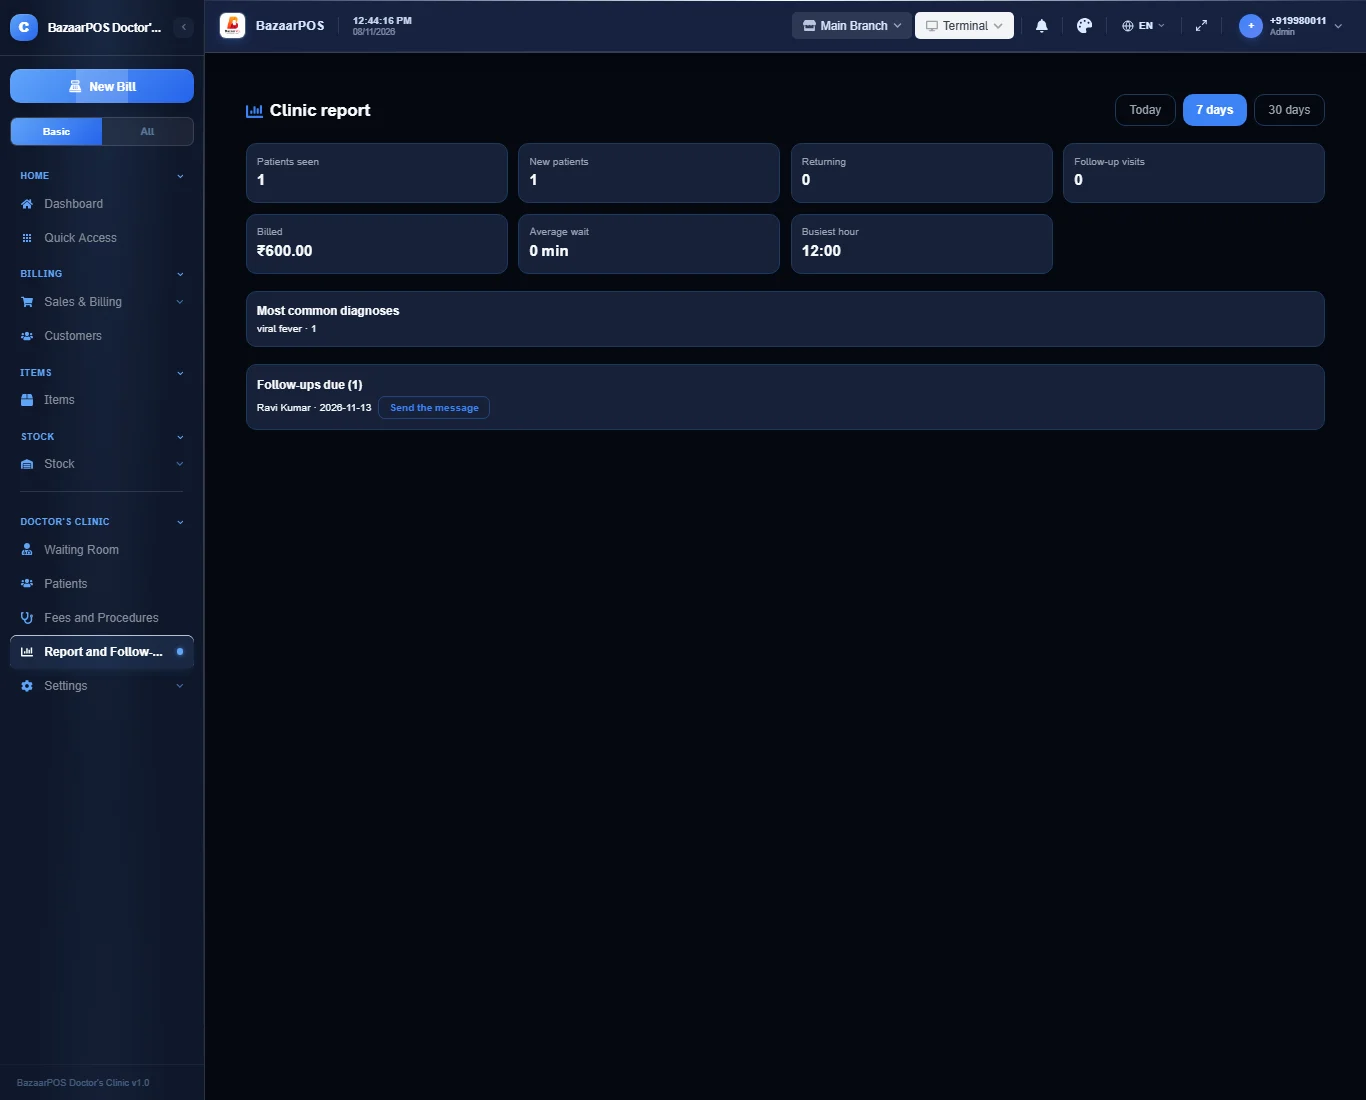
- Report and Follow-ups: patients seen, new and returning, billed, top diagnoses, busiest hour, average wait, and follow-ups due.
Step 1: Set the fee and the procedures
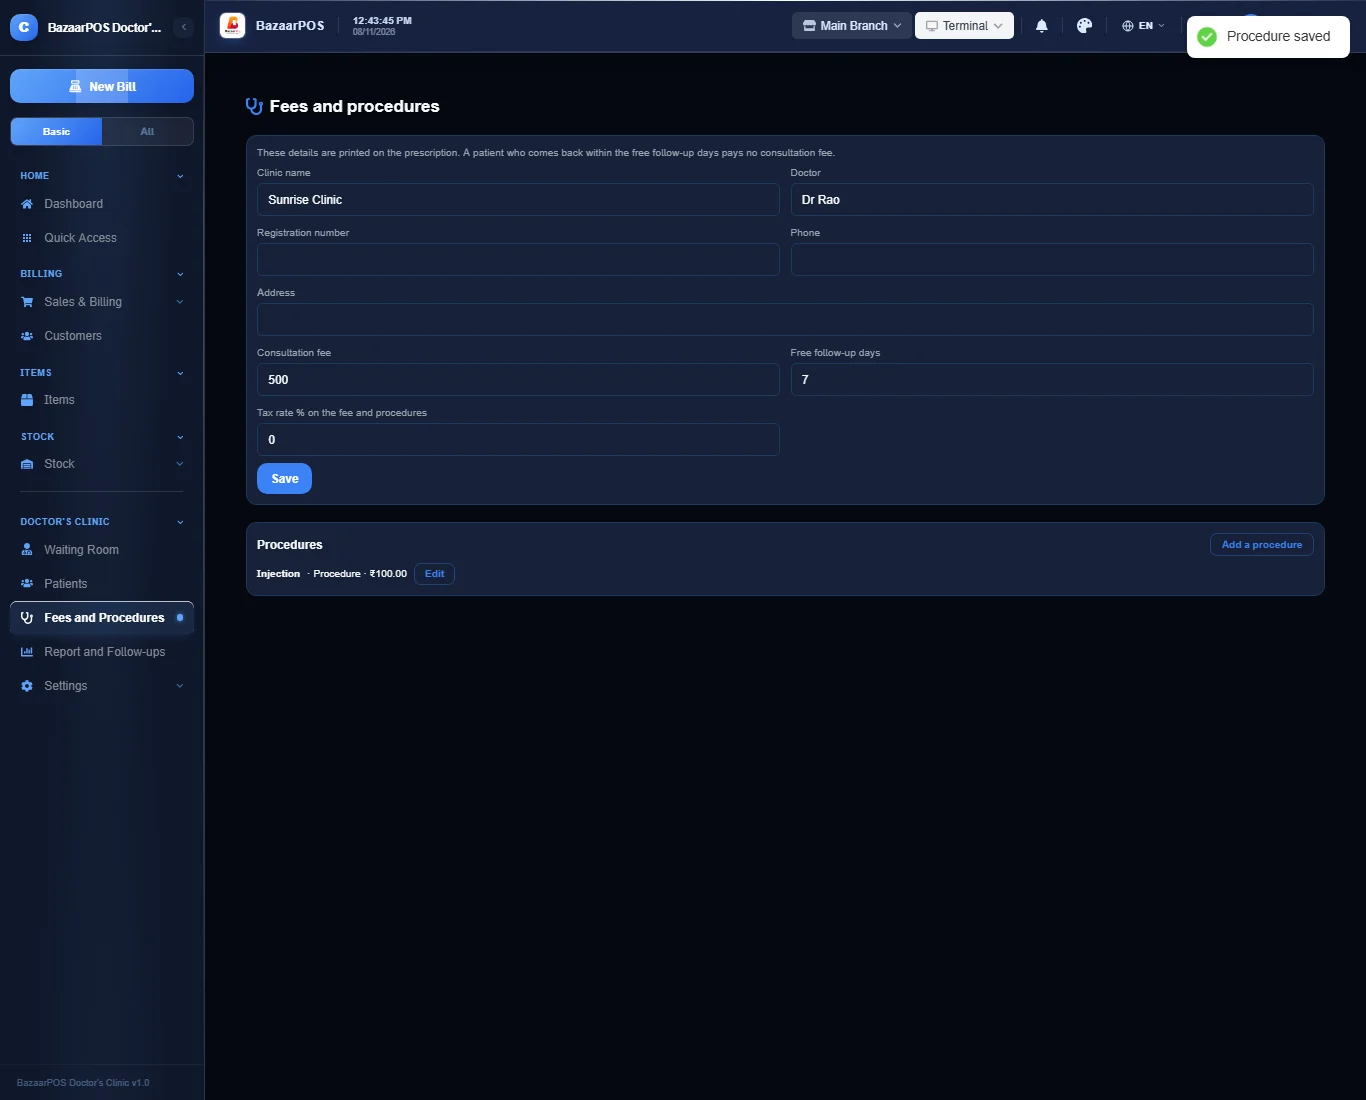
Open Fees and Procedures. Type the clinic name, the doctor, the registration number, the consultation fee and the number of free follow-up days, then press Save. Press Add a procedure for each injection, dressing or test with its price.
Step 2: Add patients
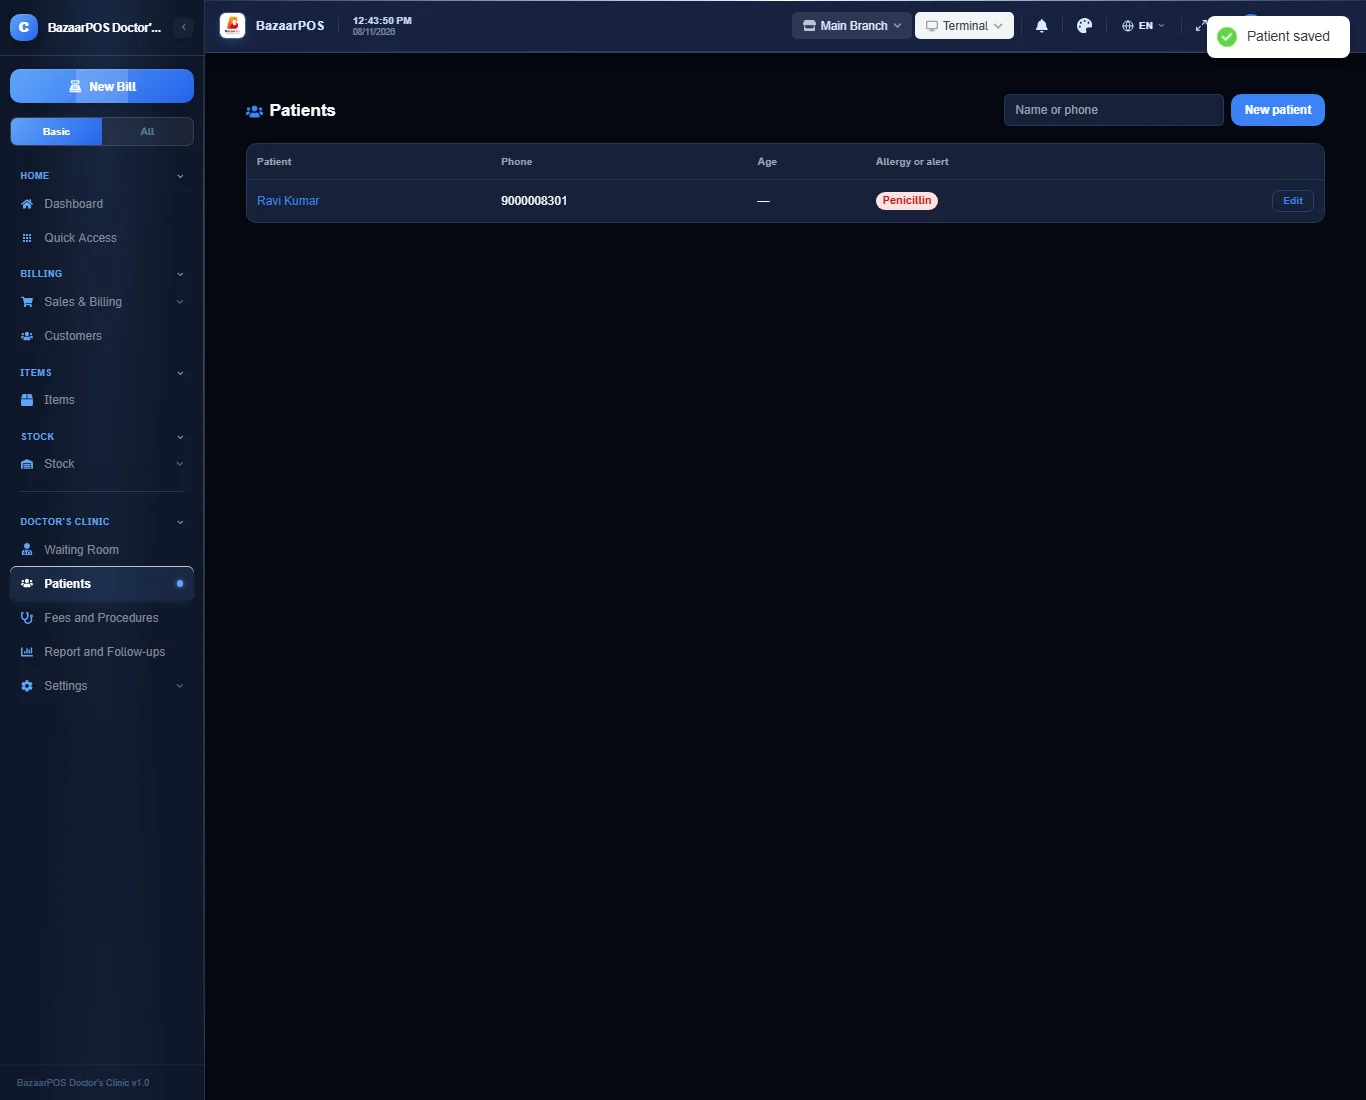
Open Patients and press New patient. A phone number makes the patient a customer so the visit can be billed. An allergy is shown at the top of every visit.
Step 3: Give tokens
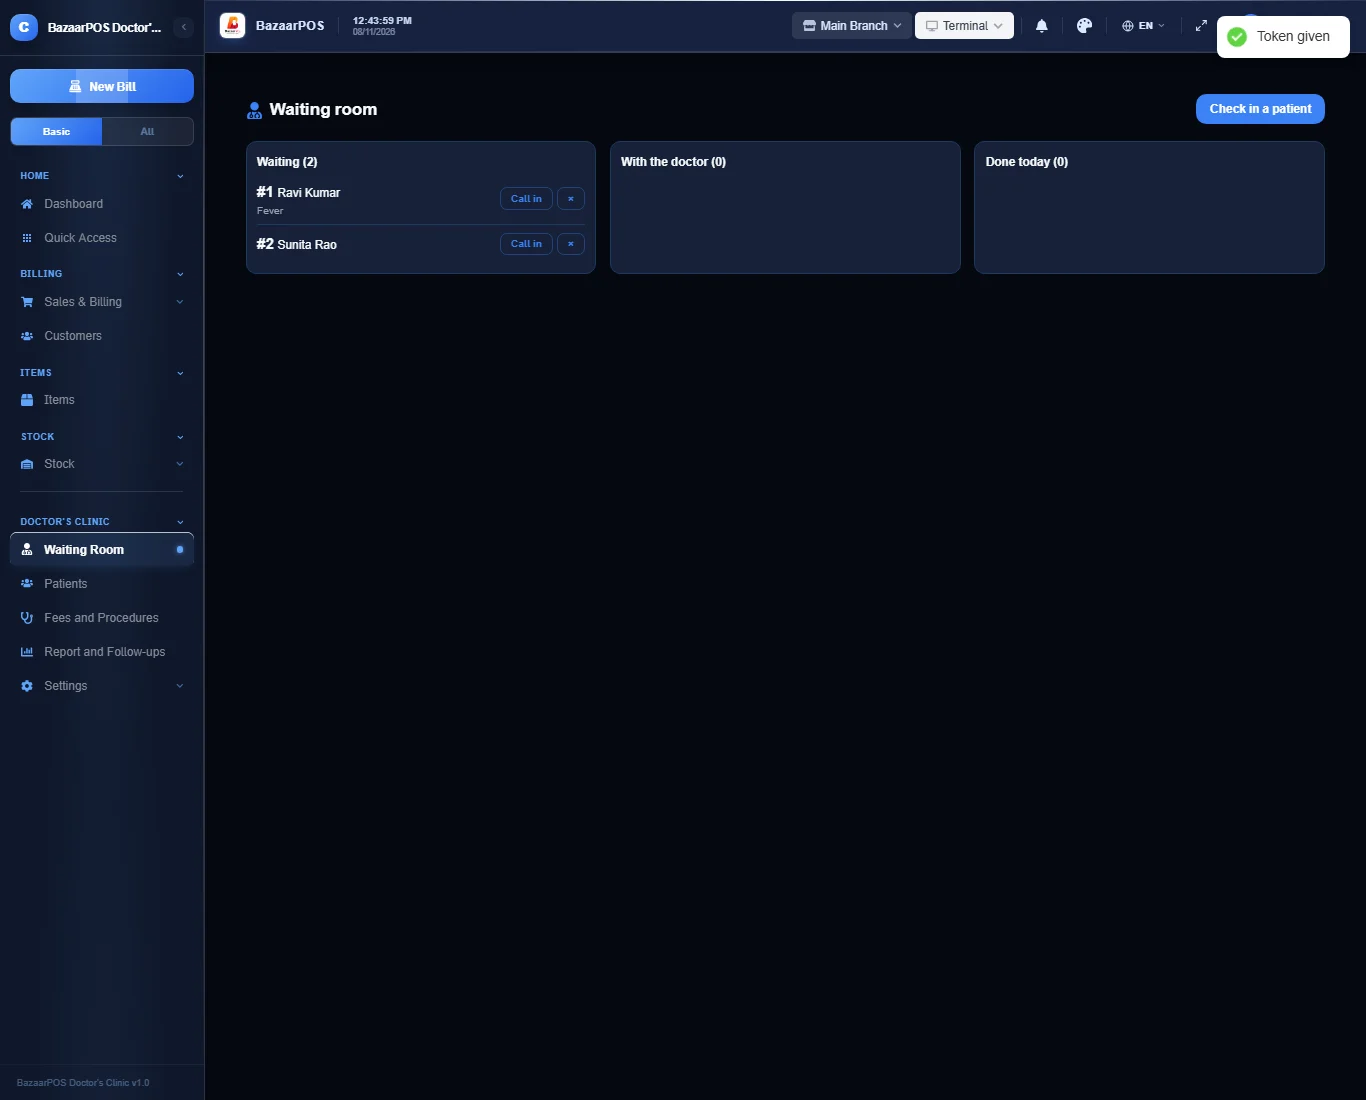
Open Waiting Room and press Check in a patient. Find the patient by name or phone, or type a new one. Each patient gets the next token of the day. A patient who returns within the free follow-up days is marked as a follow-up and the consultation fee is not charged.
Step 4: The visit
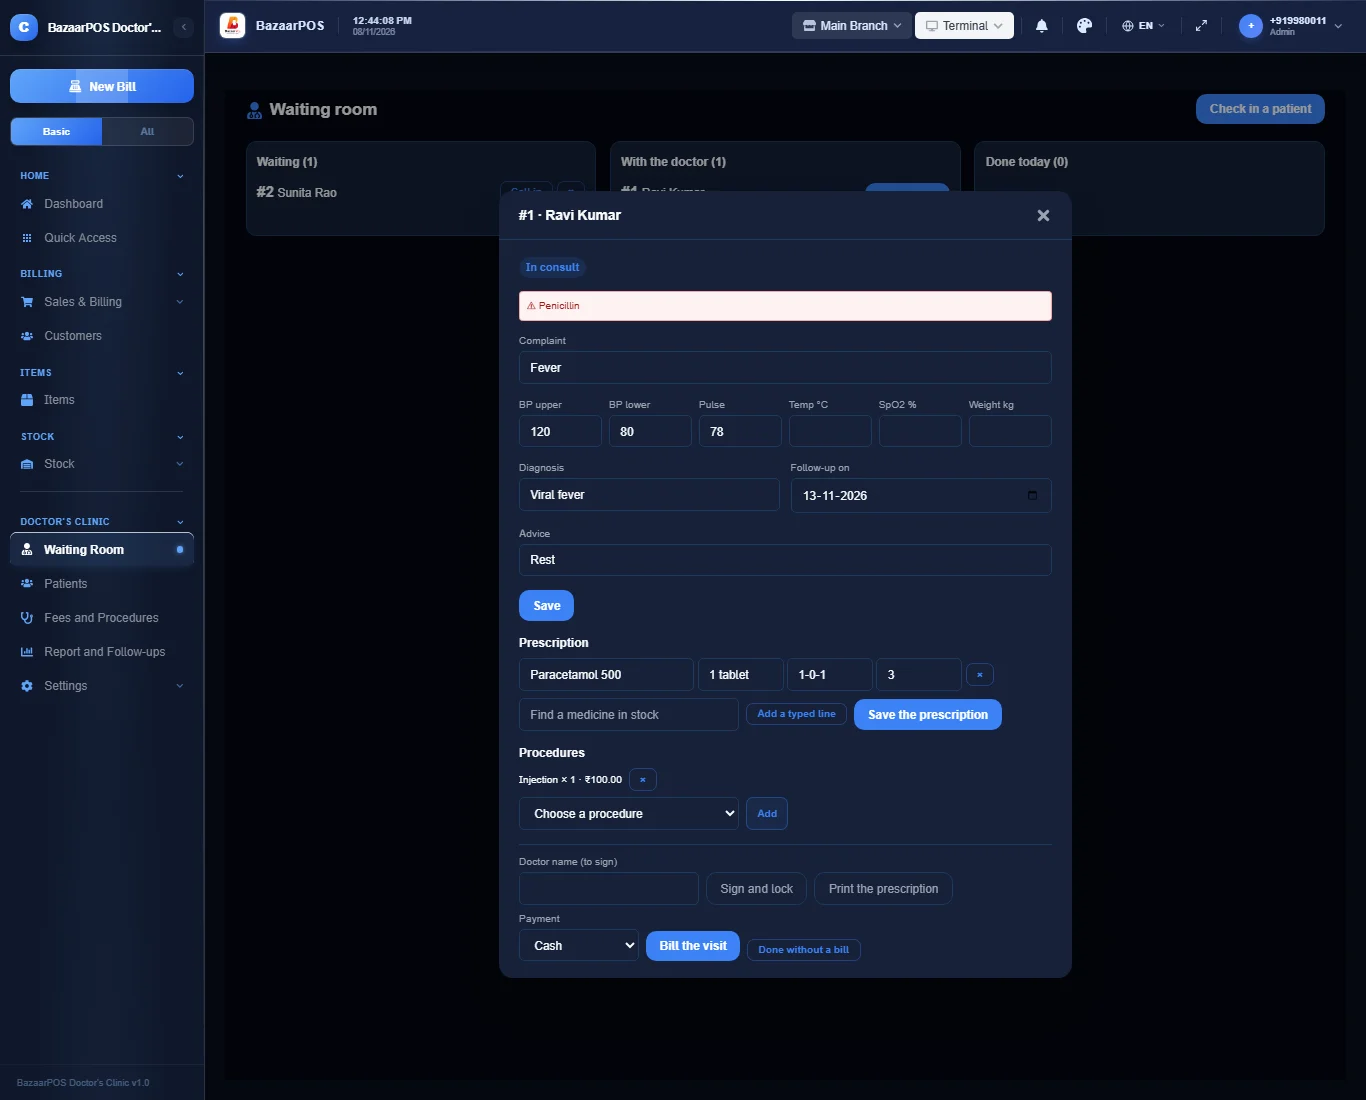
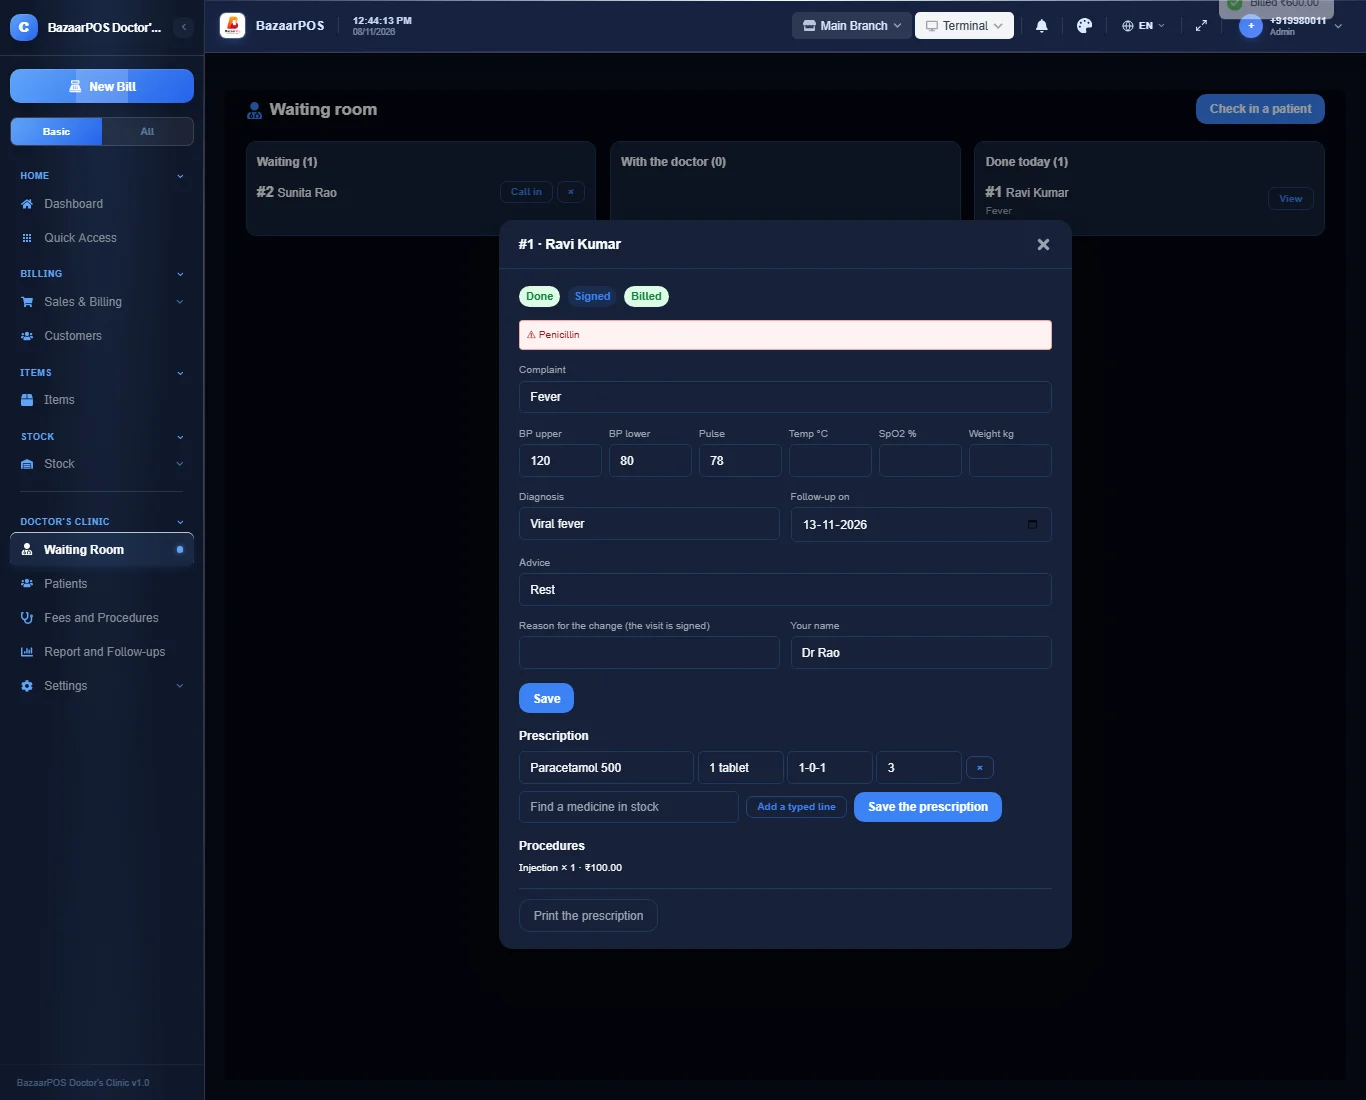
Press Call in, then Open visit. Type the vitals, diagnosis, advice and a follow-up date, add the prescription lines (a medicine you stock can be dispensed and billed) and the procedures. Press Sign and lock: a signed visit can only be corrected with a reason and your name, and the correction is kept in a log.
Step 5: Print and bill
Press Print the prescription for the page with the clinic name, the doctor and the registration number. Press Bill the visit: the fee, the procedures and the dispensed medicines go on one bill.
Step 6: The report
Open Report and Follow-ups for the numbers and the patients whose follow-up is due, each with a ready message.
On the phone
The phone app has Waiting Room, Follow-ups and Report.
Also useful here
- Barcode labels: see Barcodes.
- Counting stock: see Stock count.
- Importing items: see Import and export.
- Expiry dates and batches: see Expiry monitor.
Questions
Is this separate from items and billing?
No. A procedure and a medicine are items, the patient is a customer and the bill is a normal sale.
Is it a medical record that meets a legal standard?
No. It keeps the visit, vitals, diagnosis and prescription for your use. ABDM or ABHA registration, lab and imaging orders, video consultation and digital-certificate signing are not built.
How does the free follow-up work?
You set a number of days. A patient who returns within that many days of a paid consultation pays no consultation fee; procedures and medicines are still billed.
Is there a phone version?
Yes. The queue, check-in, calling in, vitals and diagnosis, typed medicines, procedures, signing, billing, follow-ups and the report are on the phone. Dispensing a stock medicine, printing and the fee settings are on the desk app.
Which plan includes what
Clinic & OPD comes in Basic, Advanced and Enterprise plans. A screen your plan does not include shows a message with how to upgrade.
- Basic: billing, items, customers, reports, patients, the queue, visits and the prescription.
- Advanced: everything in Basic, plus the report.
- Enterprise: everything in Advanced, plus more than one branch and AI sales forecasting.