Tailoring Setup
Run a tailoring shop in BazaarPOS: measurements by garment with history, orders of several garments with fabric from your items, stages with the tailor and piece rate, trial and delivery dates, alterations and billing with your country's tax.
How it fits together
You keep your normal Items, Customers, billing, purchase orders and special orders. Nothing is entered twice. Shop fabric is a normal item sold by the metre, so its metres come off stock when the order is billed. Stitching and alterations are service items with the tax you set, the customer is a normal customer, and a handed-back order is billed as a normal sale. Added on top are the measurements, the orders with stages, the tailor and piece rate, the trial and delivery dates and the report.
- Measurements: by garment, each save a new version.
- Orders: garments, fabric, stages with the tailor, trial, ready, bill and hand back.
- Schedule and Report: trials and deliveries due, tailor pay and settings.
Step 1: Take the measurements
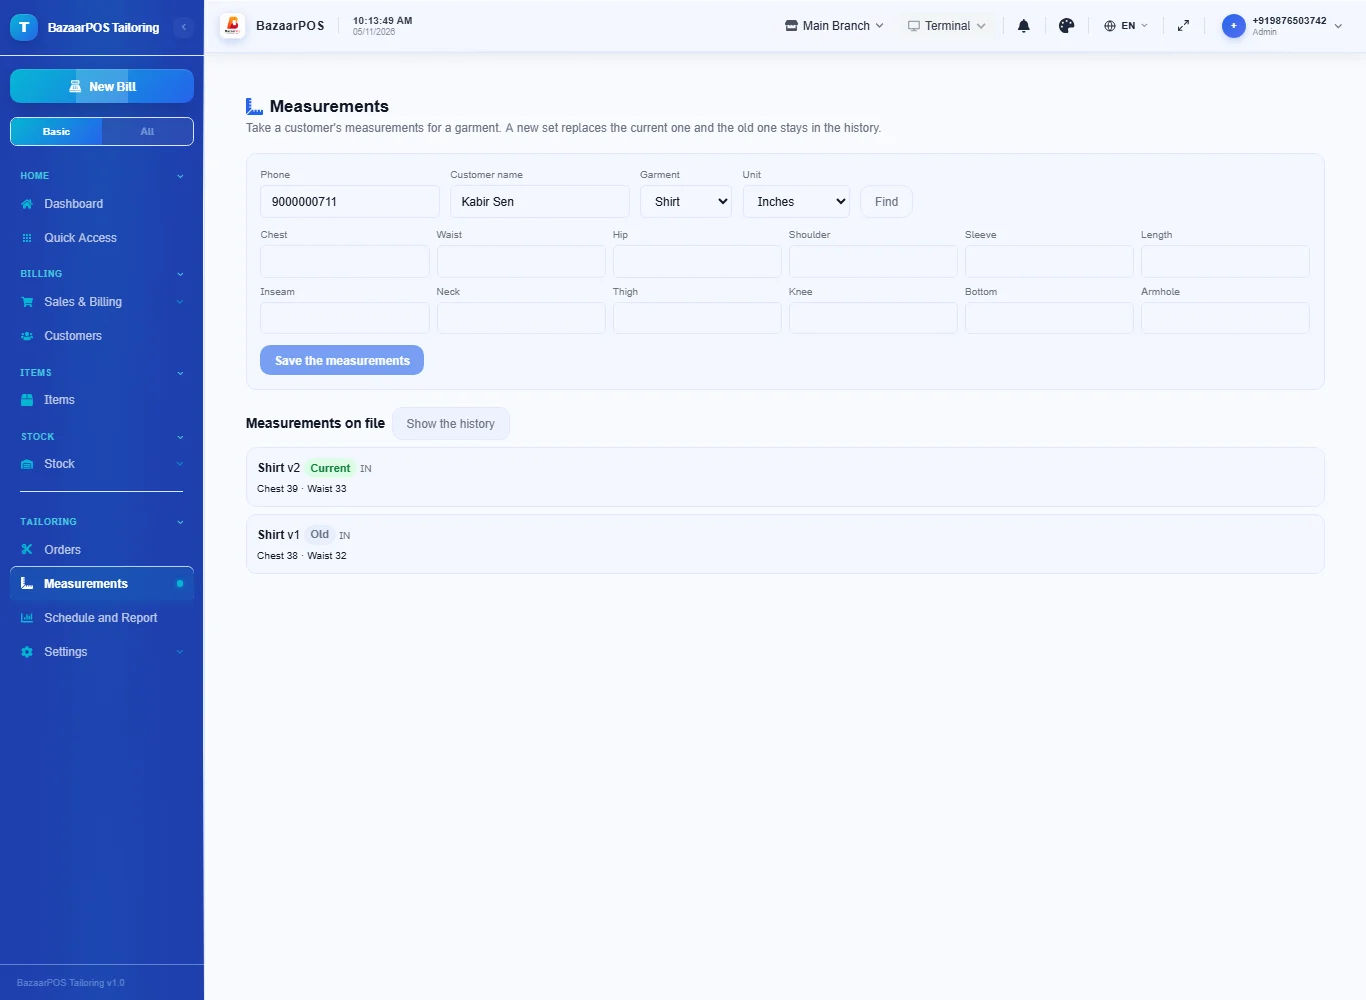
Open Measurements, type the customer's phone and name, choose the garment and the unit, fill the measurements and press Save the measurements. Saving again for the same garment makes version 2 and keeps version 1 in the history (Show the history).
Step 2: Book the order
Open Orders and press New order. Type the customer, the trial date (optional) and the delivery date. For each garment choose New garment or Alteration, the garment, the quantity and the stitching charge. For fabric, choose Fabric from the shop and search your items: the rate fills in, then type the metres; or choose Customer's own fabric, which is only noted. Type an advance if paid and press Make the order.
Step 3: Cut and stitch
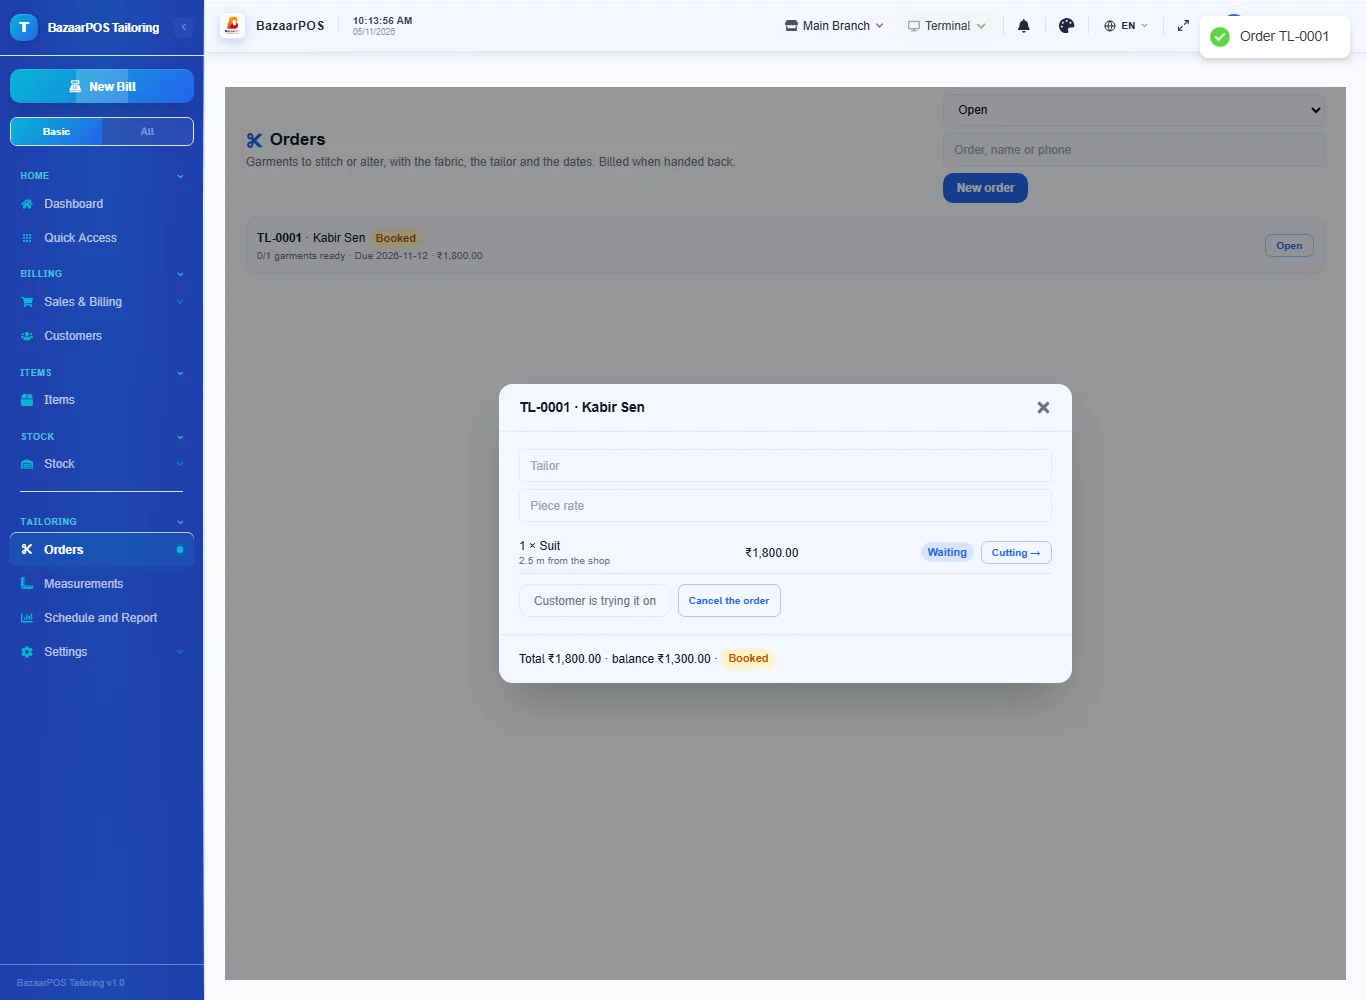
Open the order. Type the tailor and the piece rate, then press the stage button on a garment to move it from waiting to cutting, stitching, finishing and ready. A garment cannot be cut without a tailor.
Step 4: Try on and ready
Press Customer is trying it on once a garment is stitched, and Changes needed to go back. When every garment is ready press Order is ready.
Step 5: Tell the customer, bill and hand back
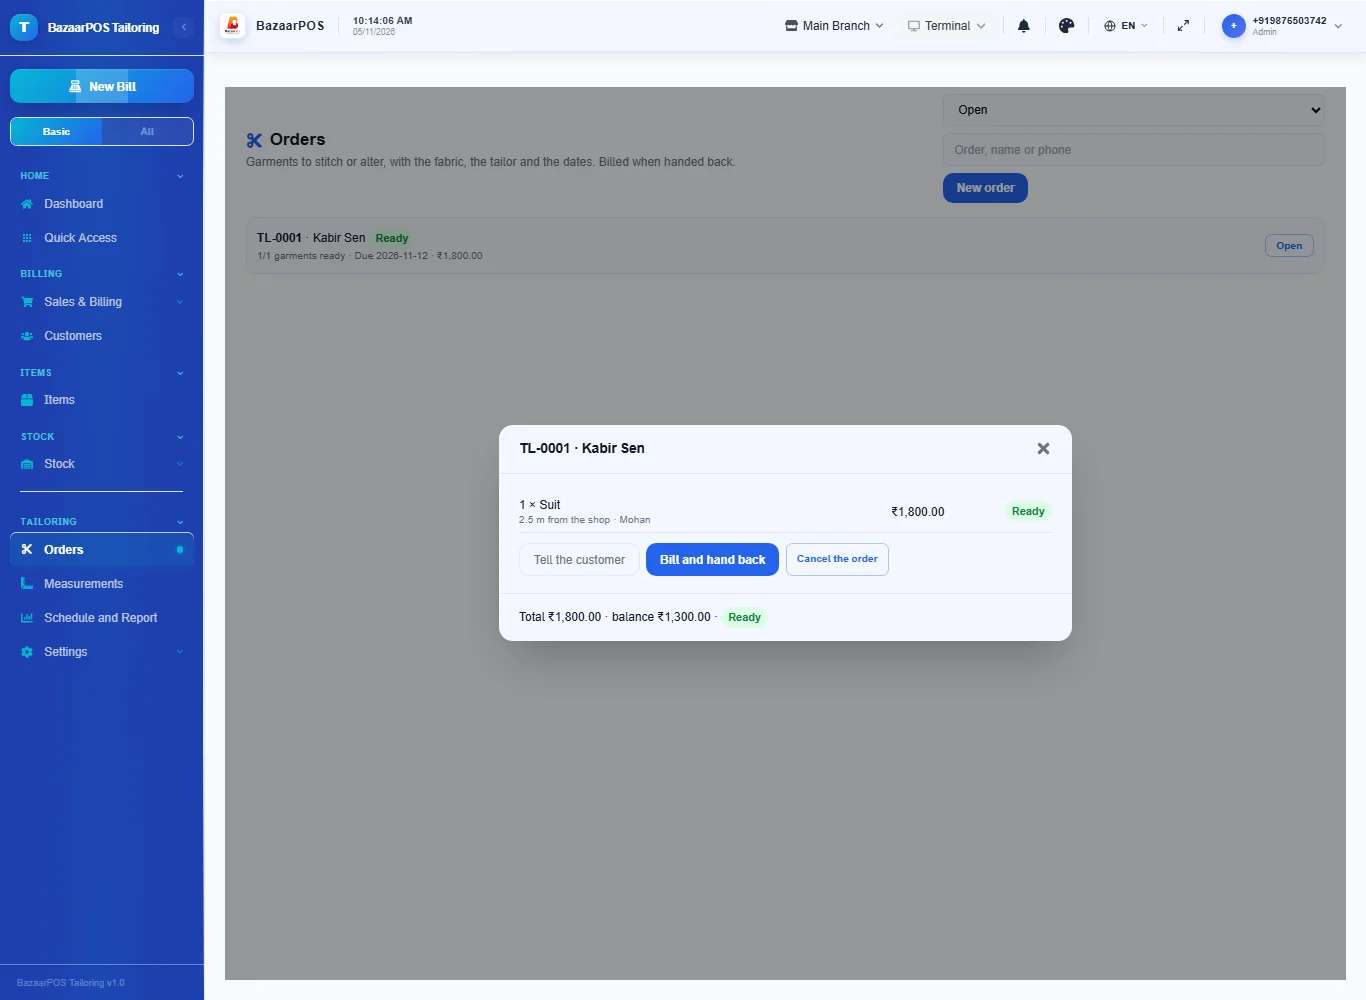
A ready order has Tell the customer, which opens WhatsApp, and Bill and hand back: the stitching and alterations are billed as service lines, the shop fabric as its item's lines (its metres come off stock), with your country's tax and the advance noted.
Step 6: Schedule and report
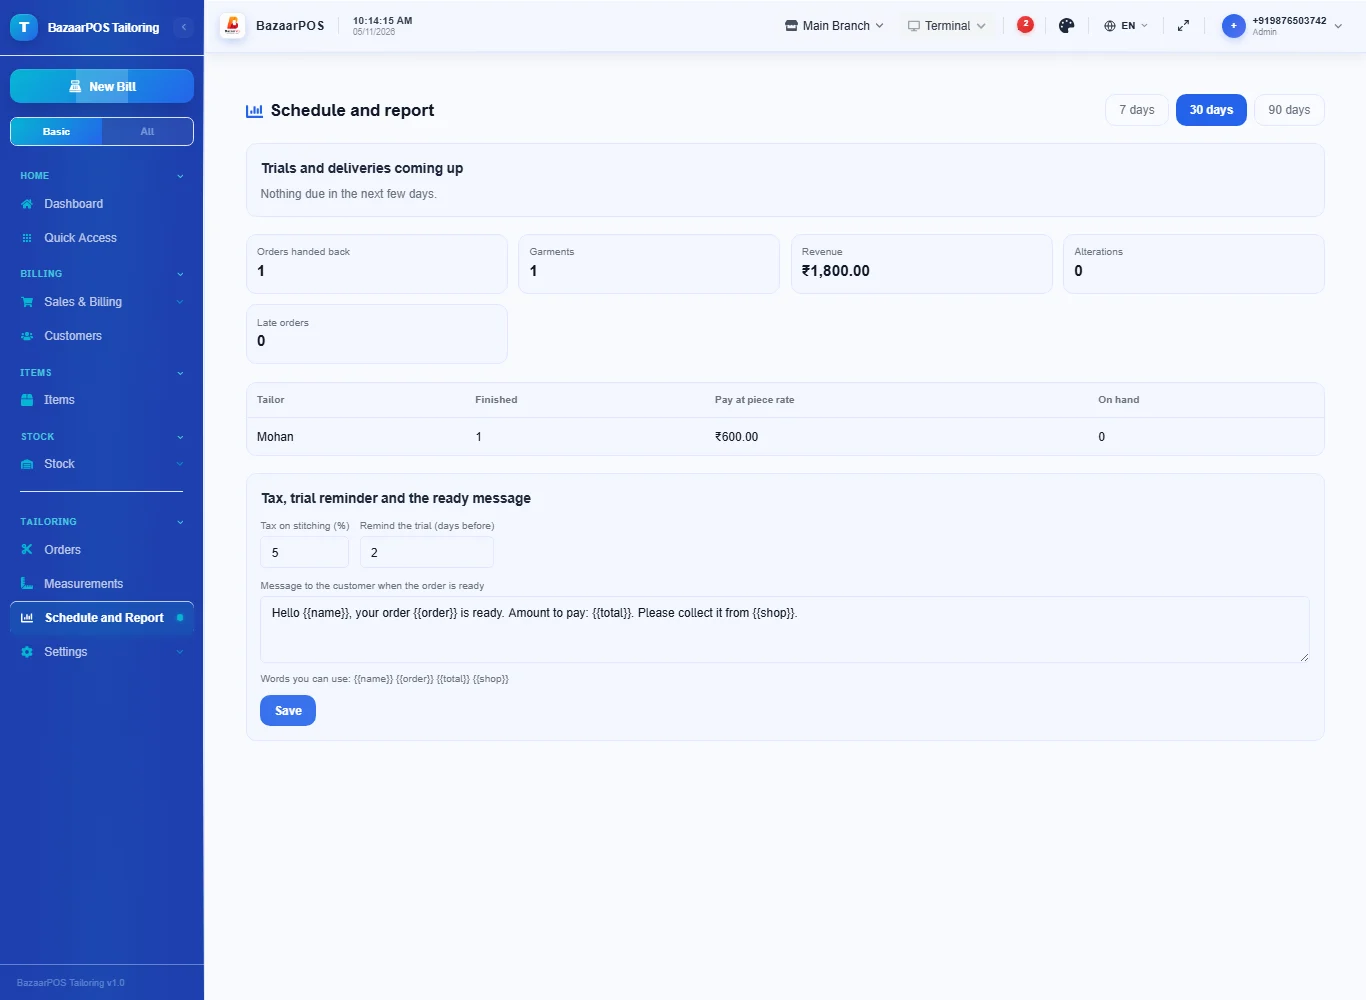
In Schedule and Report see the trials and deliveries coming up or late, the garments each tailor finished with their pay at the piece rate, and the garments still on hand. Set the tax on stitching, the trial reminder days and the ready message there.
On the phone
The phone app has Orders (move garments to the next stage, trial, ready, bill), Trials & Deliveries and Tailor Report.
Also useful here
- Barcode labels: see Barcodes.
- Counting stock: see Stock count.
- Importing items: see Import and export.
- Expiry dates and batches: see Expiry monitor.
Questions
Is this separate from items and billing?
No. Fabric is an item sold by the metre, stitching and alterations are service items, and a handed-back order is a normal sale.
Are old measurements lost when I save new ones?
No. Each save is a new version; the newest is current and the older ones stay in the history.
What about the customer's own fabric?
It is noted on the line and not billed or taken from stock.
Does it use my country's tax?
Yes. The tax on stitching is a setting and the fabric uses its own item's tax.
Is there a phone version?
Yes. Orders and their stages, trials and deliveries and the tailor report are on the phone.
Which plan includes what
Tailoring comes in Basic, Advanced and Enterprise plans. A screen your plan does not include shows a message with how to upgrade.
- Basic: billing, items, customers, reports, measurements and orders.
- Advanced: everything in Basic, plus the schedule, tailor report and settings.
- Enterprise: everything in Advanced, plus more than one branch and AI sales forecasting.